Building a WordPress website can be a rewarding experience, allowing you to showcase your creativity, share your passion, or promote your business online. In this comprehensive guide, we will walk you through the step-by-step process of creating a WordPress website.
Step 1: Define Your Website’s Purpose and Goals
Before diving into the technical aspects of building a WordPress website, it’s essential to define your website’s purpose and goals. Consider what you aim to achieve with your website, whether it’s to sell products, share information, showcase your portfolio, or attract clients. Understanding your goals will help shape the design and content of your site.
Step 2: Choose a Domain Name and Web Hosting
The next step is to choose a domain name that reflects your brand or business and is easy to remember. You can register a domain name through domain registrars like GoDaddy, Namecheap, or Bluehost. Additionally, select a reliable web hosting provider that offers good uptime, speed, security, and customer support. Popular hosting providers include Bluehost, SiteGround, HostGator and Kinsta.
Step 3: Install WordPress
To install WordPress on your website, you can follow these steps:
- Log in to Your Hosting Account.
First, log in to your web hosting account. This is where you’ll manage your website files and settings.

- Access the Control Panel (cPanel)
Most hosting providers use cPanel as the control panel. Look for an option like “cPanel” or “My Account” in your hosting account dashboard.

- Find the WordPress Installer
In cPanel, look for an icon or section labeled “WordPress” or “Softaculous Apps Installer.” Click on it to access the WordPress installation tool.

- Configure Your WordPress Installation
Next, you need to configure your WordPress installation by entering details like the site name, description, admin username, password, and email address. You can also choose a language and select any plugins or themes you want to install.

- Start the Installation Process
Inside the WordPress installer, click on the “Install Now” button. You will be prompted to choose the domain where you want to install WordPress.
- Complete the Installation
Once you’ve entered all the necessary information, click on the “Install” button. The installer will create the necessary database and install WordPress on your domain.

- Access Your WordPress Dashboard
After the installation is complete, you will receive a confirmation message with a link to access your WordPress dashboard. This is where you can customize your website, add content, and manage settings.


That’s it! You have successfully installed WordPress on your website. You can now start building your website by choosing a theme, adding pages and posts, installing plugins, and customizing the design. If you encounter any issues during the installation process, reach out to your hosting provider’s support team for assistance.
Step 4: Choose a Theme and Customize Your Website
WordPress offers thousands of free and premium themes that determine the design and layout of your website. Browse the WordPress theme directory or third-party marketplaces like ThemeForest to find a theme that aligns with your brand and goals. Once you’ve selected a theme, customize your website by adding your logo, changing colors and fonts, and creating custom menus.
Step 5: Create Essential Pages and Posts
Now it’s time to add content to your website. Create essential pages such as Home, About Us, Services, and Contact. Write engaging copy, add images or videos, and optimize your content for search engines using relevant keywords. Additionally, publish blog posts regularly to keep your audience engaged and drive traffic to your site.
Step 6: Set Up SEO
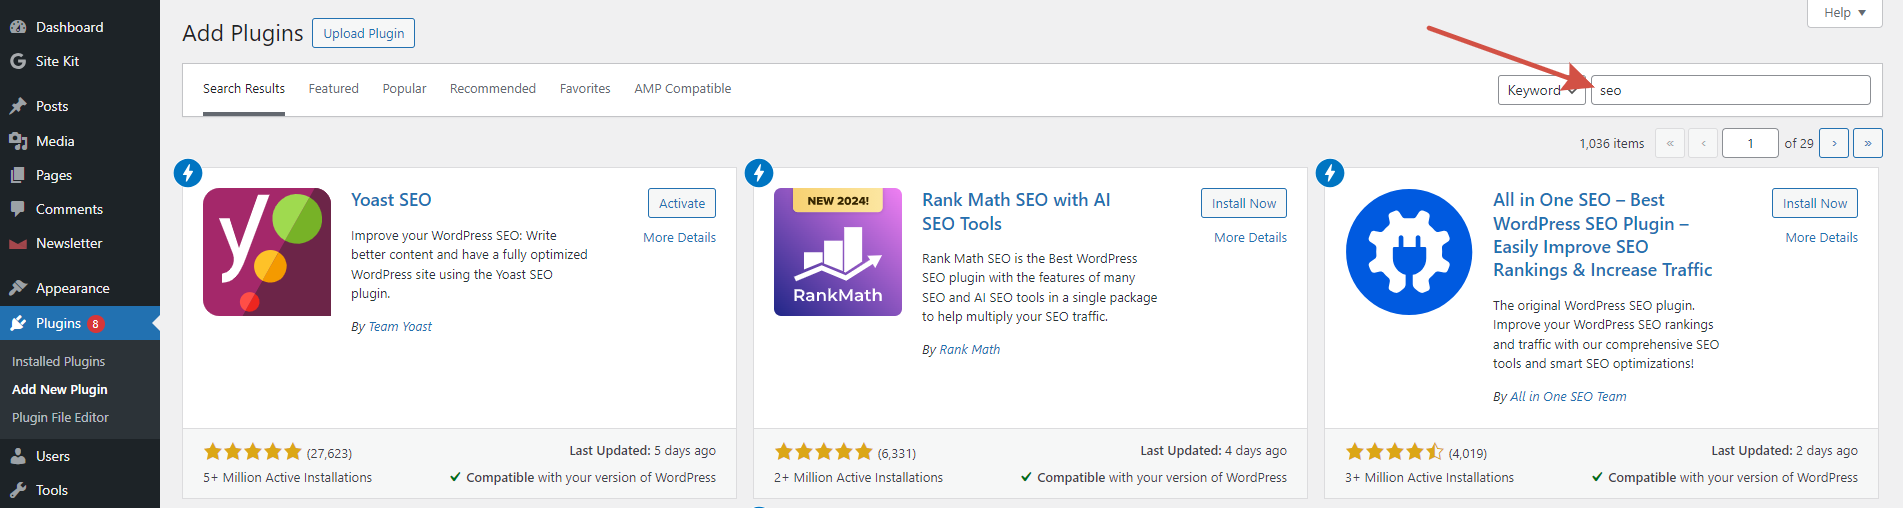
Search engine optimization (SEO) is crucial for improving your website’s visibility in search engine results. Install an SEO plugin like Yoast SEO or Rank Math to optimize your pages and posts for target keywords, meta descriptions, and structured data. Create an XML sitemap and submit it to search engines like Google for indexing.
Step 7: Install Essential Plugins
WordPress plugins extend the functionality of your website by adding different features. We recommend that you install the ones that will be useful for the first step and for the whole time you use WordPress:
SEO Plugins to improve website’s visibility in Search engine results: Yoast SEO / All in One SEO / Rank Math SEO – one of them will be enough. Additionaly, using Google Site Kit is our strong recommendation.
E-commerce Plugins in case you sell products or services: WooCommerce / Easy Digital Downloads / Shopify – research and choose one that fits you most.
Contact Form Plugins to allow your visitors contact you: Contact Form 7, WPForms, or Gravity Forms. Regardless of the form you choose make sure you protect it from spam and spambots with anti-spam protection like Anti-Spam.
Security Plugin to protect the site from threats like malware or hacking attempts: Security & Malware scan – it’s a 18-in-1 plugin that will be sufficient for you.
Performance Optimization Plugins: you might want to use WP Rocket, W3 Total Cache, and Smush Image Compression and Optimization to get started.
Step 8: Test Your Website and Launch
Before launching your website, test it on different devices and browsers to ensure it looks and functions correctly. Check for broken links, slow loading times, and mobile responsiveness. Once you are satisfied with the results, launch your website by promoting it on social media, email newsletters, and other marketing channels.
Step 9: Maintain and Update Your Website
After launching your website, it’s crucial to maintain it regularly by updating WordPress core, themes, and plugins. Monitor website performance using tools like Google Search Console and GTmetrix. Create fresh content, engage with your audience, and make necessary adjustments to improve user experience and achieve your goals.
Step 10: Monitor Analytics and Optimize
Monitor your website’s performance using tools like Google Analytics to track visitor behavior, traffic sources, and conversions. Analyze the data to identify areas for improvement and make informed decisions to optimize your website further. Continuously refine your content strategy
SEO efforts, and user experience based on analytics insights.
In conclusion, building a WordPress website involves planning, creativity, and technical know-how. By following this comprehensive guide and investing time in creating quality content, optimizing for search engines, and engaging with your audience, you can build a successful online presence with WordPress. Remember that building a website is an ongoing process that requires regular updates and improvements to stay relevant and effective in achieving your goals.
Leave a Reply