CleanTalk added spam protection for Flamingo plugin using direct form integration. So in case, you prefer using Flamingo to store submitted messages be sure to use the most effective Anti-Spam plugin to protect it. Read the guide below and learn 4 steps to protect all your contact forms from spam.
Once the CleanTalk Anti-Spam plugin is installed it starts to protect all of the existing forms on your WordPress website. It may not only be Contact Form 7 forms but also many others.
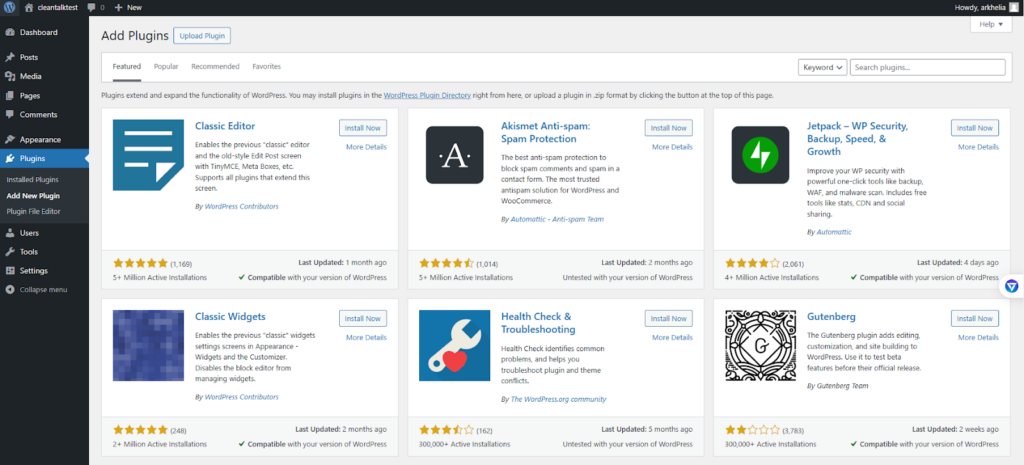
To install the Anti-Spam plugin, go to your WordPress admin panel → Plugins → Add New.
Then enter «CleanTalk» in the search box and click the Install button for «Spam protection, Anti-Spam, FireWall by CleanTalk».
After installing the plugin, click the «Activate» button.
After it is done go to the plugin settings and click the «Get Access Key Automatically» button. Then just click the «Save Settings» button.
That’s it! From now you How to completely protect your Flamingo from spam.
How to check Flamingo Spam Protection
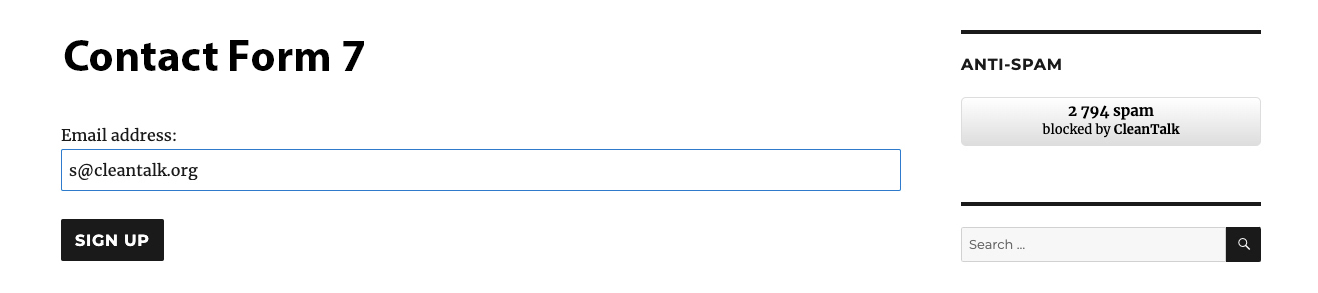
You can test the work of Anti-Spam protection for Flamingo by using a test email s @ cleantalk.org (without spaces). First, open the form in an Incognito browser tab. Fill in all the required form fields and send a form. After submitting the form, you will see a block message about the block on the form submission.
2
If you have any questions, add a comment and we will be happy to help you.
Create your CleanTalk account – Register now and protect your Flamingo messages from spam in 5 minutes
Update
The protection works only for website visitors, not for website admins. Be sure to test the form protection using Incognito mode.
Additional features
CleanTalk protects all forms at once: comments, registrations, feedbacks, contacts, reviews.
Installation takes about 1-2 minutes.
Smart 99% protection against spambots.
Always online – 24/7 technical support.
Logs, SpamFireWall, personal lists, country filters, stop-words, and many others.
Discover the complete list of CleanTalk Anti-Spam plugin features here.
CleanTalk added spam protection for Klaviyo web forms using direct form integration. So in case, you prefer using Klaviyo web forms be sure to use the most effective Anti-Spam plugin. Read the guide below and learn 4 steps to protect your Klaviyo web forms from spam.
Once the CleanTalk Anti-Spam plugin is installed it starts to protect all of the existing forms on your WordPress website. It may not only be Klaviyo web forms but also many others.
To install the Anti-Spam plugin, go to your WordPress admin panel → Plugins → Add New.
Then enter «СleanTalk» in the search box and click the Install button for «Spam protection, Anti-Spam, FireWall by CleanTalk».
After installing the plugin, click the «Activate» button.
After it is done go to the plugin settings and click the «Get Access Key Automatically» button. Then just click the «Save Settings» button.
That’s it! From now you How to completely protect your Klaviyo web forms from spam.
How to check spam protection for Klaviyo web forms
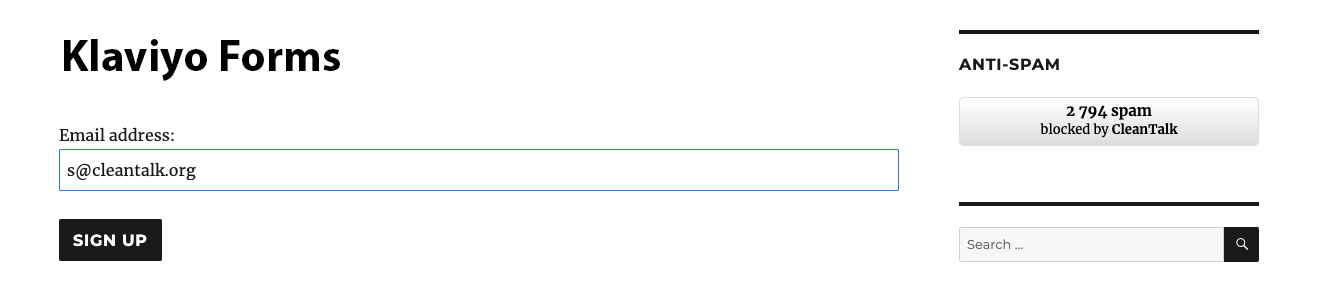
You can test the work of Anti-Spam protection for your СonvertKit Forms by using a test email s @ cleantalk.org (without spaces). First, open the form in an Incognito browser tab. Fill in all the required form fields and send a form. After submitting the form, you will see a block message about the block on the form submission.
2
If you have any questions, add a comment and we will be happy to help you.
Create your CleanTalk account – Register now and protect your СonvertKit Forms from spam in 5 minutes
Update
The protection works only for website visitors, not for website admins. Be sure to test the form protection using Incognito mode.
Additional features
CleanTalk protects all forms at once: comments, registrations, feedbacks, contacts, reviews.
Installation takes about 1-2 minutes.
Smart 99% protection against spambots.
Always online – 24/7 technical support.
Logs, SpamFireWall, personal lists, country filters, stop-words, and many others.
Discover the complete list of CleanTalk Anti-Spam plugin features here.
WordPress pages are the cornerstones of your website’s static content, perfect for showcasing timeless information like “About Us” or “Contact” sections. This comprehensive guide will empower you to not only create pages in WordPress but also structure them strategically and fill them with engaging content.
Creating a New Page
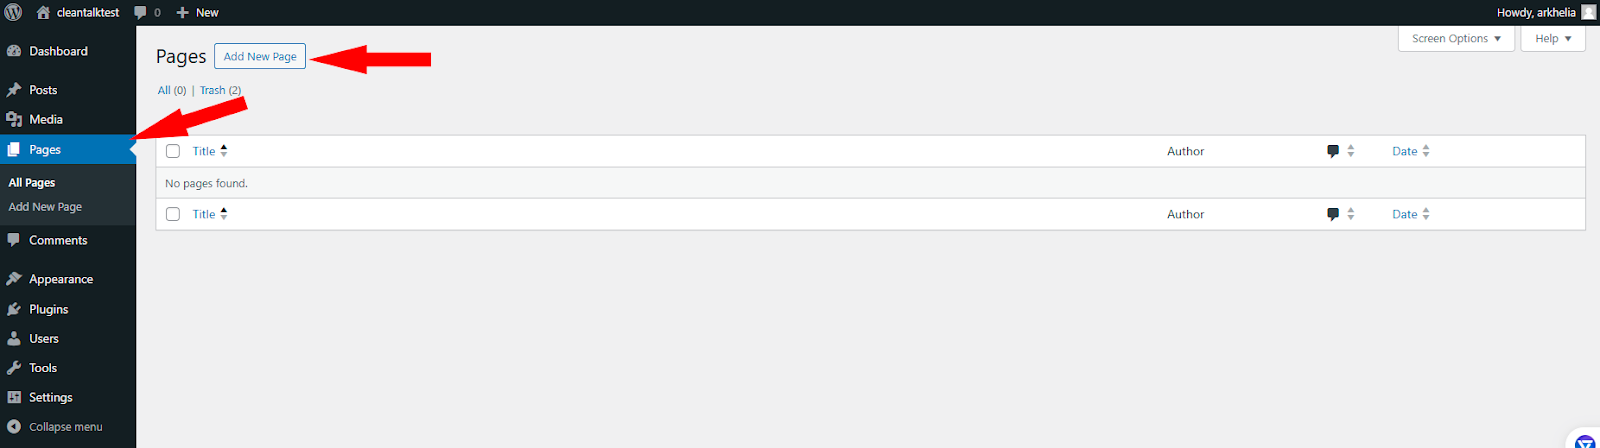
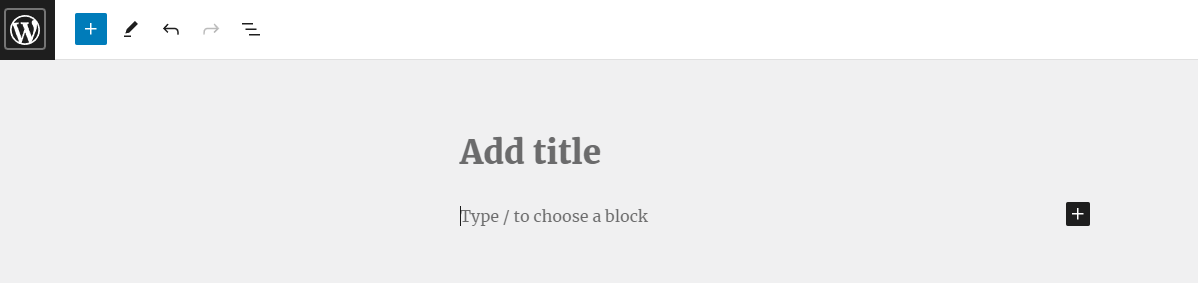
Log in to your WordPress dashboard.
In the left-hand menu, navigate to Pages.
Click on Add New.
Building Your Page’s Content
Title: Craft a clear and concise title that encapsulates your page’s content. This title will be displayed in navigation menus and search results.
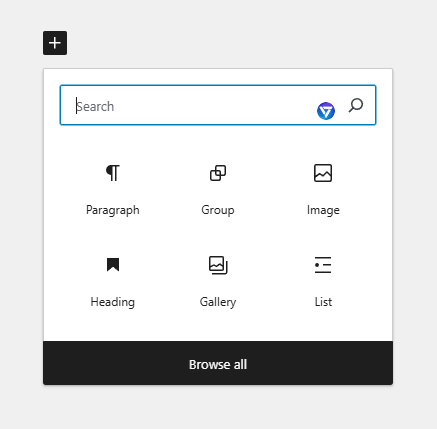
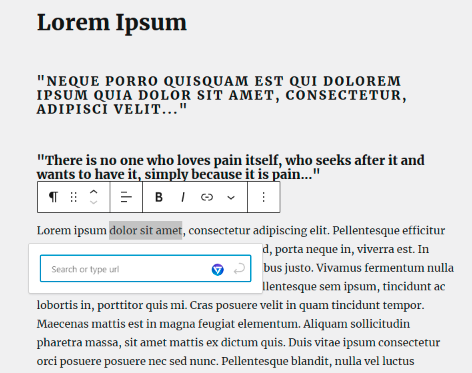
Content Area: This is where your page’s main content resides. WordPress utilizes a block editor, allowing you to add text, images, videos, and more using pre-designed blocks:
Click the “+” button to explore the various block options.
Drag and drop blocks to arrange your content in the preferred order.
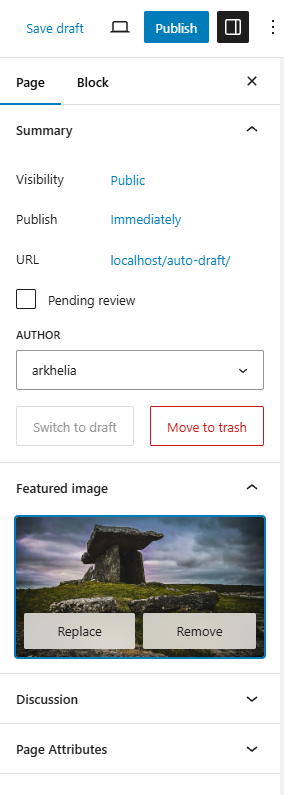
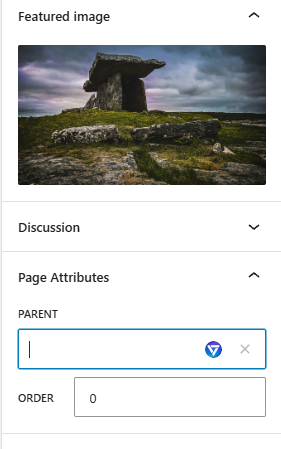
Featured Image (Optional): Select an image that visually represents your page’s content. This image is often displayed alongside your page title.
Content Composition Techniques
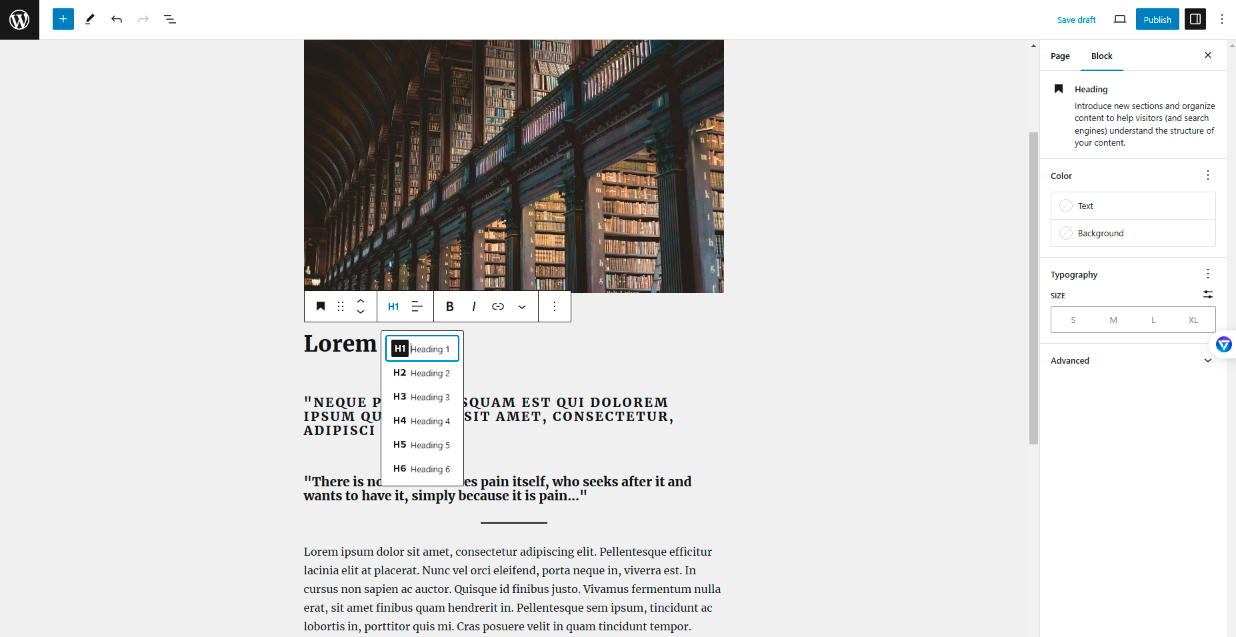
Readability Matters: Break up large text chunks with images, headings (H1, H2, etc.), and bullet points. Use short paragraphs for easy scanning.
Internal Linking Power: Link to relevant pages within your website to enhance navigation and keep visitors engaged.
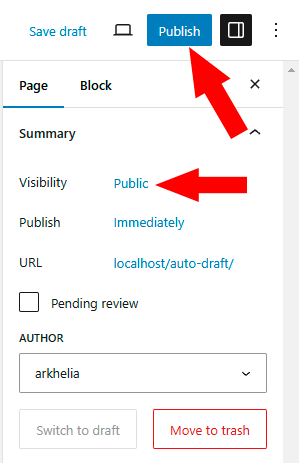
Publishing and Visibility Control
Publish Button: Once your content is ready, click the “Publish” button to make your page live on your website.
Visibility Options: You can choose to make your page publicly viewable, set it as a draft for further editing, or mark it as private for specific users.
Arranging Your Pages for Optimal Flow (Page Hierarchy)
Parent-Child Relationships: WordPress allows you to establish a hierarchical structure for your pages. A parent page acts as a category, housing child pages that fall under its umbrella.
While creating a new page, look for the “Page Attributes” section on the right-hand side of the editor.
Under “Parent,” use the dropdown menu to select an existing page as the parent. This creates a sub-page nested under the chosen parent page.
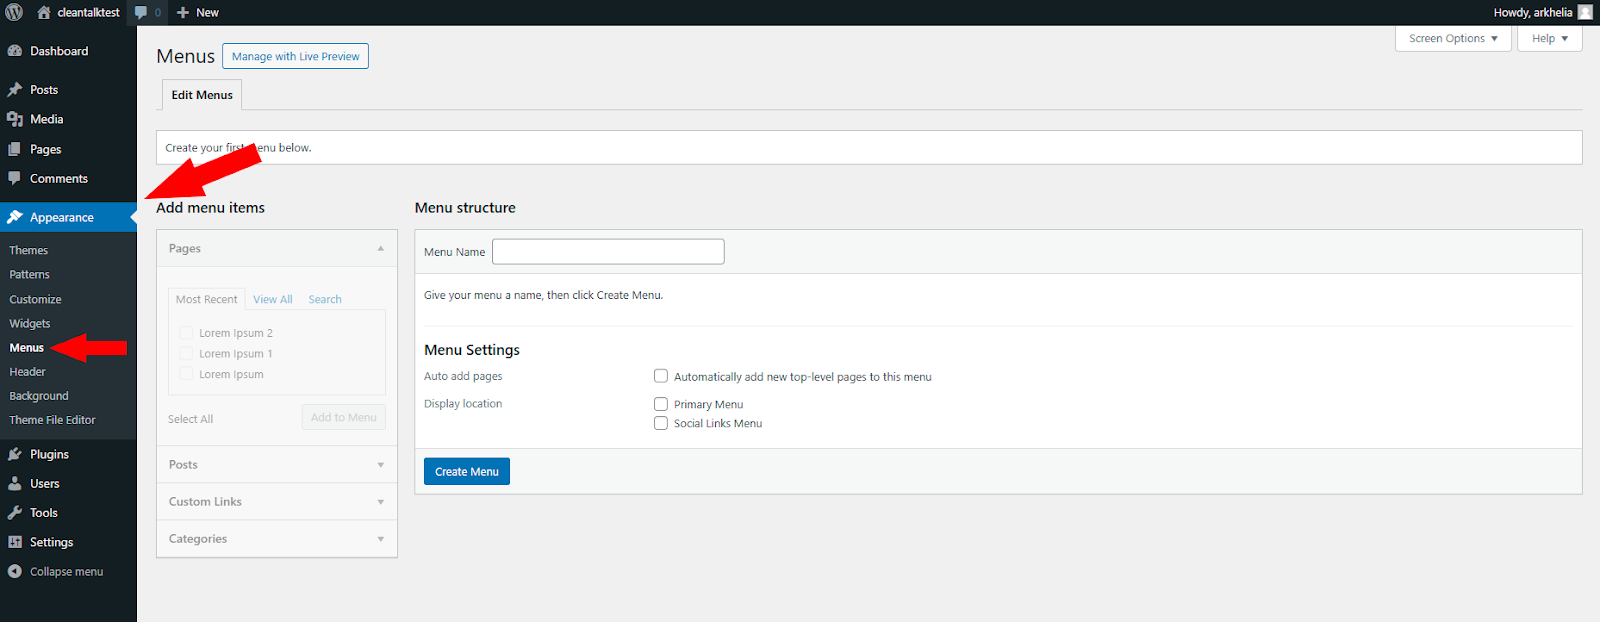
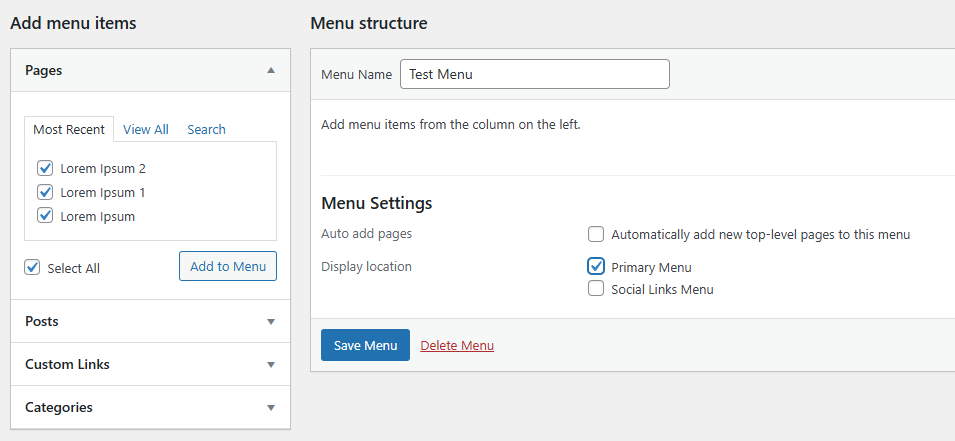
Navigation Menu Creation: Once you have a few pages, it’s time to create a navigation menu to help visitors find their way around.
In the WordPress dashboard, navigate to Appearance > Menus.
Give your menu a name and select the pages you want to include. You can use drag-and-drop to arrange the pages in the desired order within the menu.
Choose a menu location (header, footer, sidebar) and click “Save Menu” to make it live on your website.
Maximizing Your Pages’ Potential
Categorize and Tag: Organize your pages using categories and tags to help visitors discover related content. Categories are broader groupings, while tags are more specific keywords.
Preview Function: Before publishing, use the preview function to see how your page will appear on the live website. This allows you to refine the layout and content before making it public.
SEO Optimization: Enhance your search ranking by incorporating relevant keywords in your title, headings, and content. Consider using SEO plugins for further optimization.
Yoast SEO: A household name in the WordPress SEO world, Yoast offers a user-friendly interface with a comprehensive feature set. It excels in on-page optimization, guiding you through keyword optimization, readability analysis, and title tag and meta description creation. While the free version provides a solid foundation, premium plans offer additional features like internal linking suggestions and social media previews.
Rank Math: This plugin is a powerful contender, known for its extensive free features and affordable paid plans. It offers on-page optimization tools similar to Yoast, including keyword research suggestions, content analysis, and schema markup implementation. Rank Math integrates well with popular page builders and provides basic local SEO and WooCommerce SEO optimization within the free version.
SEOPress: This plugin is another strong option, particularly for those seeking a lightweight and speed-focused solution. SEOPress offers on-page optimization tools, social media optimization, and broken link checker functionalities. Their free version is feature-rich, and their paid plans cater to larger websites with features like content redirection and white labeling.
The SEO Framework: If technical SEO is your primary concern, The SEO Framework is a great choice. It prioritizes website speed and automation, with features like automatic image SEO optimization, robots.txt editor, and built-in XML sitemap generation. While the free version offers valuable tools, paid plans unlock features like local SEO optimization and content audits.
Bonus Advice: Choosing the Right SEO Plugin
The best SEO plugin for your website depends on your specific needs and preferences. Here’s a quick breakdown to help you decide:
For beginners: Yoast SEO or Rank Math (free versions) offer a user-friendly interface and essential features.
For value-seekers: Rank Math provides a comprehensive free feature set with affordable paid upgrades.
For speed-conscious users: SEOPress is a lightweight option that prioritizes website performance.
For technical SEO focus: The SEO Framework excels in website speed optimization and automation.
Remember, SEO is an ongoing process. It’s wise to experiment with different plugins to find the one that best suits your workflow and SEO strategy.
By following these detailed steps and incorporating these tips, you can create well-structured, informative, and engaging pages that will elevate your WordPress website and provide a seamless user experience for your visitors.
The CleanTalk Research Team identified a critical Stored XSS (Cross-Site Scripting) vulnerability in the WP SEOPress plugin, version 7.7.1. This flaw can be exploited by attackers with contributor privileges to create new admin accounts, potentially granting them full control of your WordPress website.
Stored XSS vulnerabilities allow attackers to inject malicious scripts directly into your website’s database. These scripts are then executed whenever someone views the compromised content. Unlike reflected XSS, user interaction isn’t required to trigger the attack, making it particularly dangerous.
How Attackers Can Exploit This Vulnerability
An attacker with contributor privileges can exploit this vulnerability by injecting malicious JavaScript code into the “SEO Title” field while creating a new post. This code can then be used to create a new admin account, granting them complete control over your website.
Potential Consequences of an Exploit
Complete Site Takeover: Attackers could create new admin accounts and seize full control of your website.
Data Theft: Sensitive information like user credentials, financial records, and even your website’s content could be stolen.
Website Defacement: Attackers could alter the appearance of your site, inject further malicious code, or display unauthorized content.
Persistent Backdoors: Malicious actors might install backdoors to ensure continued access even after the initial vulnerability is patched.
Taking Action to Secure Your Website
Update Immediately: The most critical step is to update the WP SEOPress plugin to the latest version as soon as possible. This update addresses the vulnerability and safeguards your website.
Review User Roles: Carefully review user roles and permissions. Contributors should have the minimum access necessary for their tasks.
Through continuous vulnerability discovery and disclosure, we empower website owners and developers to take preventative measures. We believe that by working together, we can create a robust and secure WordPress ecosystem for everyone.
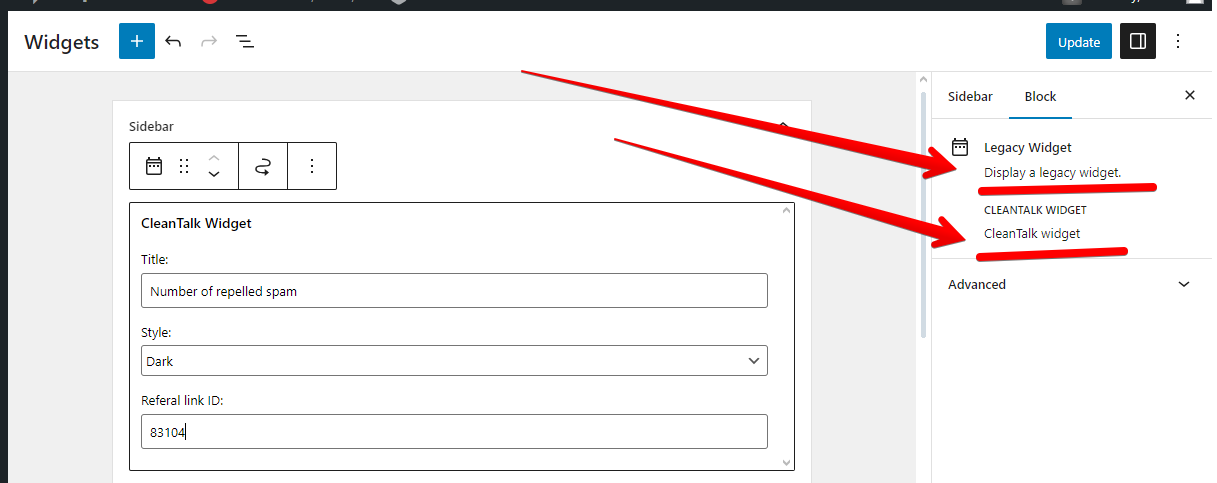
We’re writing to inform you that the public widget for CleanTalk Anti-Spam will be removed from the plugin and no longer be supported after August 1, 2024.
What does this mean for you?
The public widget, which is typically displayed on public pages and demonstrates the number of spam attacks, is no longer considered compatible with modern WordPress development practices and has seen low user demand. As a result, we’re removing it from the plugin to ensure optimal performance, streamline the user experience, and focus on core functionalities. This removal also helps us stay aligned with future WordPress versions.
What action should you take?
While the public widget will no longer be available after August 1, 2024, CleanTalk Anti-Spam’s core functionality remains unchanged and will continue to provide robust spam protection for your WordPress site.
Here’s what you can do:
No action required: If you don’t utilize the public widget, you don’t need to take any further action. CleanTalk Anti-Spam will continue to operate seamlessly.
Review alternative widget usage: If you’ve been using the public widget, we recommend exploring alternative methods for interacting with CleanTalk Anti-Spam’s features. These may include accessing settings pages or utilizing shortcodes.
Affiliate Program Guidance
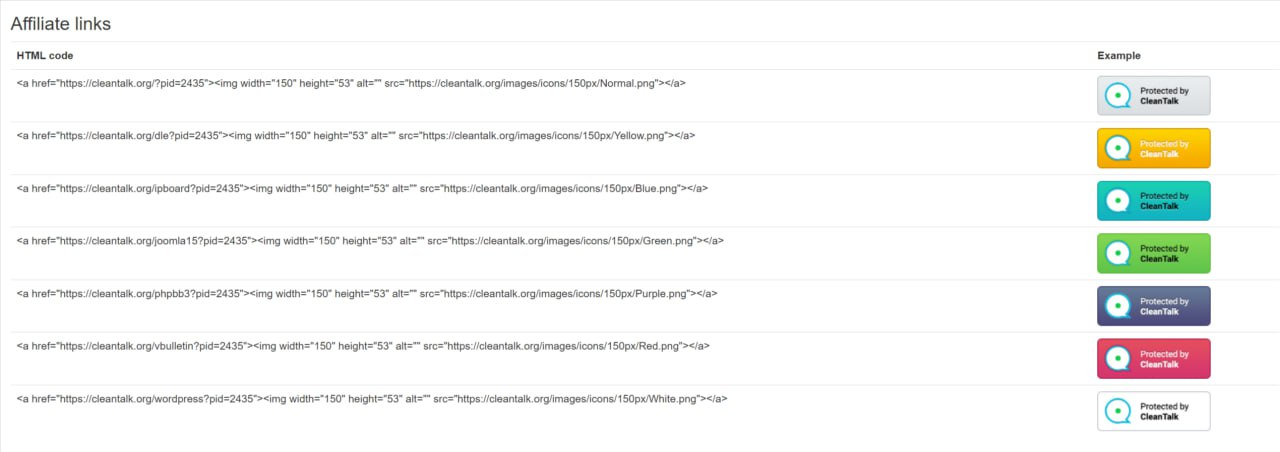
If you’ve been using the public widget to promote the CleanTalk AntiSpam Affiliate program, we recommend transitioning to using Affiliate links along with our banner. This method provides a more streamlined and effective way to promote the program.
To get started with Affiliate links:
Access your CleanTalk Affiliate Dashboard: Log in to your CleanTalk account and navigate to the Affiliate program section.
Generate your Affiliate link: Your unique Affiliate link is provided within the dashboard. Copy this link for use in your promotional materials.
Utilize our Affiliate banner: We offer a visually appealing banner that you can include alongside your Affiliate link. Download the banner from the Affiliate dashboard.
Promote your Affiliate link and banner: Share your Affiliate link and banner on your website, social media channels, or other relevant platforms. When a visitor clicks on your link and signs up for CleanTalk AntiSpam, you’ll earn a commission.
By transitioning to Affiliate links and our banner, you can continue to effectively promote the CleanTalk AntiSpam Affiliate program while aligning with the updated public widget removal.
We understand that change can be challenging, and we appreciate your understanding as we work to enhance the CleanTalk Anti-Spam experience.
If you have any questions or concerns, please don’t hesitate to contact our support team.
Thank you for being a valued CleanTalk Anti-Spam user!
Our team at CleanTalk prioritizes the safety and security of the WordPress ecosystem. Through routine security testing, we’ve identified a critical vulnerability in the Gutenberg Blocks by Kadence Blocks plugin. This flaw poses a serious threat to WordPress websites, as it allows attackers to inject malicious code and potentially gain complete control.
This vulnerability, classified as Stored XSS (Cross-Site Scripting), enables attackers to embed malicious scripts directly into your website’s content. Unlike some vulnerabilities, Stored XSS doesn’t require user interaction to be triggered. This means anyone visiting your site, not just administrators, could be exposed.
Potential Consequences of an Exploit
Complete Site Takeover: Attackers could create new admin accounts and seize full control of your website.
Data Theft: Sensitive information like user credentials, financial records, and even your website’s content could be stolen.
Website Defacement: Attackers could alter the appearance of your site, inject further malicious code, or display unauthorized content.
Persistent Backdoors: Malicious actors might install backdoors to ensure continued access even after the initial vulnerability is patched.
Taking Action to Secure Your Website
The most critical step is to update the Gutenberg Blocks by Kadence Blocks plugin to the latest version immediately. This update addresses the vulnerability and safeguards your website.
CleanTalk’s Commitment to WordPress Security
At CleanTalk, we are relentless in our pursuit of discovering and disclosing vulnerabilities to protect the WordPress community. We strongly encourage all website owners to prioritize regular security updates and implement additional security measures like:
Regular Vulnerability Scans: Proactive scanning helps identify and address potential threats before they are exploited.
Least Privilege Principle: Grant users only the permissions necessary for their roles to minimize damage in case of a compromise.
Security Plugins: Consider using security plugins that offer features like malware scanning, firewalls, and real-time threat monitoring.
By working together, we can create a safer and more secure WordPress ecosystem for everyone.
Attention WordPress website owners! We’re excited to announce that the CleanTalk Security Plugin now effectively addresses a well-known vulnerability involving the WordPress.com API.
This vulnerability, previously discussed here, allowed unauthorized actors to potentially trace administrator usernames through a public API endpoint. While disabling the REST API entirely would be ideal, it wasn’t always a viable option for many websites.
The CleanTalk Team Steps Up
We understand the critical nature of this vulnerability and the potential security risks it poses. Our development team has been working diligently to implement a comprehensive solution within the CleanTalk Security Plugin.
This update delivers:
Enhanced User Data Protection: CleanTalk can now effectively block attempts to exploit the exposed API endpoint, safeguarding your administrator username and other sensitive user data.
Improved Overall Security: This fix is just one piece of the puzzle. CleanTalk Security offers a robust suite of security measures to keep your website safe from a wide range of threats.
What You Can Do
Update Your Plugin: Ensure you’re running the latest version of the CleanTalk Security Plugin to benefit from this critical fix and ongoing protection.
Review Your Security Practices: Consider implementing additional security measures like strong password policies and user access restrictions for an extra layer of defense.
CleanTalk: Committed to Your Security
We at CleanTalk are dedicated to providing the best possible security for your WordPress website. We continuously refine our plugin to address both emerging and long-standing vulnerabilities.
For further information on CleanTalk Security and its capabilities, please refer to the plugin’s documentation.
This revised announcement emphasizes the team’s effort in resolving a known issue and highlights the broader security benefits of the CleanTalk Security Plugin.
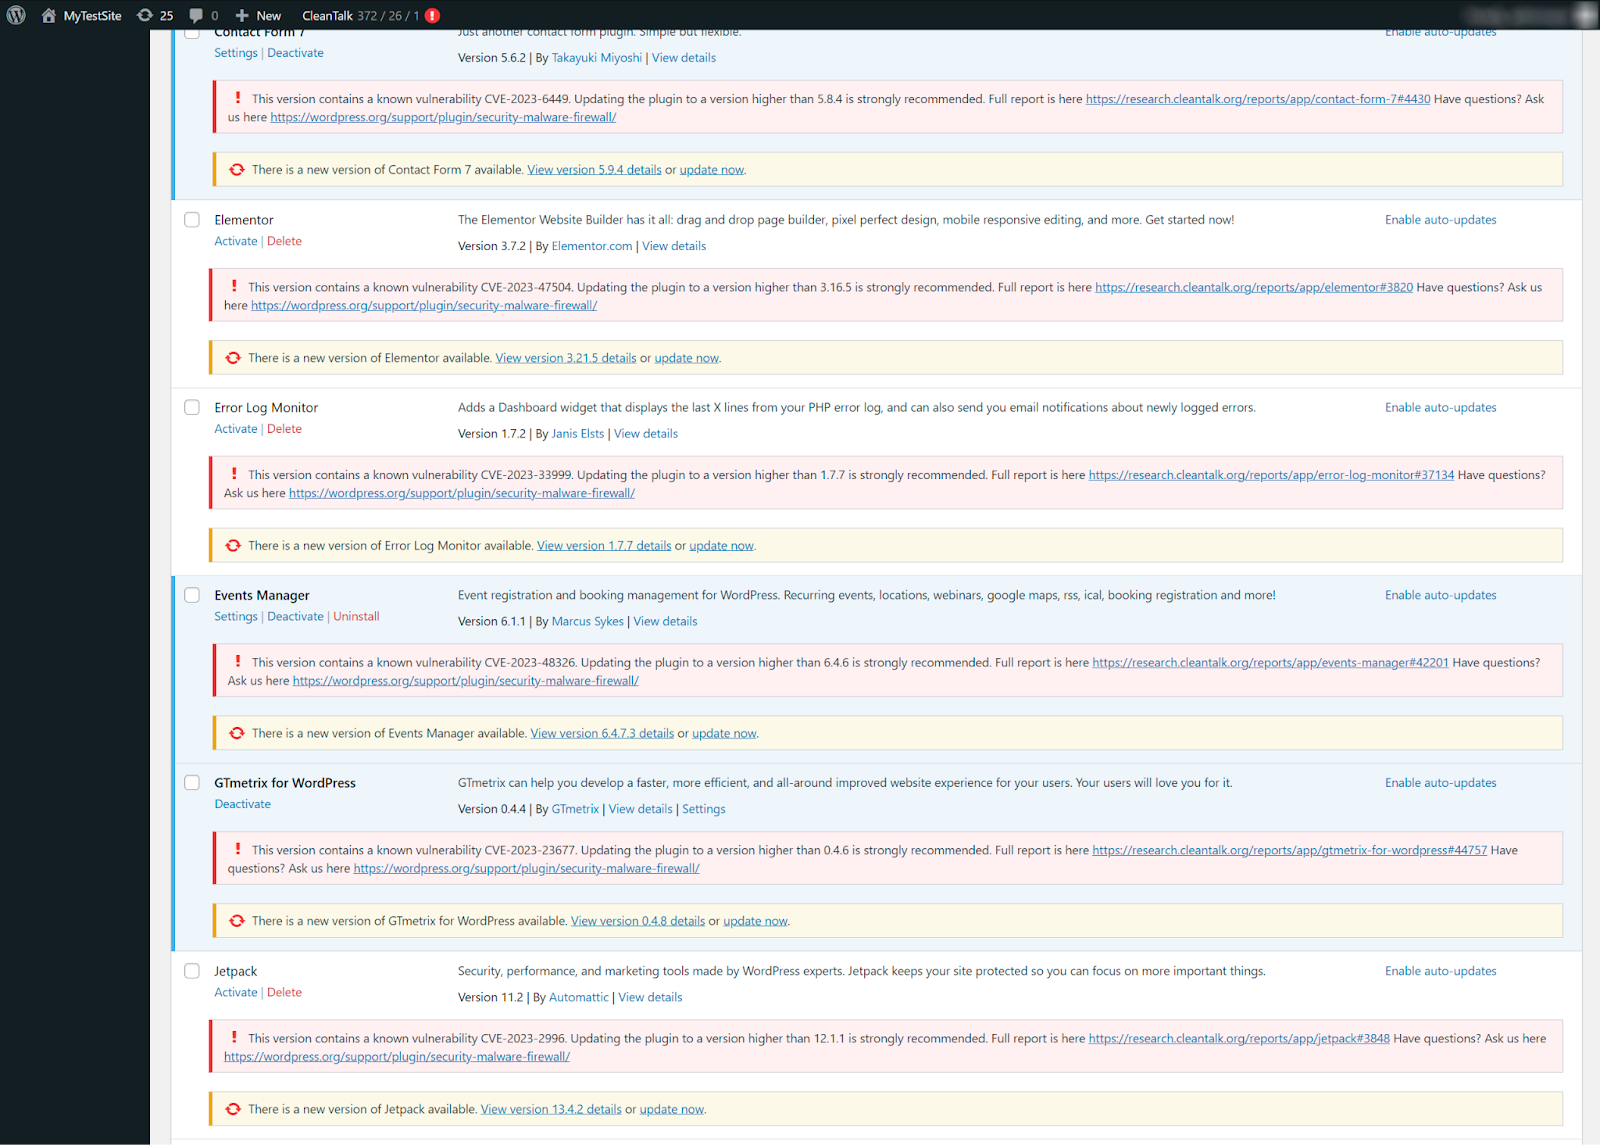
The CleanTalk Security plugin now offers built-in plugin vulnerability checks, empowering you to safeguard your WordPress website proactively. Just a friendly reminder if you haven’t try it till now: feel free to pick up the plugin and install it according to these instructions.
While plugins add valuable functionality, they can also introduce security risks if vulnerabilities exist. To address this, CleanTalk regularly scans popular plugins and integrates the findings directly into the Security plugin.
Here’s how it benefits you:
Real-time Vulnerability Insights: Get notified within the plugin itself whenever potential vulnerabilities are detected in your active plugins.
Proactive Security Measures: Take immediate action to address vulnerabilities and minimize the risk of attacks.
Simplified Security Management: No need to visit external platforms for vulnerability information; it’s all accessible within the plugin.
This integration strengthens your WordPress security by informing you about potential threats and allowing you to take immediate action.
Stay Updated, Stay Secure!
The CleanTalk Security plugin continues to evolve, offering comprehensive security solutions for your WordPress site. Remember to update the plugin to benefit from the latest features and vulnerability checks.
Welcome aboard the WordPress express! Today, we’re rolling up our sleeves to install WordPress from scratch. Don’t worry if tech stuff seems like a foreign language; I’ll guide you through each step with crystal clarity.
1. Pick Your Host
Selecting the right hosting provider sets the foundation for your website’s success. It’s akin to choosing the perfect spot for your dream home. Take into account crucial aspects like pricing plans, available storage, customer support responsiveness, and server uptime reliability.
With a plethora of hosting options out there, ranging from big names to smaller, niche providers, you’re spoiled for choice. Some offer user-friendly interfaces, while others prioritize lightning-fast servers or round-the-clock support. It’s like browsing through a buffet—each option has its unique flavors, catering to different preferences.
So, take your time to explore the offerings, read reviews, and consider your priorities. Once you’ve found the host that ticks all your boxes, it’s time to make it official. Sign up, secure your digital plot, and get ready to build your online empire with WordPress!
2. Launch One-Click Install
Once you’ve got hosting sorted, log into your hosting account. Look for the “WordPress Installer” or a similar tool. Click it, follow the instructions, and boom! WordPress is now installed on your hosting server.
3. Installing WordPress Without One-Click
If your hosting provider doesn’t offer a one-click WordPress installation option, fear not! You can still install WordPress manually, and it’s simpler than you might think. Here’s a step-by-step guide to get you started:
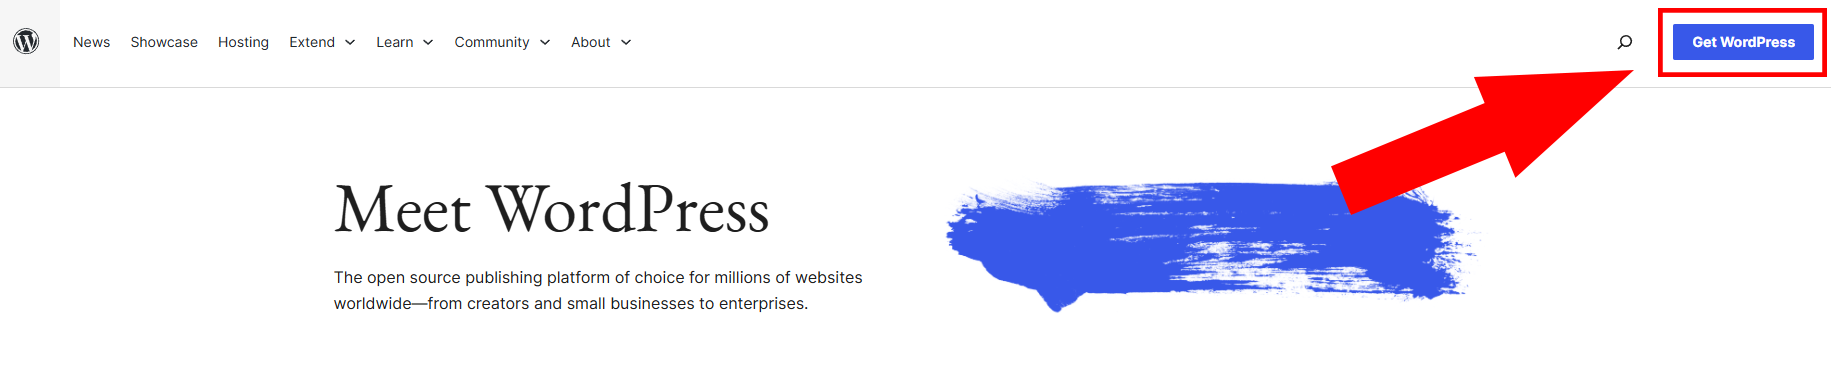
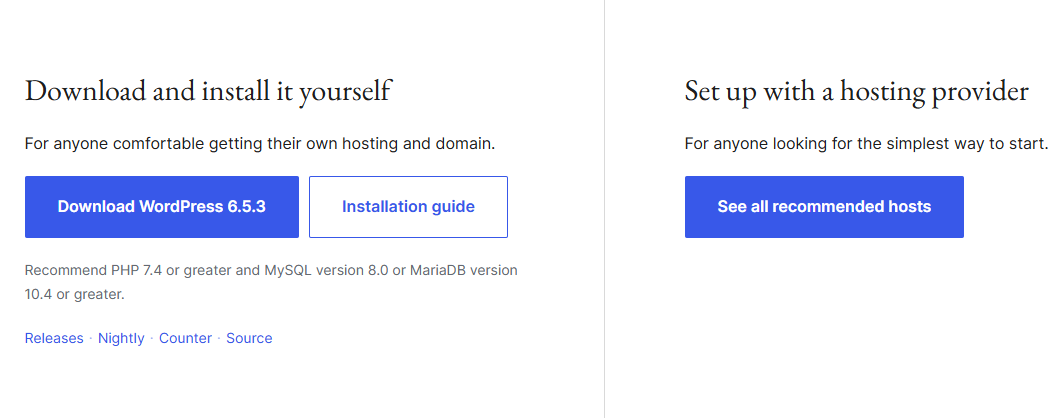
Download WordPress: Visit the official WordPress website and download the latest version of WordPress. It will be a zip file, so make sure to extract its contents to a folder on your computer.
Create a Database: Log in to your hosting account’s control panel (usually accessed through a link provided by your hosting provider). Look for the “Database” section and create a new MySQL database. Note down the database name, username, and password—you’ll need these later.
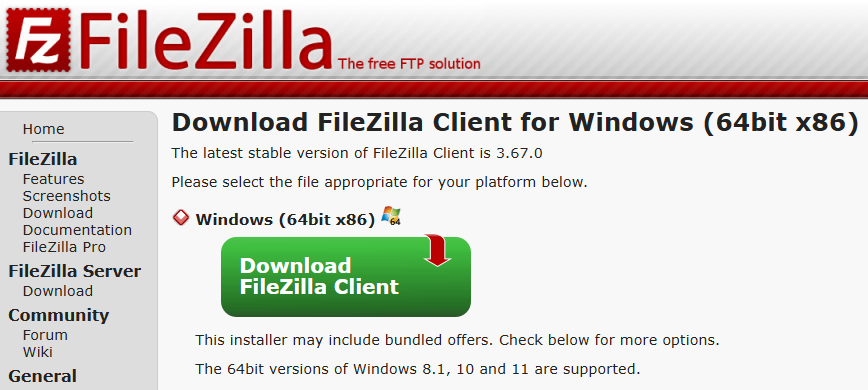
Upload WordPress Files: Using an FTP client like FileZilla, connect to your hosting account. Navigate to the directory where you want to install WordPress (usually the “public_html” folder) and upload all the extracted WordPress files.
Configure wp-config.php: In the WordPress folder on your hosting account, you’ll find a file named “wp-config-sample.php.” Rename this file to “wp-config.php” and open it in a text editor. Enter your database details (database name, username, and password) where indicated, and save the file.
Run the Installation Script: Now, open your web browser and navigate to your domain name (e.g., www.yourdomain.com). You should see the WordPress installation wizard. Select your language and click “Continue.” Enter your site details (title, username, password, email) and click “Install WordPress.”
Complete Installation: Once the installation is complete, you’ll receive a success message. You can then log in to your WordPress dashboard using the username and password you set during installation.
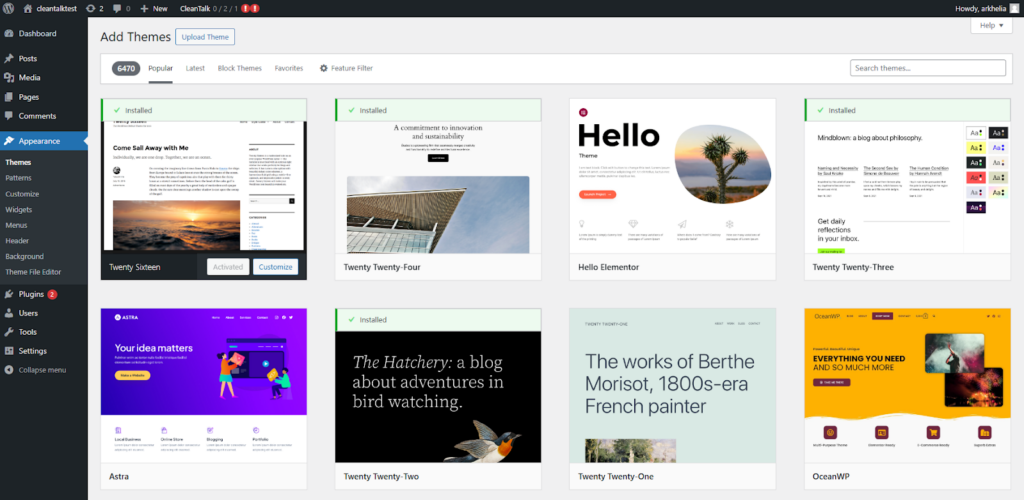
4. Choose a Theme
It’s time to spruce up your site with a theme. Head to “Appearance” > “Themes” in the dashboard. Browse the free themes or consider purchasing a premium one for extra features. Click “Install” and “Activate” to apply your chosen theme.
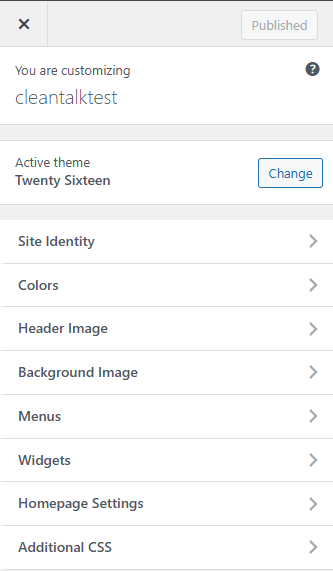
5. Customize Your Site
Personalize your site’s appearance by tweaking settings in the WordPress Customizer. Change colors, fonts, and layouts to match your style. No coding is required—just click, preview, and save your changes.
6. Add Essential Plugins
Plugins are like apps for your website, adding extra functionality with a few clicks. From your dashboard, go to “Plugins” > “Add New.” Search for plugins like Yoast SEO for better search engine visibility or Contact Form 7 for creating forms. It’s a good idea to shield your website from spambots—they’ll know about it in the blink of an eye, and you’ll be attacked by virtual armies in no time. Also, you might want to exclude the possibility of your work being ruined by malware programs. For both of these problems, a good solution is Anti-Spam and Security plugins by CleanTalk.
Click “Install” and then “Activate” to start using them.
7. Start Creating Content
Time to unleash your creativity! Click on “Posts” or “Pages” in the dashboard to write articles or create new pages. Use the intuitive editor to format text, add images, and publish your content. Don’t worry about making it perfect — editing is your friend!
There you have seven straightforward steps to install WordPress and kickstart your online journey. No tech wizardry required, just a little patience and a willingness to explore. So go ahead, dive in, and start building your dream website!
During routine plugin testing, we discovered a critical security vulnerability in the Shortcodes Ultimate plugin for WordPress which has 600,000+ installations. This plugin, widely used for adding powerful shortcodes to enhance website functionality, is currently vulnerable to a severe security flaw that could potentially allow attackers to exploit and gain unauthorized access to your WordPress site.
The exploit allows contributors to embed malware JavaScript code into new posts via shortcode, subsequently facilitating admin account creation. By exploiting this flaw, attackers can gain unauthorized access and wreak havoc on websites.
Don’t rush to delete the plugin. To mitigate the risk you should just update your Shortcodes Ultimate plugin to the latest version. Additionally, implementing robust security measures, such as regular vulnerability assessments and user role restrictions, can fortify defenses against XSS attacks.