If you use Formidable Forms on a WordPress website, spam will eventually become a real issue. It usually starts with a few junk submissions in a contact form, quote request form, survey, quiz, or registration form. Then it turns into fake leads, bot traffic, meaningless messages, and wasted admin time.
That is not a Formidable-specific flaw. It is a normal consequence of running public-facing forms on a visible website. The more accessible the form is, the more often bots and abusive senders will try to submit it. That is why Formidable Forms spam protection should be configured from the start, not only after your inbox is already full of garbage entries.
This guide explains how to build a practical layered setup for Formidable spam protection. The main solution here is the Anti-Spam plugin by CleanTalk, and then we will also cover additional tools such as built-in anti-spam options, honeypot protection, reCAPTCHA, hCaptcha, Cloudflare Turnstile, and other WordPress anti-spam plugins.
By the end of this article, you will know how to stop most fake submissions in Formidable Forms without making your forms harder for real visitors to use.

Formidable Forms – WordPress Form Builder Plugin
First, let’s take a quick look at Formidable Forms itself.
Formidable Forms is a WordPress form builder used for much more than a basic contact form. Website owners use it to create contact forms, lead forms, quote request forms, surveys, quizzes, registration flows, calculators, payment forms, and other custom workflows. That flexibility is exactly why the plugin is attractive for businesses, agencies, and content-driven sites.
But that same flexibility also increases spam exposure. The more public forms a website has, the more entry points it gives to spambots and abusive users.
Typical Formidable spam problems include:
- fake contact messages,
- junk quote requests,
- automated survey submissions,
- low-quality leads,
- bot-driven registration attempts,
- repeated testing of form fields and validation logic.
So when users search for formidable spam, they are usually not describing one single issue. They often mean a broader set of problems: fake submissions, spammy messages, junk leads, bot traffic, and abusive attempts to use public forms.
A strong anti-spam strategy should address all of those while keeping the experience simple for legitimate users.
As WordPress.org shows, Formidable Forms is currently used on over 300,000 websites and has 1,357 user reviews with an average rating of 4.8.
Plugin Homepage at wordpress.org | Website formidableforms.com
Install Formidable Forms to create contact forms, quote request forms, surveys, quizzes, registration forms, and other custom forms in WordPress.
You can set it up in just a few easy steps:
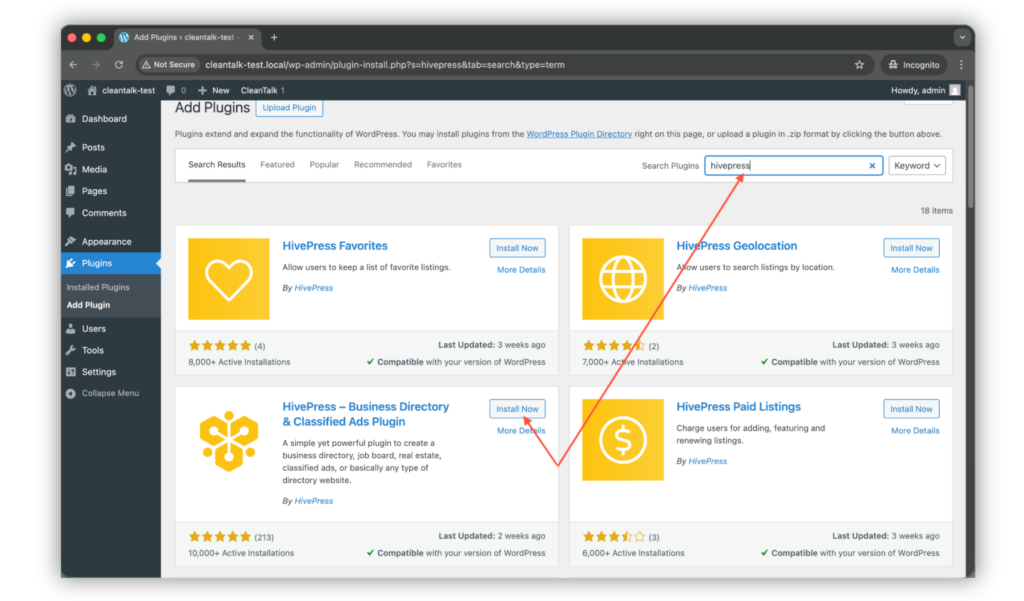
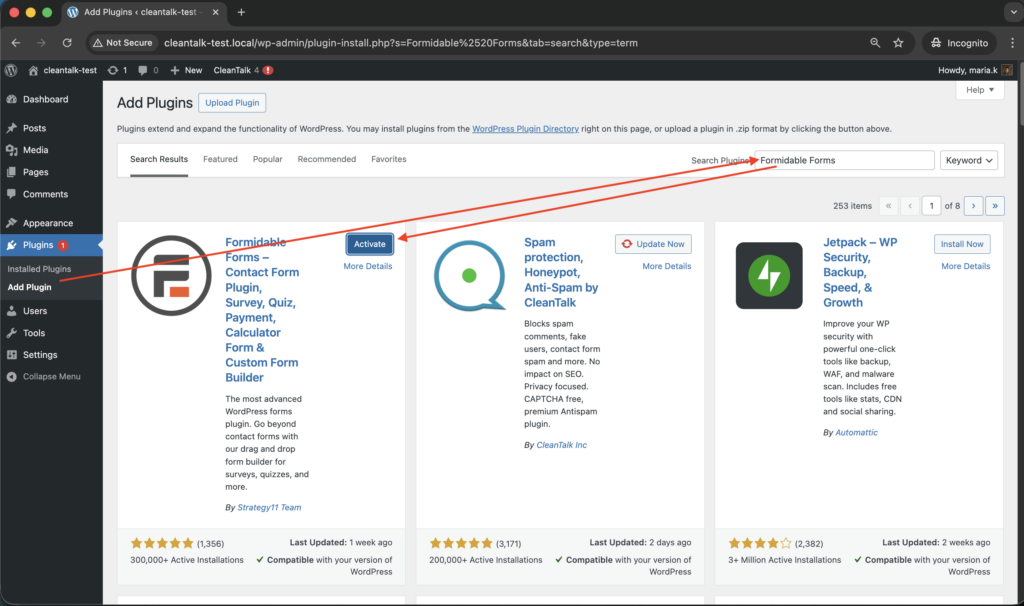
1. Search for the plugin in WordPress console -> Plugins -> Add Plugin -> Search -> Type ‘Formidable Form
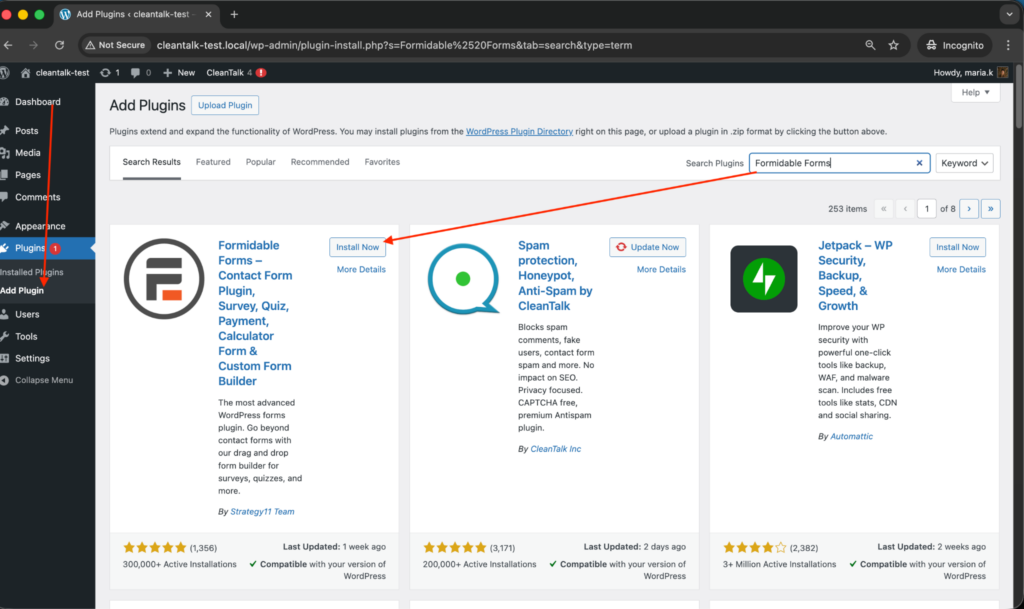
2. Install and Activate the plugin
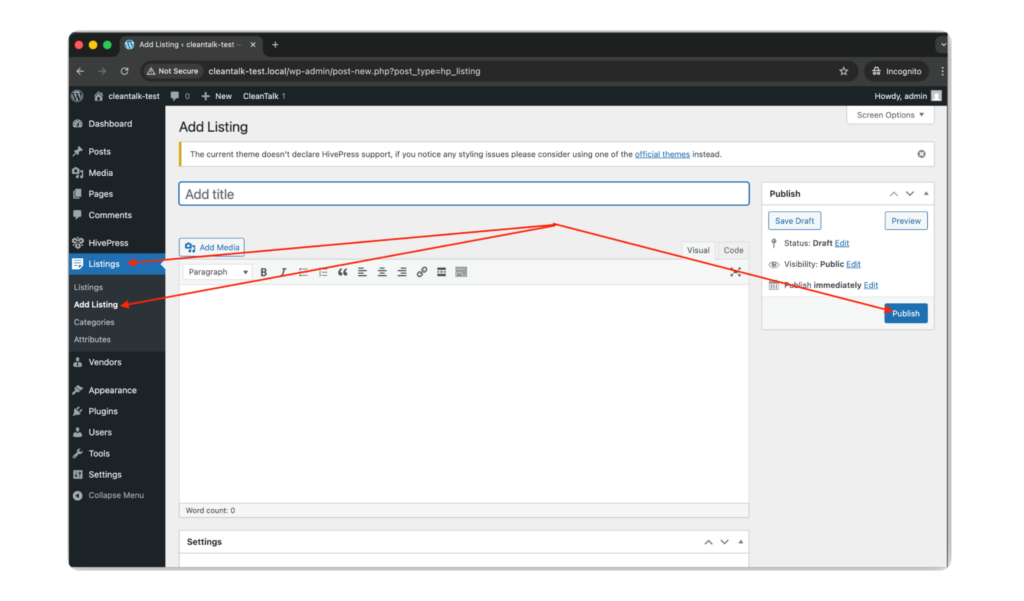
3. Create your first form in WordPress console -> Formidable -> Forms -> Add New.
WordPress console -> Formidable -> Forms -> Add New -> choose a template or start with a blank form -> add fields and settings -> Save.
4. That’s all! Your first form is ready and Formidable Forms is now set up on your site.
Anti-Spam plugin by CleanTalk for WordPress
The main solution in this guide is the Anti-Spam plugin by CleanTalk.
CleanTalk is a cloud-based anti-spam service for WordPress and other CMS platforms. Instead of making every visitor solve a challenge, it checks submissions in the background and filters spam automatically. This matters because one of the biggest weaknesses of CAPTCHA-only protection is friction: every extra test can reduce conversion rate and annoy real users.
Here is why CleanTalk works well for Formidable Forms websites:
- it checks submissions automatically in the background,
- it helps protect contact, registration, survey, quote, and feedback forms,
- it reduces fake entries before they clutter your inbox or database,
- it does not rely on classic CAPTCHA for every visitor,
- it gives you a cloud dashboard for reviewing decisions and fine-tuning protection if needed.
In practical terms, this means you can keep the form experience clean for real users while filtering suspicious behavior in the background.
For most websites, CleanTalk should be the primary spam filter, while CAPTCHA and other tools are used only as additional layers on higher-risk forms.
According to WordPress.org, Anti-Spam by CleanTalk for WordPress has over 200,000 active installations, with 3,168 reviews and an average rating of 4.7.
Plugin Homepage at cleantalk.org | Latest release at GitHub.com | Website cleantalk.org
Install the CleanTalk Anti-Spam plugin
Show Instructions
To install the Anti-Spam plugin, go to your WordPress admin panel → Plugins → Add New.

Then enter «СleanTalk» in the search box and click the Install button for «Spam protection, Anti-Spam, FireWall by CleanTalk».

After installing the plugin, click the «Activate» button.

After it is done go to the plugin settings and click the «Get Access Key Automatically» button. Then just click the «Save Settings» button.

That’s it! From now you know how to completely protect your HivePress from spam.
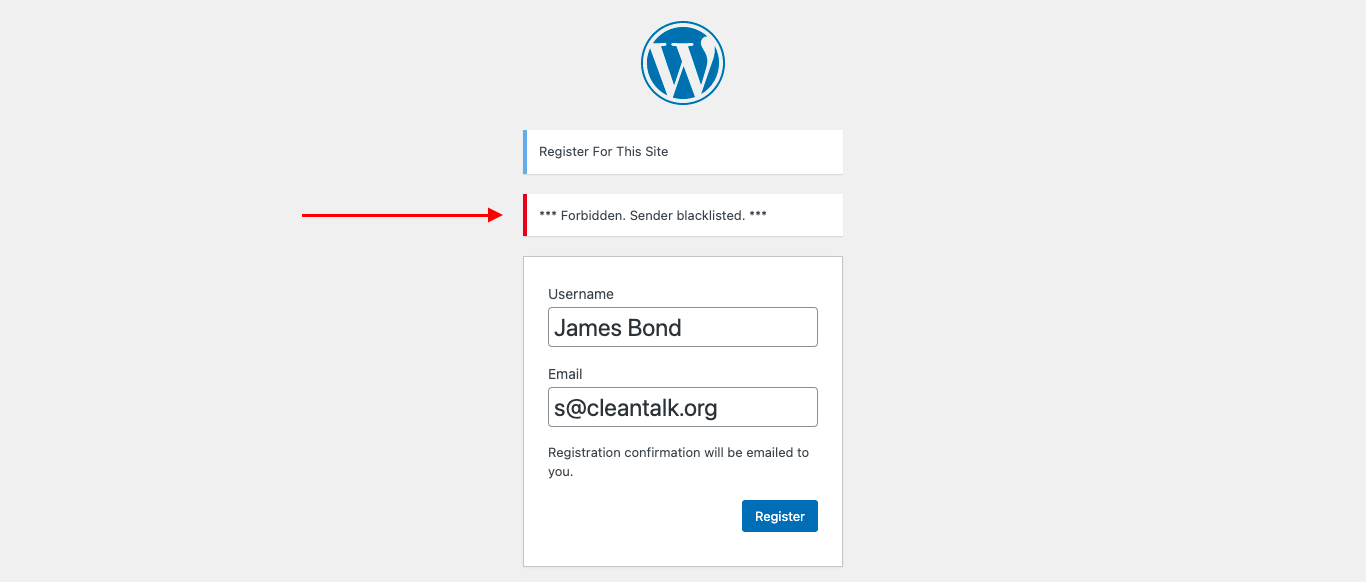
Check if spam protection works with Formidable Forms
The easiest way to test the setup is to use the CleanTalk test email:
stop_email@example.com
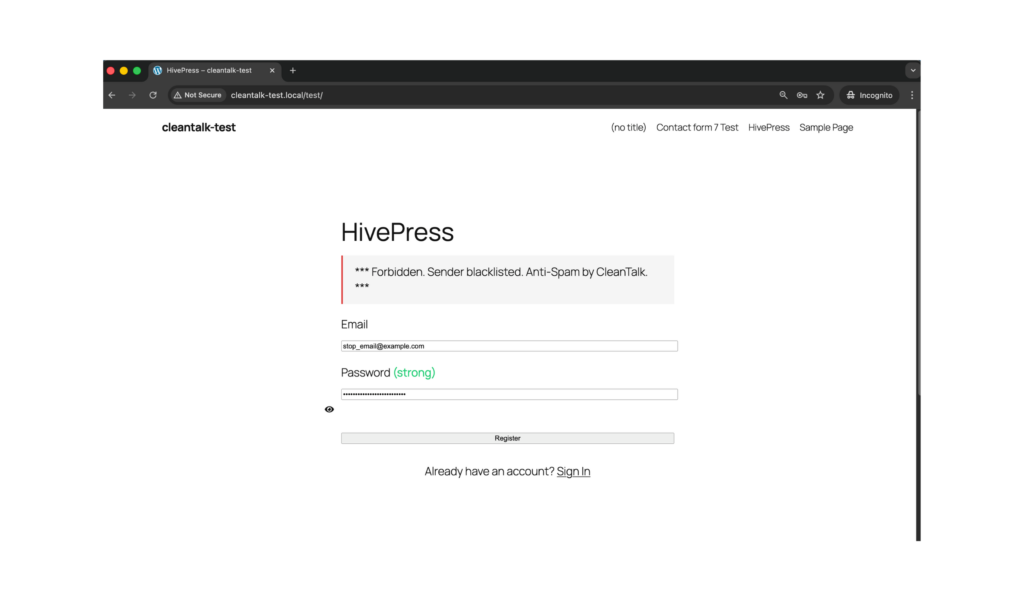
Use this method:Open a page with your Formidable form in an Incognito or Private browser window.
- Fill out the form.
- Use stop_email@example.com as the sender email.
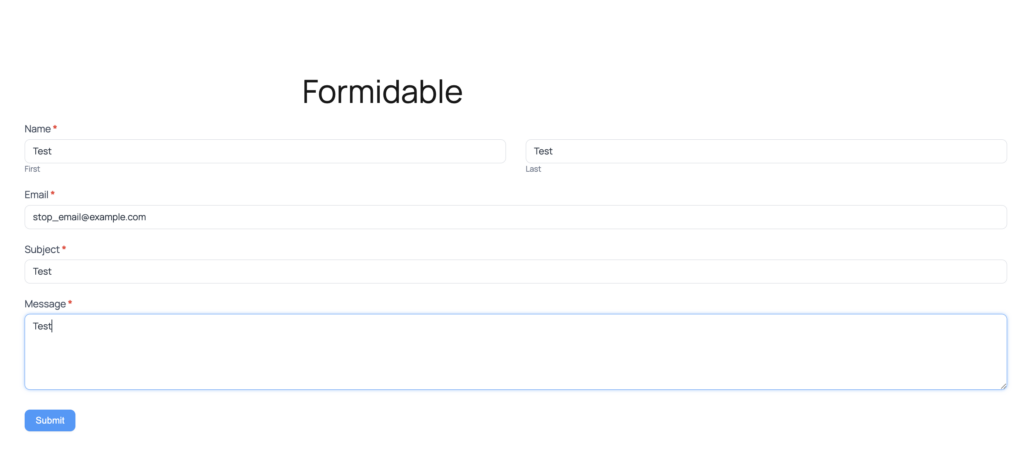
4. Submit the form.
5. You should see a blocking message from the Anti-Spam plugin instead of a successful submission.
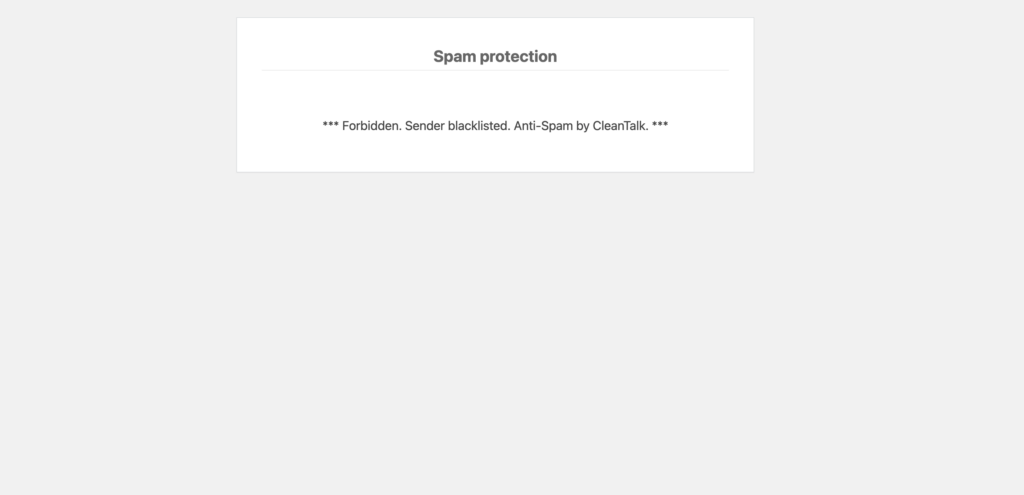
If that happens, the protection is working correctly and your Formidable form is already filtering known spam submissions.
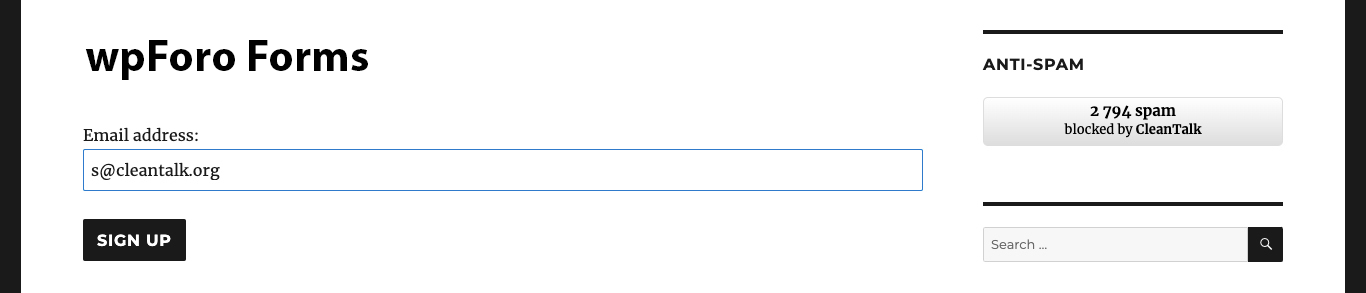
Cloud Dashboard
In addition, the CleanTalk Cloud Dashboard gives you more visibility into what is happening with submissions processed through the anti-spam service.
For Formidable Forms websites, this is useful because it helps you review not only whether a submission was blocked, but also why it was blocked.
In the dashboard, you can usually find details such as:
- sender IP and email,
- geolocation of the sender,
- date and time of the submission,
- page URL where the form was submitted,
- cloud decision – Approved or Denied,
- explanation for the decision,
- tools to move the sender to Allow or Block lists.
This is especially helpful if the site receives repeated attacks, recurring junk leads, or suspicious activity from the same sources.
Built-in Spam Protection in Formidable Forms
Besides CleanTalk, Formidable Forms itself can be used with built-in anti-spam measures and additional anti-abuse checks.
These are useful, but in most real-world cases they work best as secondary protection, not as the only defense.
Honeypot protection
A honeypot is one of the simplest anti-spam methods. It adds hidden fields that real visitors do not interact with, but simple bots often fill automatically. When that happens, the submission can be rejected.
Why honeypot is useful:
- it is invisible to legitimate users,
- it creates no extra friction,
- it catches primitive bots efficiently.
Why it is not enough on its own:
- more advanced bots can bypass it,
- it does not handle every case of fake leads or manual spam,
- it is better as a supporting layer than as a full anti-spam strategy.
That is why honeypot is a good addition, but not a complete replacement for a broader spam filter.
Native anti-spam and validation options
Form builders often include basic anti-abuse logic, validation rules, and submission checks. These can help reduce low-quality automated submissions and obvious junk entries.
However, built-in checks are usually narrower than a dedicated anti-spam service. They may stop some bot patterns, but they do not always provide broader reputation analysis, behavior-based filtering, or cloud-level spam intelligence.
For that reason, a layered setup works better: use Formidable’s own checks where appropriate, but keep CleanTalk as the main filter working in the background.
reCAPTCHA, hCaptcha, and Cloudflare Turnstile for Formidable Forms
Another common question is whether CAPTCHA should be used together with Formidable Forms.
The answer is: yes, sometimes – but not as the only protection layer.
CAPTCHA-style tools are most useful for higher-risk forms, such as:
- registration forms,
- quote request forms,
- lead generation landing pages,
- public surveys,
- pages that receive repeated bot attacks.
Google reCAPTCHA
Google reCAPTCHA is one of the best-known anti-bot tools. It can reduce obvious automated abuse, but it also has downsides:
- it may interrupt the user experience,
- it can lower form completion rates,
- some spam still passes through,
- it does not replace a complete anti-spam strategy.
So reCAPTCHA can help, but it should not replace your main spam filter.
hCaptcha
hCaptcha is often chosen by site owners who want an alternative to Google-based services. It can be useful as an additional challenge layer for forms that receive repeated automated abuse.
Its role in a Formidable setup is simple: increase resistance on risky forms while CleanTalk continues filtering quietly in the background.
Cloudflare Turnstile
Cloudflare Turnstile is a more modern alternative that often works with less visible friction than classic CAPTCHA challenges. For websites that want extra bot protection with a lighter user experience, it can be a strong second layer.
But the same principle still applies:
Do not rely on Turnstile alone.
Use it together with CleanTalk, not instead of CleanTalk.
Akismet and other third-party anti-spam plugins
There are also other WordPress anti-spam solutions that site owners may consider.
Akismet
Akismet is well known in the WordPress ecosystem and is often used for comments and basic spam filtering. On a Formidable-based website, it may help with broader site-level anti-spam needs outside the form workflow itself.
But for a forms-heavy website, Akismet is usually better treated as a supporting layer rather than the core Formidable spam protection strategy.
Other universal anti-spam plugins
Some website owners also try solutions such as:
- WP Armour,
- OOPSpam,
- Maspik,
- honeypot plugins,
- CAPTCHA-focused plugins.
These can be useful in specific projects, especially if a website has unusual traffic patterns or several different plugins handling different submission points.
At the same time, using too many overlapping anti-spam plugins can also create conflicts, duplicate filtering, false positives, or an unnecessarily complicated admin workflow.
That is why the cleaner approach is usually better:
one primary spam filter, one optional CAPTCHA layer, and extra tools only where they solve a clear problem.
Frequently Asked Questions
Why am I still getting fake submissions in Formidable Forms after enabling spam protection?
Spam protection blocks most automated junk, but not every unwanted lead is a classic bot submission. Some low-quality entries may be submitted manually or by more advanced automated methods. In that situation, the best fix is layered protection: keep CleanTalk as the main background filter and add CAPTCHA or Turnstile only to the forms that receive repeated abuse.
Can CleanTalk protect all Formidable Forms or do I need to configure each form separately?
In most cases, CleanTalk starts checking form submissions after installation and activation, so you do not need to rebuild every Formidable form manually. That makes it convenient for websites with multiple contact forms, quote request forms, survey forms, and registration pages.
Should I use CAPTCHA together with CleanTalk for Formidable Forms?
For many standard contact forms, CleanTalk alone is enough. But if a site runs registration forms, quote pages, paid-traffic landing pages, or other high-risk forms, adding reCAPTCHA, hCaptcha, or Cloudflare Turnstile as a second layer is a good idea.
What types of Formidable forms attract the most spam?
The most common targets are contact forms, lead generation forms, quote request forms, registration forms, and surveys on public pages. These forms are easy for bots to discover and usually contain clear fields that can be abused at scale.
How can I check whether CleanTalk is actually blocking Formidable spam?
The simplest test is to open your Formidable form in an Incognito window and submit it using stop_email@example.com. If CleanTalk is working correctly, the form submission should be blocked and a spam warning should appear.
Why would a legitimate Formidable form submission be blocked as spam?
Occasional false positives can happen with any anti-spam system. This may be caused by unusual sender behavior, shared networks, VPN use, aggressive browser settings, or plugin conflicts. If needed, review the event in the CleanTalk dashboard and move trusted senders to the allow list.
What is the best anti-spam setup for contact, quote, and registration forms built with Formidable?
For most websites, the best setup is CleanTalk as the main spam filter, Formidable’s built-in checks or honeypot as a lightweight extra layer, and CAPTCHA only on the forms with the highest spam risk. This keeps the user experience smoother than forcing challenge-based verification everywhere.
Why are my Formidable form notifications landing in spam folders even when submissions are blocked correctly?
This usually points to an email delivery issue rather than a form filtering problem. If form notifications go to spam, configure SMTP for the WordPress site, avoid relying on the default PHP mail function, and make sure the sending domain has valid SPF, DKIM, and DMARC records.
Recommended Anti-Spam Stack for Formidable Forms
No single anti-spam method stops every type of spam. The most reliable approach is a layered anti-spam stack, where each layer deals with a different category of abuse.
Small business website with a contact form
Recommended setup:
- CleanTalk Anti-Spam as the main protection,
- optional honeypot or built-in checks,
- occasional dashboard review if spam appears.
That is usually enough for a simple business website with normal traffic.
Lead generation, quote request, survey, or registration forms
Recommended setup:
- CleanTalk Anti-Spam as the main protection,
- honeypot or built-in validation as an extra layer,
- reCAPTCHA, hCaptcha, or Turnstile on the most attacked forms.
This setup gives better resistance against recurring bot attacks and fake leads.
High-traffic or high-risk forms
Recommended setup:
- CleanTalk Anti-Spam as the main protection,
- CAPTCHA or Turnstile on targeted forms,
- allow/block list tuning in the dashboard,
- checks for plugin conflicts,
- SMTP configuration for reliable email notifications.
This is the best option for websites that actively attract spam traffic.
Final thoughts
If you are trying to stop Formidable Forms spam in WordPress, the most effective approach is not to rely on one tool alone.
A reliable setup usually looks like this:
- CleanTalk as the main background spam filter,
- honeypot or built-in checks as lightweight support,
- reCAPTCHA, hCaptcha, or Turnstile only where additional verification is needed,
- dashboard monitoring and personal lists for fine-tuning.
That combination helps reduce fake submissions, keeps the form experience cleaner for real users, and gives you more control when spam patterns change over time.