Part 1: Installing the Universal Anti-Spam Plugin 
Universal Anti-Spam plugin can be installed on any custom websites, CMS and Frameworks. If you don’t have programming experience to add our API on a website it will be a better way to protect your website from spam with CleanTalk. Invisible to the visitors, spam protection has a positive effect on the loyalty of the site’s audience.
Installation guide 
1. Make backup copies of your website files and database.
2. Download and unzip the “cleantalk” folder into your websites’ ROOT folder.
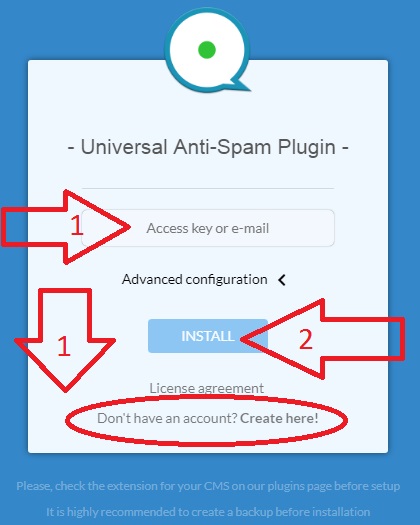
3. Proceed to address (your_website_name/cleantalk/install.php):

4. Enter your Access key and click the button “Install” to continue with the installation or enter your e-mail to register a CleanTalk profile and continue with the installation.
Also, you can register a CleanTalk profile manually by simply clicking the button “Don’t have an account? Create here!“.

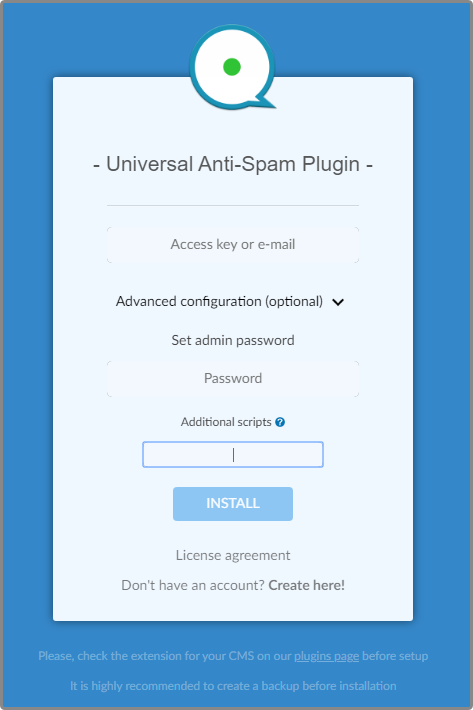
Universal Anti-Spam plugin will write protection code to index.php file by default. If your contact or registration forms are located in different files/scripts, list them in the “Advanced configuration” section separated by commas. Also, you can set an additional password to the plugin settings.

At the end of the successful installation, you will see this message
.png)
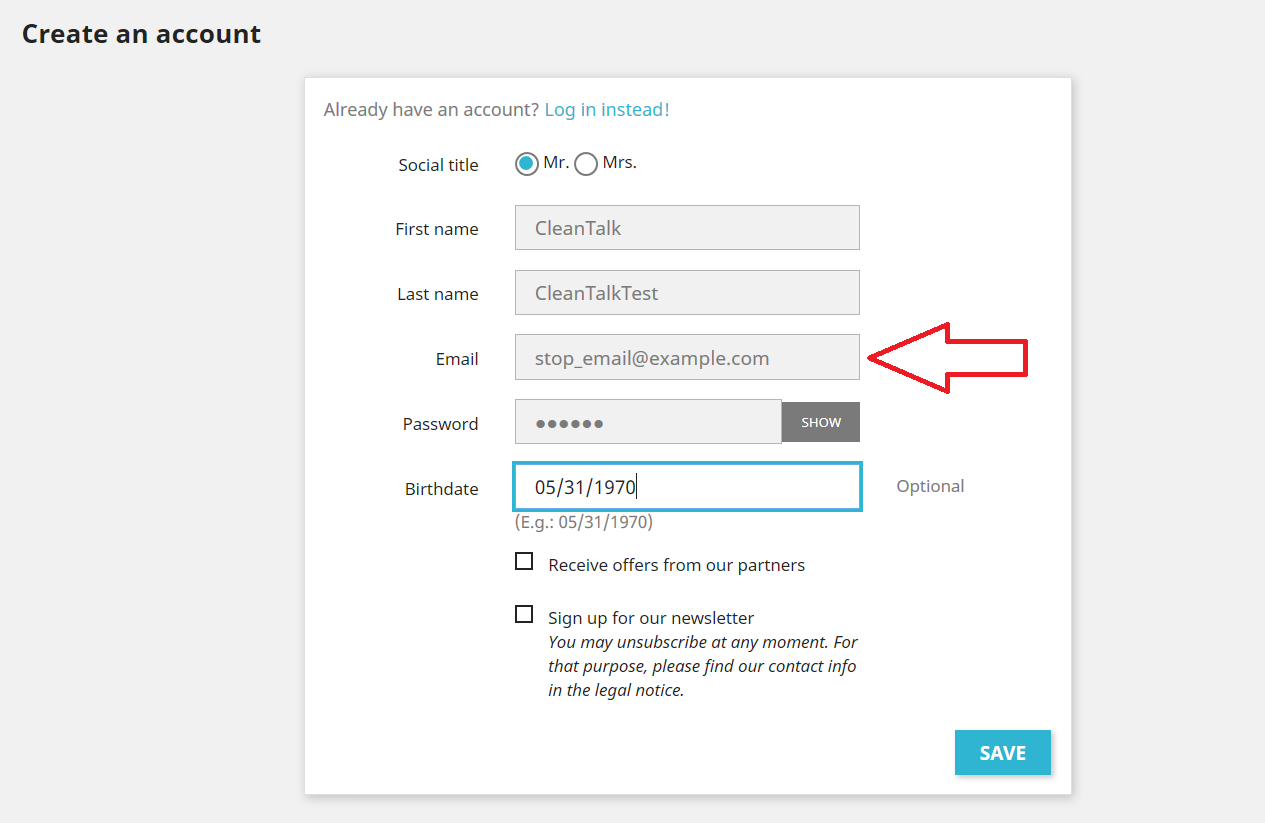
5. You can test any form on your website by using special e-mail st********@*****le.com. Every submits with this email will be blocked. There is an example of site registration interface on the image.


How to Add Website to Cleantalk Anti-Spam Dashboard 
Please, use this guide to add website to CleanTalk Anti-Spam Dashboard: https://cleantalk.org/help/add-website
Сongratulations! The setup is complete!
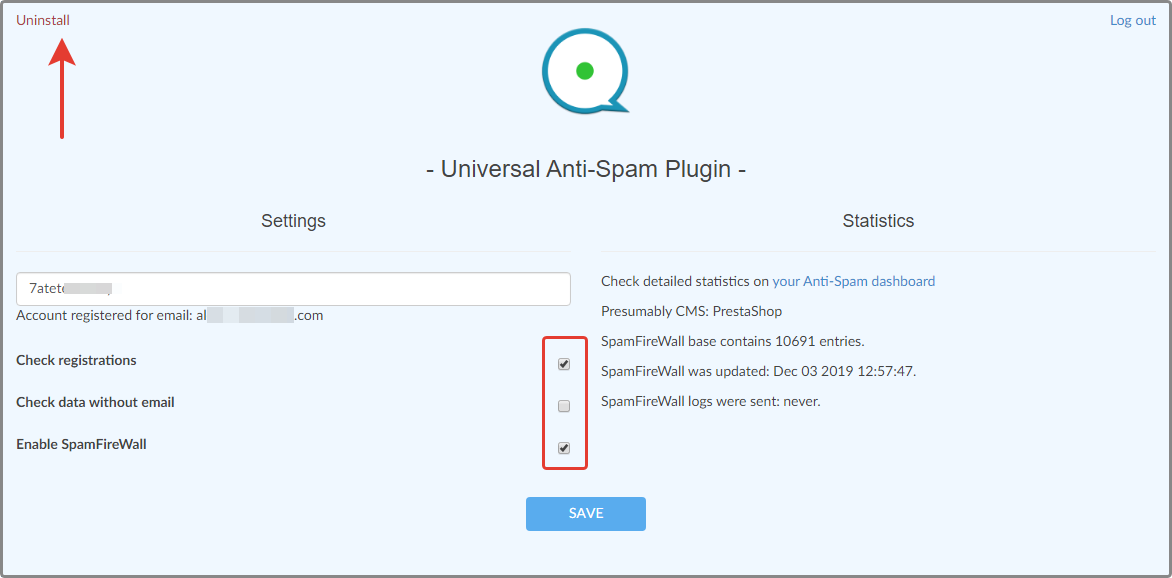
Notice: To enter the plugin settings go to (your_website_name/cleantalk/settings.php). Here you can manage the plugin options, see statistics and uninstall the plugin.

Please go to your Dashboard to see your anti-spam status, add new websites or manage existing ones!
Part 2: Adding some settings to CS-Cart to protect your CS-Cart website from spam 
Step 1: Create a block with html content.
And after that go to its Content tab and enable the html adding mode.
Then add the following script:
<script>var apbct_checkjs_val = "Q6b4cecdsec6dc894Fa55387bde069cbee18705a0a25e826c30a11774da0b262";</script>
<script src="/cleantalk/js/ct_js_test.js"></script>
<script src="/cleantalk/js/ct_ajax_catch.js"></script>
Attention!
The value of the variable Q6b4cecdsec6dc894Fa55387bde069cbee18705a0a25e826c30a11774da0b262 needs to be changed and is equal to SHA256 (your API key).
Step 2: Go to Layouts and add this block to the layout of your main page to make it display all over the website.
That’s it! Now you know how to protect your CS-Cart website from spam and from now your site is safe.
Read more about all CleanTalk anti-spam features. Read the following guide and learn how to protect your CS-Cart website from spam using Universal Anti-Spam plugin.
December 2021 update:
We have changed the way frontend hash is generated:
- MD5 algorithm is replaced by more progressive SHA256 because of collisions, that were making brute-force easier. Now it’s much more safe. This is relevant for all users of the plugin.
- From now hash also contains Salt (a unique set of characters generated at the installation stage) in order to exclude brute-forcing of an access key.
Also in the admin panel for CS-CART users there is a snippet that must be inserted into the pages, i.e. no need to go somewhere yourself – everything is at hand in a box. I am attaching a picture.
Also backward compatibility works here: users who have installed the snippet on MD5 don’t need to redo something.
Leave a Reply