As a WordPress user let me share my experience of using CAPTCHA less and CAPTCHA style Anti-Spam tools on the example of Contact form 7.
Is reCAPTCHA good or bad for Contact form 7?
Contact Form 7 users may prefer Anti-spam by CleanTalk over reCAPTCHA for several reasons, as each solution has its own advantages and disadvantages. Here are some potential reasons why some users prefer Anti-spam by CleanTalk:
- Simplicity: Anti-spam by CleanTalk offers a simpler and more user-friendly solution compared to reCAPTCHA. It doesn’t require users to solve puzzles or click checkboxes, which can be seen as an added step that may deter some visitors from submitting forms.
- Reduced User Friction: reCAPTCHA can sometimes lead to a less than ideal user experience, especially for those who find it challenging to complete the visual or interactive challenges. Anti-spam by CleanTalk doesn’t require any user interaction, so it doesn’t add any friction to the form submission process.
- Invisible to Users: Anti-spam by CleanTalk works invisibly in the background, so users are not aware of its presence. In contrast, reCAPTCHA typically requires users to complete a task to prove they are not a bot.
- Accessibility: Some users have accessibility concerns with reCAPTCHA, as it relies on visual verification. Anti-spam by CleanTalk does not present accessibility challenges in the same way, making it a more inclusive solution.
- Accuracy: Anti-spam by CleanTalk uses a combination of methods, including machine learning and a vast database of known spam sources, to identify and block spam submissions. This approach can be effective in detecting and preventing spam without relying on user interaction.
- Reduced False Positives: reCAPTCHA, while effective at blocking bots, may occasionally generate false positives, blocking legitimate users. Anti-spam by CleanTalk aims to minimize false positives, ensuring that genuine inquiries are not inadvertently marked as spam.
- Customization: Users have the ability to customize Anti-spam by CleanTalk settings to meet their specific needs and preferences, tailoring the spam protection to their site’s requirements.
- Integration: Anti-spam by CleanTalk is designed to seamlessly integrate with Contact Form 7 and other popular form plugins, making it easy for users to implement spam protection without significant configuration.

It’s important to note that the choice between Anti-spam by CleanTalk and reCAPTCHA may depend on the specific needs and preferences of individual website owners. Some users may prioritize ease of use and a seamless user experience, while others may prioritize the high level of bot detection offered by reCAPTCHA. Ultimately, the choice between these solutions should align with your website’s goals and the user experience you want to provide. Additionally, some users may opt to use both solutions in combination to enhance spam protection further.
How to install Anti-Spam by CleanTalk?
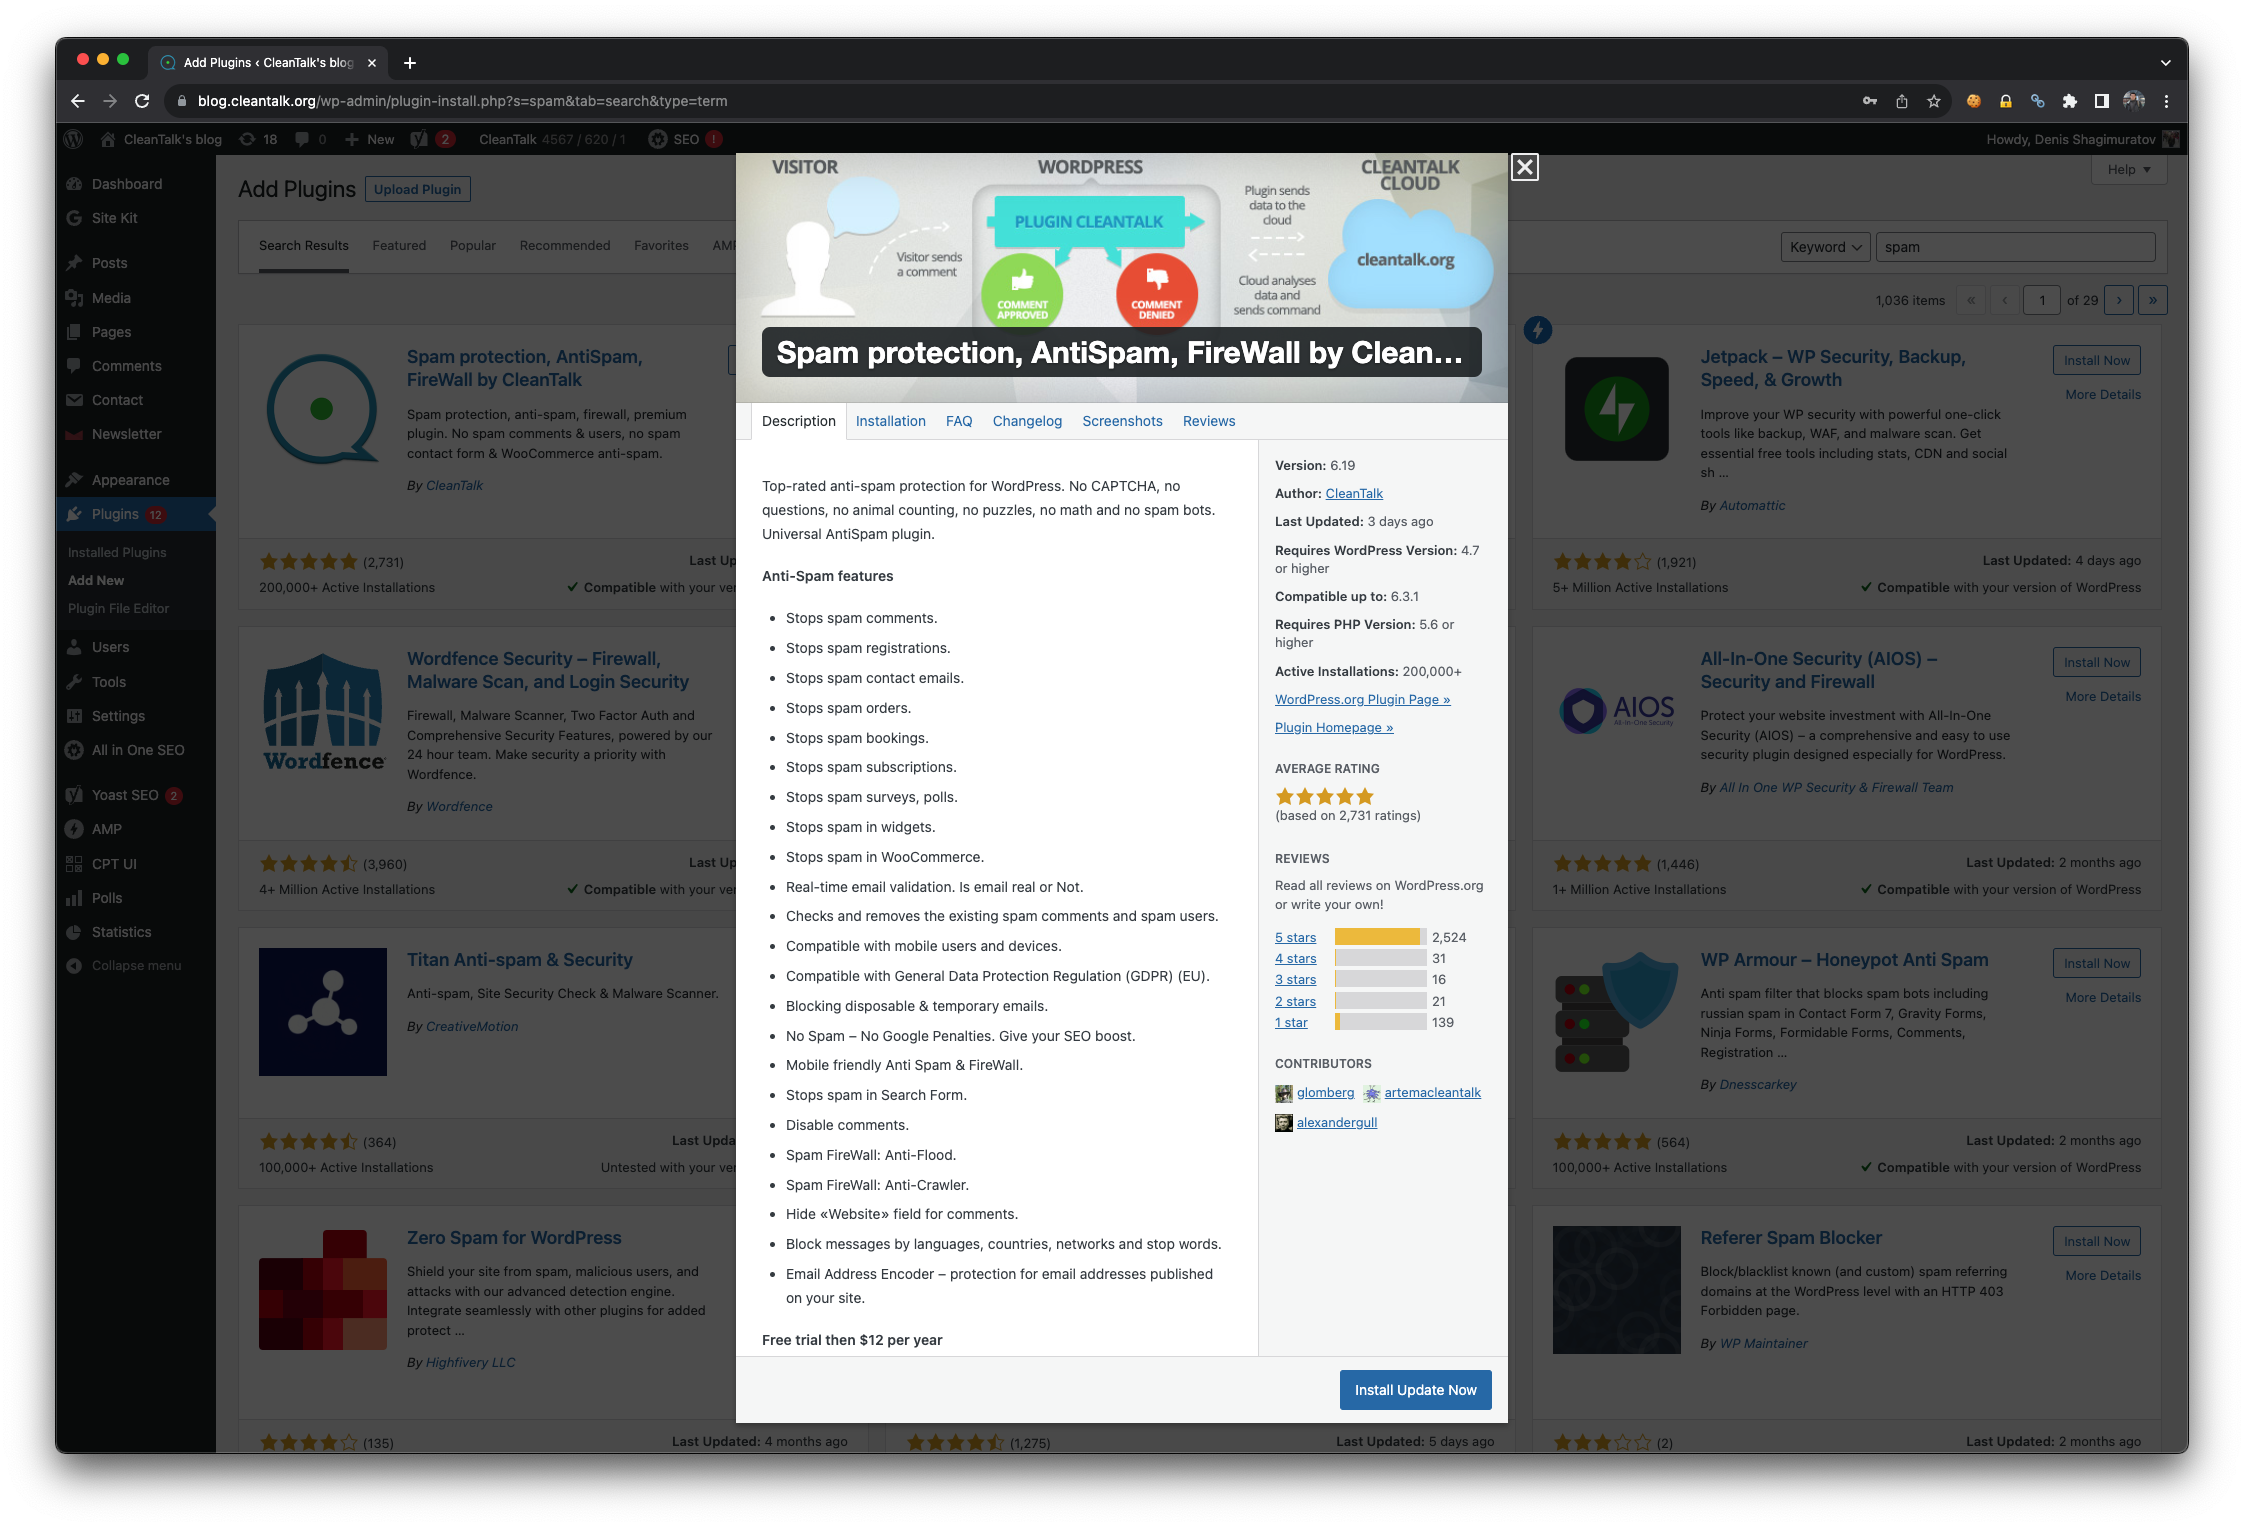
To install and configure the “Anti-Spam by CleanTalk” WordPress plugin for your website, follow these steps:
1. Log in to Your WordPress Dashboard:
Navigate to your WordPress admin dashboard by entering your site’s URL followed by “/wp-admin” (e.g., “https://yourwebsite.com/wp-admin“).
2. Access the Plugins Section:
In the WordPress dashboard, locate and click on the “Plugins” option in the left-hand menu.
3. Click “Add New”:
On the Plugins page, click the “Add New” button at the top of the screen. This will take you to the Add Plugins page.
4. Search for “Anti-Spam by CleanTalk”:
In the search bar on the Add Plugins page, type “Anti-Spam by CleanTalk” and press Enter. The search results will appear.
5. Install the Plugin:
Locate the “Anti-Spam by CleanTalk” plugin in the search results. Click the “Install Now” button next to the plugin’s name.
6. Activate the Plugin:
After installation, a new button will appear that says “Activate.” Click this button to activate the Anti-Spam by CleanTalk plugin.
7. Enter Your Access Key:
Once the plugin is activated, you’ll need to enter your access key to enable the anti-spam features. You can obtain the access key by signing up for CleanTalk on their website (https://cleantalk.org/) and subscribing to their service. After subscribing, you’ll receive an access key via email.
a. In the WordPress dashboard, go to “Settings” in the left-hand menu.
b. Click on “Anti-Spam by CleanTalk” from the submenu.
c. Enter your access key in the provided field.
d. Click the “Check Access Key” button to validate your access key.
8. Configure Settings:
Once your access key is validated, you can configure the plugin settings according to your preferences. The settings allow you to customize the anti-spam protection for your site, including options for comments, registrations, contact forms, and more.
9. Save Changes:
After configuring your settings, don’t forget to click the “Save Changes” button to apply your chosen anti-spam settings.
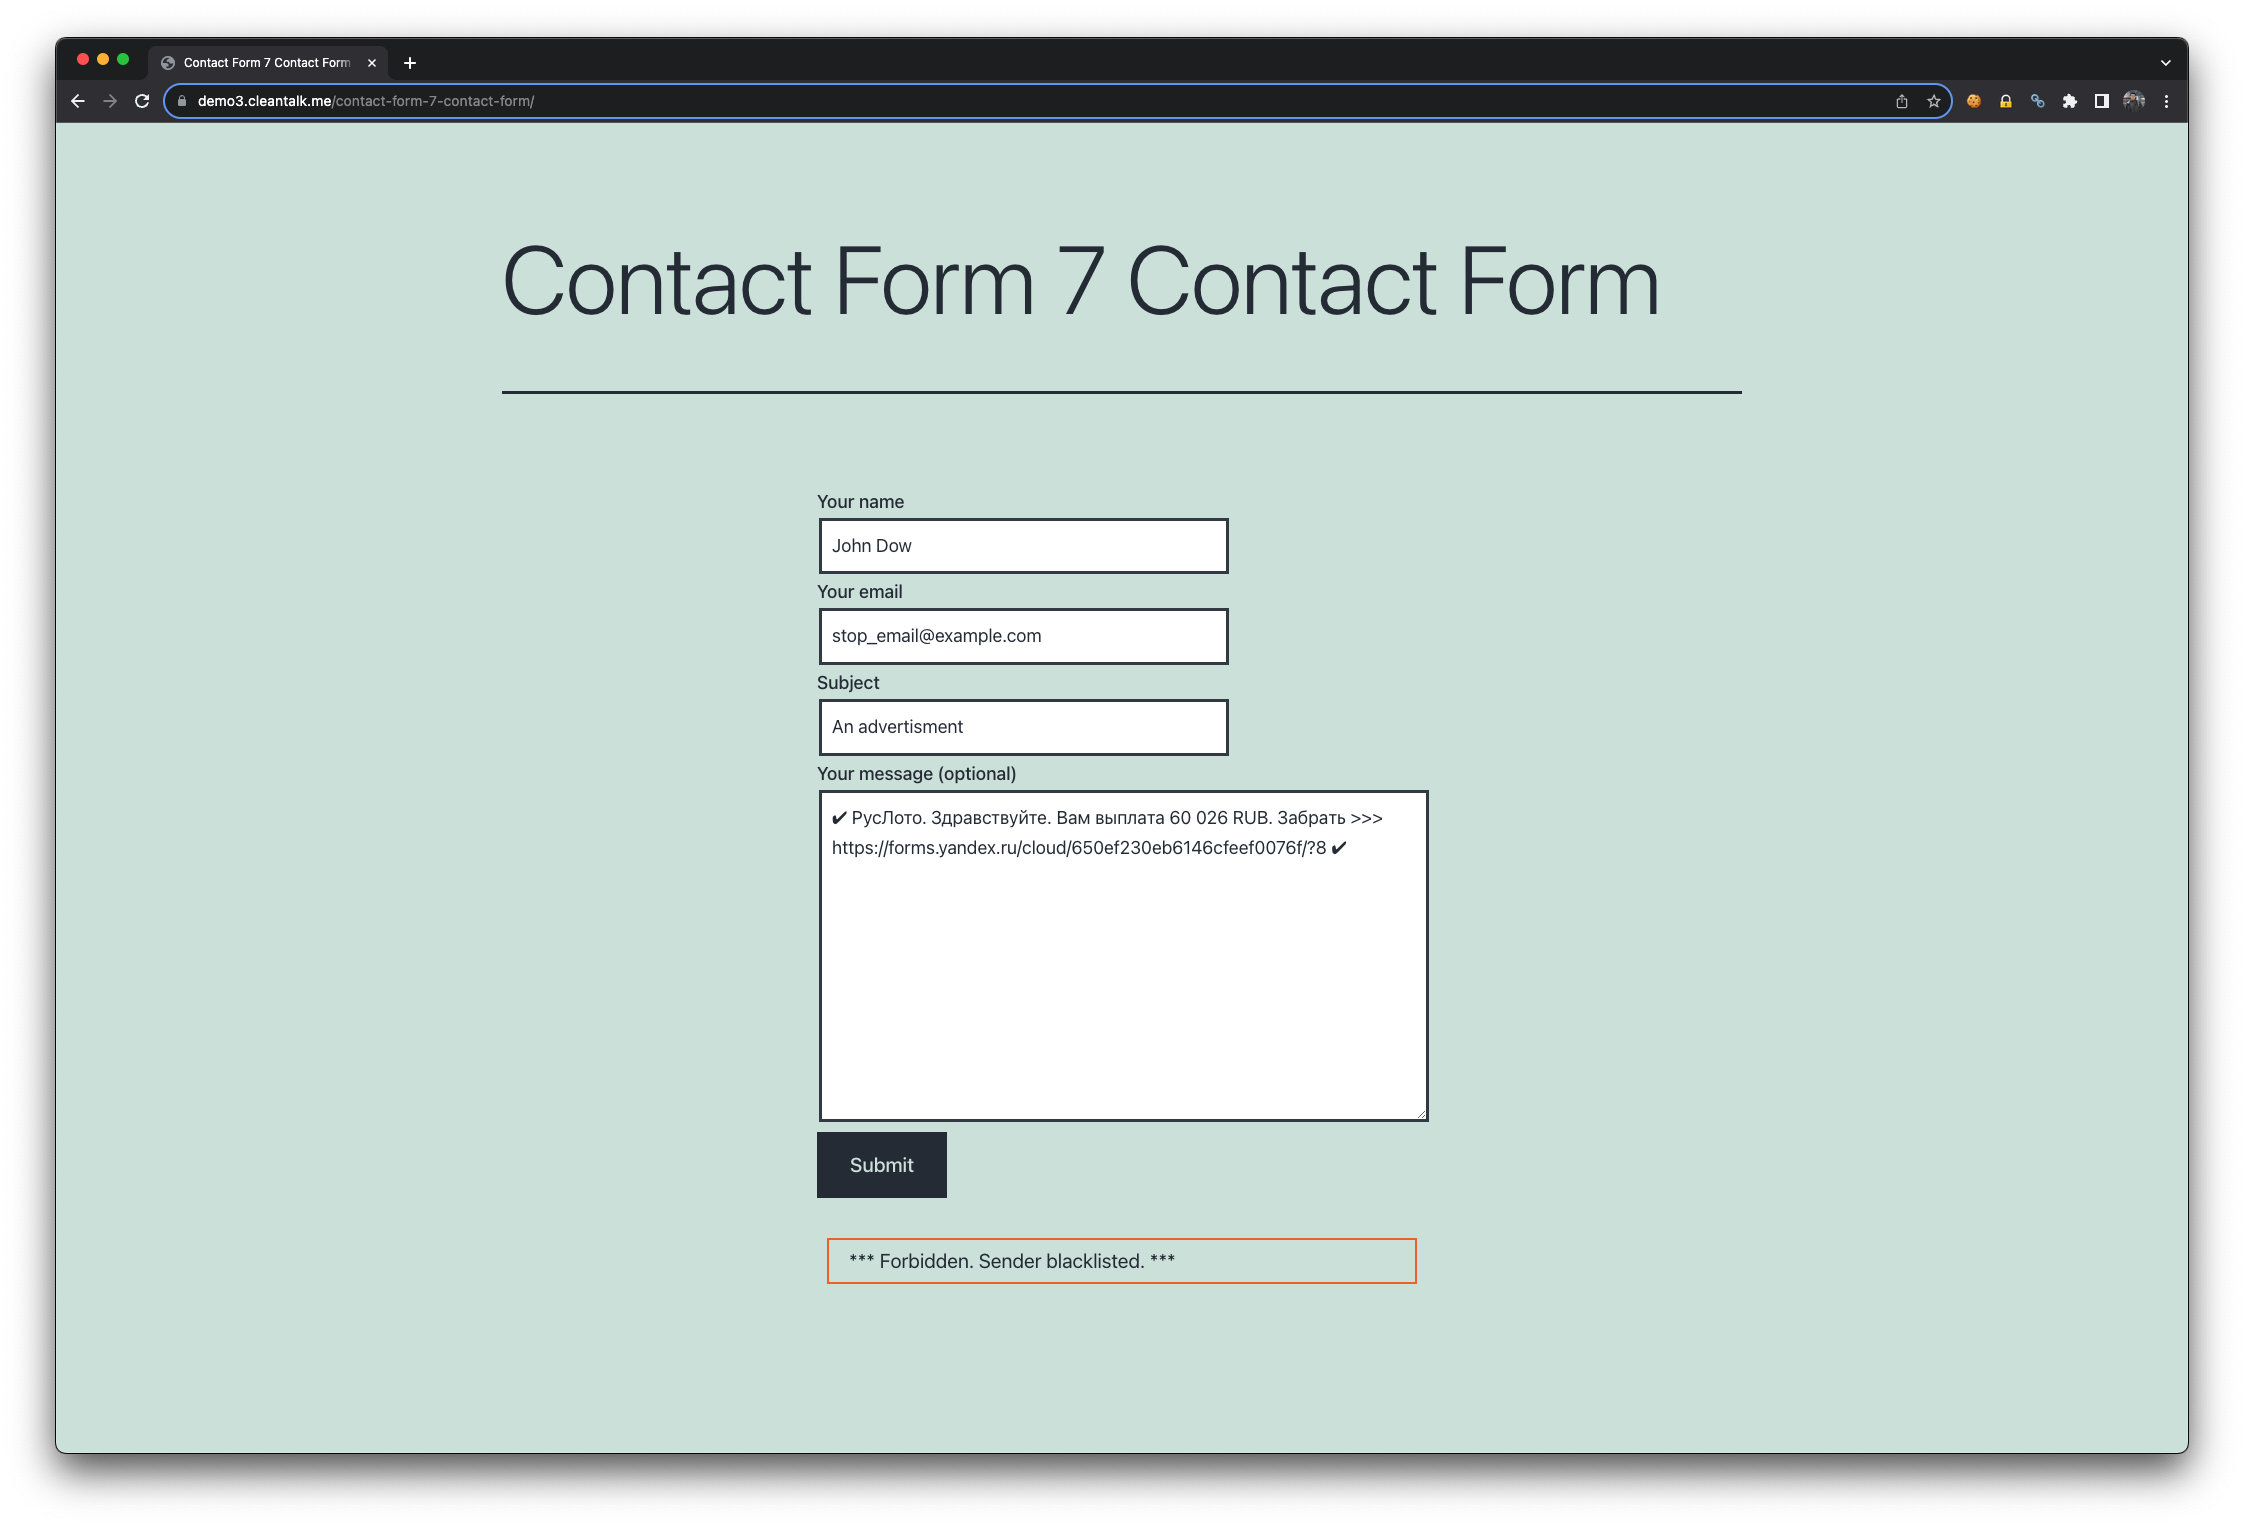
10. Verify That It’s Working:
To ensure that the plugin is effectively blocking spam, just use email st********@*****le.com in a contact form 7. You have to see a special response from Anti-Spam by CleanTalk that describes a reason for blocking.
*** Forbidden. Sender blacklisted. ***
11. Periodic Review:
Periodically review the plugin’s dashboard to check its performance and verify that it’s actively blocking spam submissions. CleanTalk provides statistics on the number of spam attempts blocked.
That’s it! You’ve successfully installed and configured the “Anti-Spam by CleanTalk” plugin on your WordPress website. This plugin will help protect your site from unwanted spam submissions and improve the overall security and user experience of your WordPress site.
Leave a Reply