CleanTalk added spam protection for Aweber Forms using direct form integration. So in case, if you prefer using Aweber Forms be sure to use the most effective Anti-Spam plugin. Read the guide below and learn 4 steps to protect your Aweber Forms from spam.
Once the CleanTalk Anti-Spam plugin is installed it starts to protect all of the existing forms on your WordPress website. It may not only be Aweber Forms but also many others.
To install the Anti-Spam plugin, go to your WordPress admin panel → Plugins → Add New.
Then enter «CleanTalk» in the search box and click the Install button for «Spam protection, Anti-Spam, FireWall by CleanTalk».
After installing the plugin, click the «Activate» button.
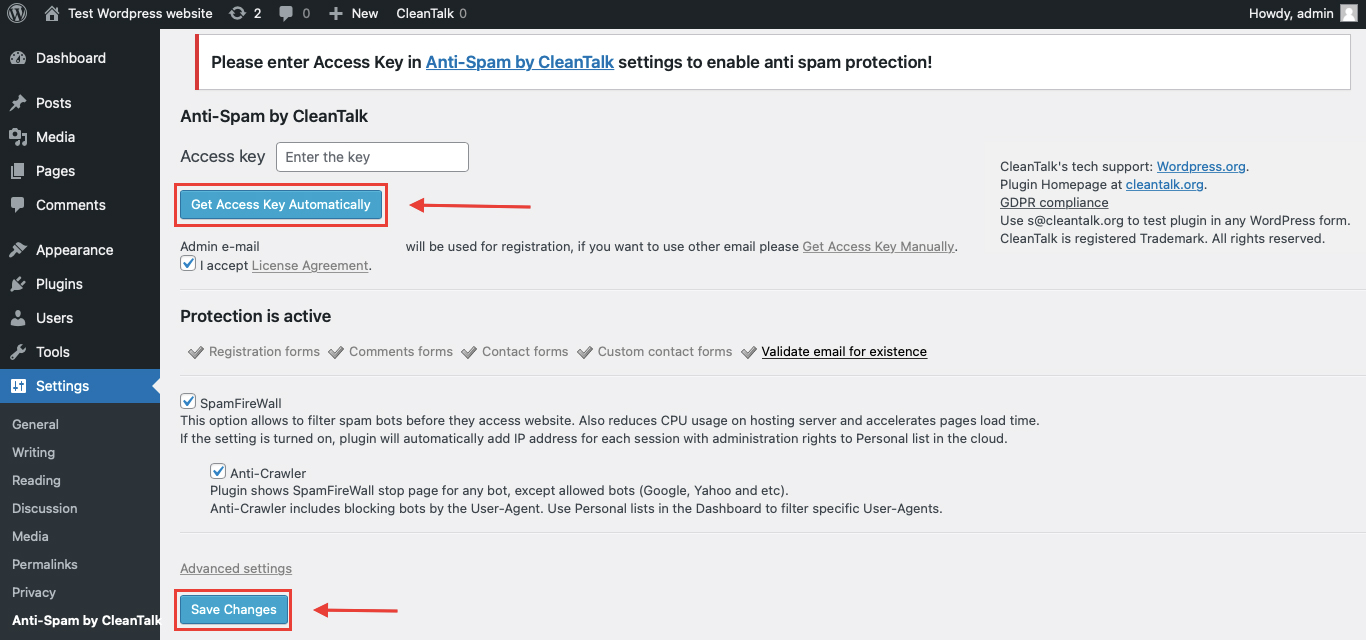
After it is done go to the plugin settings and click the «Get Access Key Automatically» button. Then just click the «Save Settings» button.
That’s it! From now you How to completely protect your Aweber forms from spam.
How to check spam protection for Aweber Forms
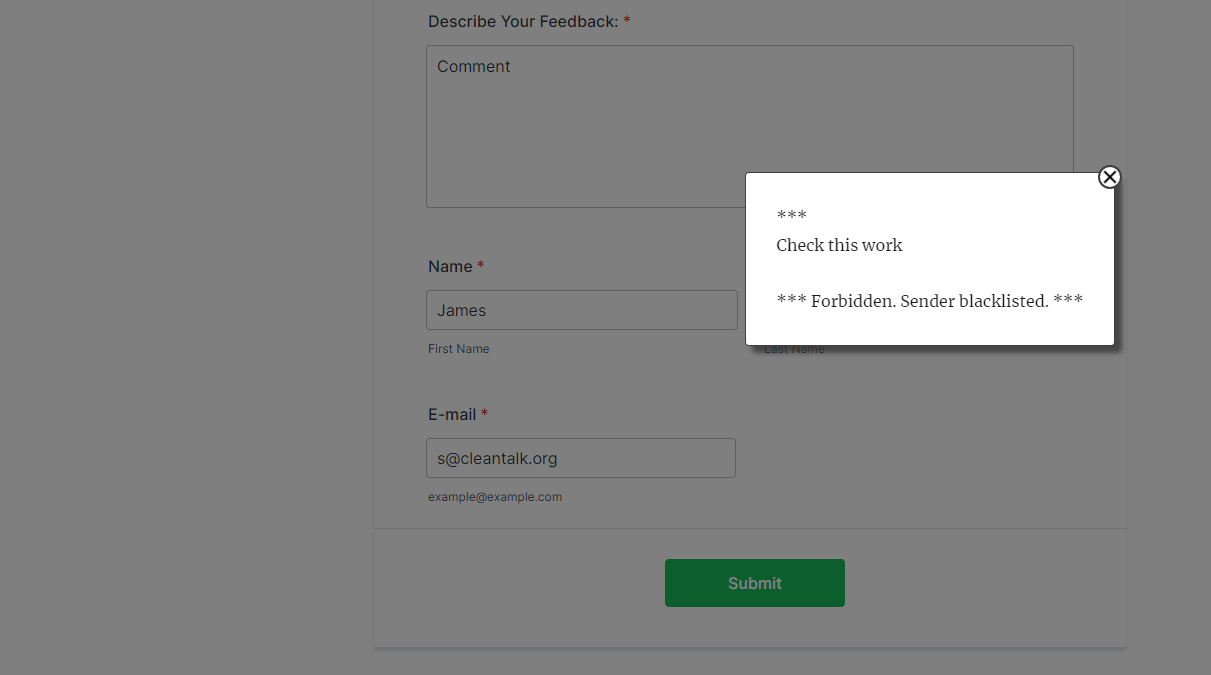
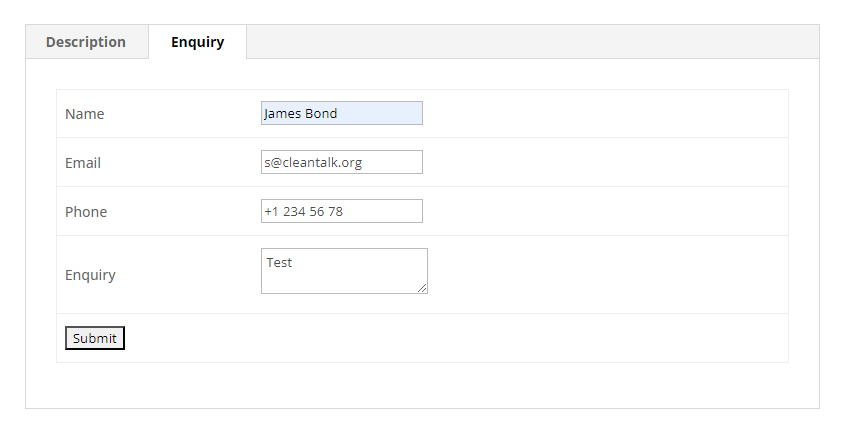
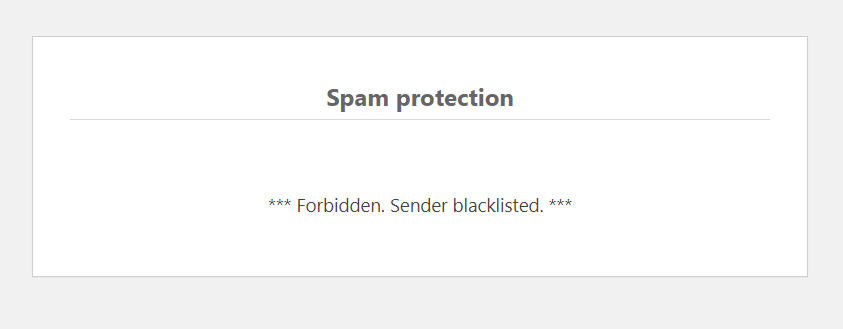
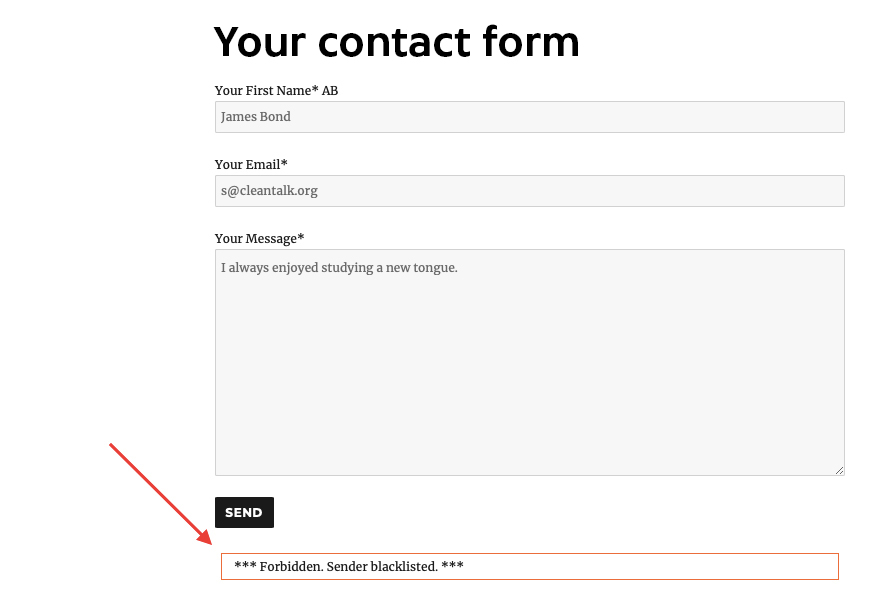
You can test the work of Anti-Spam protection for your Aweber Forms by using a test email s @ cleantalk.org (without spaces). First, open the form in an Incognito browser tab. Fill in all the required form fields and send a form. After submitting the form, you will see a block message about the block on the form submission.
If you have any questions, add a comment and we will be happy to help you.
Create your CleanTalk account – Register now and protect your Aweber Forms from spam in 5 minutes
Update
The protection works only for website visitors, not for website admins. Be sure to test the form protection using Incognito mode.
Additional features
CleanTalk protects all forms at once: comments, registrations, feedback, contacts, and reviews.
Installation takes about 1-2 minutes.
Smart 99% protection against spambots.
Always online – 24/7 technical support.
Logs, SpamFireWall, personal lists, country filters, stop-words, and many others.
Discover the complete list of CleanTalk Anti-Spam plugin features here.
CleanTalk added spam protection for Back In Stock Notifier using direct form integration. So in order to stop Back In Stock Notifier for WooCommerce spam, be sure to use the most effective Anti-Spam plugin. Read the guide below and learn 4 steps to protect your Back In Stock Notifier from spam.
Once the CleanTalk Anti-Spam plugin is installed it starts to protect all of the existing forms on your WordPress website. It may not only be Back In Stock Notifier but also many others.
Note: the protection only works with alternative cookies on and only for website visitors, not for website admins. Be sure to test the form protection using Incognito mode.
To install the Anti-Spam plugin, go to your WordPress admin panel → Plugins → Add New.
Then enter «CleanTalk» in the search box and click the Install button for «Spam protection, Anti-Spam, FireWall by CleanTalk».
After installing the plugin, click the «Activate» button.
After it is done go to the plugin settings and click the «Get Access Key Automatically» button. Then just click the «Save Settings» button.
Then go to Advanced settings and scroll down to the Data Processing section. Find the Use Anti-Spam by CleanTalk JavaScript library option and switch it on. Press the Save Changes button.
That’s it! From now you know how to stop Back In Stock Notifier for WooCommerce spam. If you have any questions, add a comment and we will be happy to help you.
Create your CleanTalk account – Register now and protect your Back In Stock Notifier from spam in 5 minutes
Additional features
CleanTalk protects all forms at once: comments, registrations, feedbacks, contacts, reviews.
Installation takes about 1-2 minutes.
Smart 99% protection against spambots.
Always online – 24/7 technical support.
Logs, SpamFireWall, personal lists, country filters, stop-words, and many others.
Discover the complete list of CleanTalk Anti-Spam plugin features here.
WordPress powers a significant portion of the internet, making it an attractive target for cyberattacks. Ensuring the security of your WordPress website is paramount. One essential aspect of WordPress security is regularly checking your wp-content directory for vulnerabilities. In this article, we’ll guide you through the process of safeguarding your wp-content folder using the powerful Security by CleanTalk plugin.
Why Checking wp-content for Malware is Crucial?
Your website’s wp-content directory is a critical part of your WordPress installation. It contains themes, plugins, and uploaded media files, making it an attractive target for hackers. Malicious actors often seek vulnerabilities in this directory to compromise your website’s security.
Checking wp-content is vital because it allows you to:
Detect Unauthorized Access: Regular checks help you identify any unauthorized changes or suspicious files within your wp-content folder.
Prevent Malware Infections: Detecting malware early can prevent it from spreading throughout your site, damaging your reputation and potentially harming your visitors.
Maintain Website Performance: A compromised wp-content directory can slow down your site and disrupt its functionality. Regular checks help maintain optimal performance.
Protect Sensitive Data: Your wp-content directory may contain sensitive information. Ensuring its security safeguards your data and user information.
Introducing Security by CleanTalk
To streamline the process of checking your wp-content directory and enhancing your WordPress security, we recommend installing the “Security by CleanTalk” plugin. This comprehensive security plugin offers a wide range of features to protect your website, including:
Real-time Firewall: Defends your site against malicious traffic and hacking attempts in real-time.
Spam Protection: Blocks spam comments and registrations to keep your site’s content clean.
Malware Scanner: Regularly scans your website for malware, vulnerabilities, and unsafe permissions.
Login Page Security: Protects your login page from brute force attacks.
Two-Factor Authentication (2FA): Adds an extra layer of login security for administrators.
IP and Country Blocking: Allows you to block specific IP addresses or entire countries to prevent malicious access.
Security Audit Trails: Keeps a record of all security-related events on your site for monitoring and analysis.
How to Install Security by CleanTalk
Follow these simple steps to install and activate Security by CleanTalk on your WordPress website:
Login to Your WordPress Admin Dashboard: Navigate to your WordPress dashboard by entering your site’s URL followed by “/wp-admin” (e.g., “https://yourwebsite.com/wp-admin“).
Go to Plugins: In the left sidebar, click on “Plugins.”
Add New Plugin: Click the “Add New” button at the top of the Plugins page.
Search for “Security by CleanTalk”: In the search bar, type “Security by CleanTalk” and press Enter.
Install and Activate: When you see the plugin in the search results, click “Install Now,” and then click “Activate” once it’s installed.
Configure Settings: Visit the “Security by CleanTalk” settings page in your WordPress dashboard to configure the plugin’s settings to your liking. Be sure to set up the malware scanner to check your wp-content directory regularly.
Enjoy Enhanced Security: With Security by CleanTalk in place, your WordPress website is now fortified against threats, and your wp-content directory will be regularly monitored for vulnerabilities.
Security by CleanTalk at WordPress.The Malware scanner checked and found an issue with wp-content.The Malware scanner cured files at wp-content.
Conclusion
Regularly checking your wp-content directory is an essential part of maintaining a secure WordPress website. To simplify this process and ensure comprehensive protection for your site, we recommend installing the “Security by CleanTalk” plugin. With its wide range of security features, this plugin will help you safeguard your website, keeping it safe from threats and ensuring the integrity of your wp-content directory.
Don’t leave the security of your WordPress site to chance—take proactive steps today by installing Security by CleanTalk and regularly checking your wp-content folder for peace of mind and a secure online presence.
As a WordPress user let me share my experience of using CAPTCHA less and CAPTCHA style Anti-Spam tools on the example of Contact form 7.
Is reCAPTCHA good or bad for Contact form 7?
Contact Form 7 users may prefer Anti-spam by CleanTalk over reCAPTCHA for several reasons, as each solution has its own advantages and disadvantages. Here are some potential reasons why some users prefer Anti-spam by CleanTalk:
Simplicity: Anti-spam by CleanTalk offers a simpler and more user-friendly solution compared to reCAPTCHA. It doesn’t require users to solve puzzles or click checkboxes, which can be seen as an added step that may deter some visitors from submitting forms.
Reduced User Friction: reCAPTCHA can sometimes lead to a less than ideal user experience, especially for those who find it challenging to complete the visual or interactive challenges. Anti-spam by CleanTalk doesn’t require any user interaction, so it doesn’t add any friction to the form submission process.
Invisible to Users: Anti-spam by CleanTalk works invisibly in the background, so users are not aware of its presence. In contrast, reCAPTCHA typically requires users to complete a task to prove they are not a bot.
Accessibility: Some users have accessibility concerns with reCAPTCHA, as it relies on visual verification. Anti-spam by CleanTalk does not present accessibility challenges in the same way, making it a more inclusive solution.
Accuracy: Anti-spam by CleanTalk uses a combination of methods, including machine learning and a vast database of known spam sources, to identify and block spam submissions. This approach can be effective in detecting and preventing spam without relying on user interaction.
Reduced False Positives: reCAPTCHA, while effective at blocking bots, may occasionally generate false positives, blocking legitimate users. Anti-spam by CleanTalk aims to minimize false positives, ensuring that genuine inquiries are not inadvertently marked as spam.
Customization: Users have the ability to customize Anti-spam by CleanTalk settings to meet their specific needs and preferences, tailoring the spam protection to their site’s requirements.
Integration: Anti-spam by CleanTalk is designed to seamlessly integrate with Contact Form 7 and other popular form plugins, making it easy for users to implement spam protection without significant configuration.
Anti-Spam by CleanTalk
It’s important to note that the choice between Anti-spam by CleanTalk and reCAPTCHA may depend on the specific needs and preferences of individual website owners. Some users may prioritize ease of use and a seamless user experience, while others may prioritize the high level of bot detection offered by reCAPTCHA. Ultimately, the choice between these solutions should align with your website’s goals and the user experience you want to provide. Additionally, some users may opt to use both solutions in combination to enhance spam protection further.
How to install Anti-Spam by CleanTalk?
To install and configure the “Anti-Spam by CleanTalk” WordPress plugin for your website, follow these steps:
1. Log in to Your WordPress Dashboard:
Navigate to your WordPress admin dashboard by entering your site’s URL followed by “/wp-admin” (e.g., “https://yourwebsite.com/wp-admin“).
2. Access the Plugins Section:
In the WordPress dashboard, locate and click on the “Plugins” option in the left-hand menu.
3. Click “Add New”:
On the Plugins page, click the “Add New” button at the top of the screen. This will take you to the Add Plugins page.
4. Search for “Anti-Spam by CleanTalk”:
In the search bar on the Add Plugins page, type “Anti-Spam by CleanTalk” and press Enter. The search results will appear.
5. Install the Plugin:
Locate the “Anti-Spam by CleanTalk” plugin in the search results. Click the “Install Now” button next to the plugin’s name.
6. Activate the Plugin:
After installation, a new button will appear that says “Activate.” Click this button to activate the Anti-Spam by CleanTalk plugin.
7. Enter Your Access Key:
Once the plugin is activated, you’ll need to enter your access key to enable the anti-spam features. You can obtain the access key by signing up for CleanTalk on their website (https://cleantalk.org/) and subscribing to their service. After subscribing, you’ll receive an access key via email.
a. In the WordPress dashboard, go to “Settings” in the left-hand menu.
b. Click on “Anti-Spam by CleanTalk” from the submenu.
c. Enter your access key in the provided field.
d. Click the “Check Access Key” button to validate your access key.
8. Configure Settings:
Once your access key is validated, you can configure the plugin settings according to your preferences. The settings allow you to customize the anti-spam protection for your site, including options for comments, registrations, contact forms, and more.
9. Save Changes:
After configuring your settings, don’t forget to click the “Save Changes” button to apply your chosen anti-spam settings.
10. Verify That It’s Working:
To ensure that the plugin is effectively blocking spam, just use email st********@ex*****.com in a contact form 7. You have to see a special response from Anti-Spam by CleanTalk that describes a reason for blocking.
*** Forbidden. Sender blacklisted. ***
Anti-Spam by CleanTalk shows the reason of blocking form submission.
11. Periodic Review:
Periodically review the plugin’s dashboard to check its performance and verify that it’s actively blocking spam submissions. CleanTalk provides statistics on the number of spam attempts blocked.
That’s it! You’ve successfully installed and configured the “Anti-Spam by CleanTalk” plugin on your WordPress website. This plugin will help protect your site from unwanted spam submissions and improve the overall security and user experience of your WordPress site.
ZeroBounce is an email validation plugin for WordPress, that works with most popular WordPress forms including registration forms, comments sections, eCommerce shops, and more. There were issues with using both ZeroBounce and CleanTalk plugins at the same time, but we’ve fixed it and now everything’s working perfectly.
To install the Anti-Spam plugin, go to your WordPress admin panel → Plugins → Add New.
Then enter «CleanTalk» in the search box and click the Install button for «Spam protection, Anti-Spam, FireWall by CleanTalk».
After installing the plugin, click the «Activate» button.
After it is done go to the plugin settings and click the «Get Access Key Automatically» button. Then just click the «Save Settings» button.
That’s it!
If you have any questions, add a comment and we will be happy to help you.
Create your CleanTalk account – Register now and protect all your Forms from spam in 5 minutes
Update
The protection works only for website visitors, not for website admins. Be sure to test the form protection using Incognito mode.
Need help with settings or missed spam?
If you have any issues with the plugin settings, test submissions or missed spam signups, feel free to ask for help in the comments section down below.
Additional features
CleanTalk protects all forms at once: comments, registrations, feedbacks, contacts, reviews.
Installation takes about 1-2 minutes.
Smart 99% protection against spambots.
Always online – 24/7 technical support.
Logs, SpamFireWall, personal lists, country filters, stop-words, and many others.
Discover the complete list of CleanTalk Anti-Spam plugin features here.
During a thorough security assessment of the Upload Media By URL plugin for WordPress, a concerning medium-level vulnerability has been uncovered in versions prior to 1.0.8. This vulnerability poses a significant risk to your website’s security and calls for immediate action! If exploited, this vulnerability allows attackers to potentially upload files containing malicious code directly to your WordPress site, exposing your users to harmful scripts and attacks.
Plugin testing and vulnerability detection in the Upload Media By URL plugin have been completed
July 10, 2023
I contacted the author of the plugin and provided a vulnerability PoC with a description and recommendations for fixing
July 17, 2023
The author has eliminated the vulnerability and patched his plugin
August 2, 2023
Registered CVE-2023-3720
Discovery of the Vulnerability
During a security assessment of the Upload Media By URL plugin for WordPress, a medium vulnerability was identified in versions prior to 1.0.8. The plugin lacked Cross-Site Request Forgery (CSRF) protection when handling file uploads, allowing attackers to trick logged-in administrators into uploading files on their behalf, including HTML files containing malicious JavaScript code that could execute when accessed by users with the unfiltered_html capability.
Understanding Cross-Site Request Forgery (CSRF)
Cross-Site Request Forgery (CSRF) is an attack that forces an authenticated user to execute unwanted actions on a web application without their knowledge or consent. In this case, attackers can exploit the absence of CSRF protection in the Upload Media By URL plugin to create a crafted HTML file hosted on an external server. If a privileged user, such as an administrator, unknowingly accesses the external link, the malicious HTML file can trigger the upload of harmful files onto the WordPress system.
Exploiting the Cross-Site Request Forgery (CSRF)vulnerability
By crafting a malicious HTML file that includes a CSRF payload, attackers can entice administrators with upload privileges to visit the external link. Once the link is accessed, the malicious file exploits the lack of CSRF protection in the plugin to perform unauthorized actions, effectively tricking the administrator into uploading harmful files to the WordPress site.
The CSRF vulnerability in the Upload Media By URL plugin poses severe risks to website administrators and users alike. Beyond the technical implications, it also serves as a potential tool for social engineering attacks. Real-world scenarios include:
Stored Cross-Site Scripting (XSS) Attacks:: Attackers could upload HTML files containing embedded XSS payloads, compromising the security and privacy of users accessing the affected pages, and potentially exposing sensitive data or credentials.In almost all cases , Stored XSS is used to steal cookies , thereby Account Takeover.
Malware Distribution: Malicious files, such as infected scripts or executables, could be uploaded, leading to the dissemination of malware among website visitors or affecting the overall integrity of the website.
Unauthorized Content Injection: Attackers might use this vulnerability to inject unauthorized content into the website, damaging the site’s reputation, or defacing it with inappropriate or harmful materials.
Social Engineering Exploits: Since the plugin allows the upload of files, attackers could craft seemingly innocent files (e.g., images, documents) with misleading names or enticing content to lure unsuspecting users into downloading or opening the files, facilitating social engineering attacks.
Recommendations for Improved Security
To mitigate the risks associated with this vulnerability and enhance overall security, the following measures are strongly advised:
Immediate Plugin Update: Website administrators should update the Upload Media By URL plugin to the latest version, which includes CSRF protection and patches this vulnerability.
Implement CSRF Protection: Plugin developers should include robust CSRF protection mechanisms when processing sensitive actions, such as file uploads, to prevent unauthorized access.
Regular Security Audits: Conduct regular security assessments and penetration tests on WordPress installations to identify and remediate potential vulnerabilities proactively.
User Privilege Restriction: Implement strict access controls to ensure that users can only access information that they are authorized to view based on their roles and permissions.
User Awareness: Educate website administrators and users about the risks of sharing sensitive information and the importance of strong, unique passwords.
By addressing the CSRF vulnerability in the Upload Media By URL plugin and implementing these security recommendations, website owners can significantly reduce the likelihood of security breaches, protect their site’s integrity, and safeguard against social engineering exploits.
Use CleanTalk solutions to improve the security of your website
Dmitrii i.
If you think your website is infected and you need help, contact us for malware cleanup. Our specialists will provide you with professional assistance in cleaning your website from malware.
Protection against brute-force attacks is essential to prevent unauthorized access to systems and accounts. Brute-force attack is a method where attackers sequentially try all possible combinations of account passwords and sometimes gain access to the system. The CleanTalk plugin has options such as: 1.1. Number of unsuccessful authorizations before blocking occurs. 1.2. Lockout time of the visitor which is the time period between login attempts. 1.3. Time period the IP will be blocked for when the limit of unsuccessful authorizations is reached.
User Actions Log is designed to track user actions in the WordPress Dashboard and ensure security. It allows you to record and display user actions in real time, to see which pages of the website backend and at what time they were visited. This tool is useful for detecting and preventing hacking attempts, unauthorized access, and other suspicious activities on the website.
Security Firewall is designed to block access to the site under certain conditions: 3.1. CleanTalk Database of Dangerous IP Addresses is being used to block access to the site for those IP addresses that have already participated in hacking attempts into other sites. 3.2. Your Personal Lists of IP Addresses is being used to block access to the site. You can add custom IP addresses, networks, and countries on your CleanTalk Dashboard. Visitors that were blocked by the Security FireWall will not be able to pass it and get to your site.
Security Report provides a summary of how the plugin works on your websites. The report is being sent once a week to your email address and provides the following statistics: 4.1. Blocked requests in Security FireWall 4.2. Number of brute-force attempts 4.3. Successful admin logins 4.4. Malware scanner statistics
The option “Notifications of administrator users authorizations” sends you a notification by email every time you successfully log in with an administrator account. This allows you to quickly receive information about unauthorized users.
Real-Time Traffic Monitor feature provides you with real-time traffic information on your website. It helps you in tracking visitors activity and detect potentially malicious traffic — these can be password cracking attempts, SQL injections, DDOS attacks, and other threats.
The feature also allows you to see bots activity on your site. Bots can have different intentions, but it’s important to be able to distinguish real users from automated bots. You can view the list of bots and take action to block unwanted activity. You can see data such as IP address, location, country, and other information that will help determine if a visitor is a suspicious or unwanted bot. It will also help you make the appropriate security settings.
The feature works In real time, meaning you can see the activity immediately without a delay. You can view the current users on the site, as well as which pages or sections of the site are currently being viewed.
Malware Scanner is one of the features of the CleanTalk Security Plugin for WordPress that is designed to detect and remove malicious code on your website. Daily automatic site scanning. The plugin scans your site once a day and you will receive up-to-date information about your site cleanness. You can choose the time period for the automatic site scanning — every 12 hours, 24 hours, 3 days, 7 days, 14 days, or every 30 days.
The Malware Scanner feature analyzes all files on your site, including the WordPress core files, themes and plugins. It looks for vulnerabilities, malicious scripts, and other suspicious elements that may be related to malicious code.
When Malware Scanner detects malware or suspicious files, it alerts you instantly via email. You will receive a detailed report of the found threats, including the file names. This will help you quickly respond and take necessary actions to remove malware.
Automatic Malicious Code Removal: The CleanTalk Security Plugin for WordPress provides this feature to automatically remove malicious code. If there is a known signature for the detected malicious code, the file will be disinfected automatically.
The option “Collect and send PHP log” allows you to automate the process of checking your PHP logs for errors that occur while your site is running. Errors could appear for a short period of time and only when one specific function is running, they can’t be spotted in other circumstances so sometimes it’s hard to catch them. The CleanTalk Scanner will check your website backend once per hour. Statistics of errors are available in your CleanTalk Dashboard.
2FA: WordPress Two-Factor Authentication is a tool to provide an additional level of security for the website administrator account. The main purpose of 2FA is to protect user accounts from unauthorized access, even if an attacker knows the user’s password. When a user enters their password to log into their WordPress account, 2FA requires them to provide a second authentication code. The code is being sent to the WordPress account email address.
The CleanTalk Security plugin allows administrators to set up 2FA for various user roles. So they can grant 2FA to certain groups of users. The option “Custom WP-Login URL” in the CleanTalk Security Plugin for WordPress allows you to change the default login URL of your WordPress Dashboard (wp-login.php). This is useful for several reasons:
• Protection against brute-force attacks: Changing the login URL of the admin panel makes it less predictable and harder for attackers to determine. Most brute-force scripts and bots look for the standard URL, so using a custom URL improves security. • Hiding the fact that WordPress is being used: Many hackers and attackers specifically look for sites built on WordPress in order to gain access to them. Changing the login URL makes your site less vulnerable for attacks that are being made by the principle “Default WordPress Login URL Search” . • If you use a custom login URL, this may be more memorable and convenient for you. You can choose an URL that is easy to remember or related to your brand. • Prevent spam and DDoS attacks: Changing your login URL can help you prevent spam bots and DDoS attacks that often target a standard URL. This can significantly reduce the amount of unwanted activity and improve the performance of your site.
The option “Prevent collecting of authors’ logins” in the CleanTalk Security Plugin for WordPress is an additional tool to protect your site from malicious attacks and unauthorized access.
One of the most common ways of attacking websites is by attempting to hijack the accounts of the administrator or content authors. A hacker can use various methods to gain access to usernames and passwords and use them for malicious purposes such as injecting malicious code, modifying website content, and even stealing user data.
The option in the CleanTalk Security Plugin can greatly reduce the risk of such attacks. This feature allows you to hide the names of your authors (logins) from public view on the site, storing them in the database for administrative access only.
Firstly, it will prevent attackers from accessing authors’ data, which will significantly complicate the hacking process. Secondly, the site will look more secure and inaccessible to hackers. Thirdly, using this option reduces the likelihood of data leakage and privacy violations.
The option “Disable XML-RPC” in the CleanTalk Security Plugin is an important step to increase security and prevent potential attacks on your site.
XML-RPC is a protocol that allows you to remotely interact with your WordPress site. It was created to facilitate data transfer and information exchange with other platforms. However, due to several vulnerabilities, XML-RPC can become an entry point for hackers.
One of the main reasons for disabling XML-RPC is the possibility of an attack called brute-force. This attack involves attempts to forcefully input different random passwords for administrative accounts in a rapid succession. XML-RPC, by its very nature, allows attackers to carry out such attacks because it allows iterative validation of multiple passwords without restrictions. Disabling XML-RPC greatly reduces the risk of such attacks and prevents unauthorized access to your site.
In addition, XML-RPC can also be used to carry out DDoS (Distributed Denial of Service) attacks. Attackers can use XML-RPC to send a large number of requests to your site at the same time, which can lead to server overload and temporary site denial of service. Disabling XML-RPC protects your site from such attacks and helps keep it running for your visitors.
Disabling XML-RPC in WordPress is quite simple. You can do this with the CleanTalk Security Plugin and enable the option “Disable XML-RPC”. It is recommended to disable XML-RPC unless you are using it to communicate with other platforms or services.
The option “Disable REST API for non-authenticated users”. The REST API is a set of programming interfaces that allow you to interact with your WordPress site and access data and functionality. However, access to the REST API can become a vulnerability for attackers if the option “Disable REST API for non-authenticated users” is not enabled. Examples: getting a list of all posts, creating a new post or updating an existing one, deleting a post, getting/creating users and comments.
Disabling the REST API for unauthenticated users has several benefits. First, it reduces the risk of an attack on your site. If an attacker gains access to the REST API, they can use this opportunity to obtain sensitive data, change site content, or perform other unwanted actions. Disabling the REST API for unauthenticated users helps in preventing these potential attacks.
Second, disabling the REST API for unauthenticated users helps improve the performance of your site. The REST API can put a load on the server, especially when trying to process many requests from unauthenticated users. Disabling this feature for these users reduces the server load and speeds up your site response.
Enabling the option “Disable REST API for non-authenticated users” in the CleanTalk Security Plugin is very simple. Just activate this option in the plugin settings and save the changes. It is important to note that this option will not affect authenticated users, and they will be able to continue using the REST API without any issues. If you only use the WordPress Dashboard to work with the site and want to increase the security level of your resource, then it is recommended to disable the WP REST API.
The option “Forbid to show your website in <iframe> tags on third-party websites” in CleanTalk Security prevents your site from being embedded in an <iframe> on other websites. An <iframe> is an HTML element that allows you to embed one web page inside another. Technically speaking, <iframe> can be used to display your site on other third-party sites while still maintaining visual and functional content. However, this can also lead to security risks and undesirable consequences.
This has several advantages. First, it protects your site from potential fraudulent activities. Some attackers may create embedded iframe-copies of your website to fraudulently collect personal information from your visitors or malicious targets. Disabling <iframe> prevents this possibility and protects your users.
Second, opting out of showing your site in an <iframe> on third-party websites helps you control content and prevent copyright loss. If your site is embedded in another website’s <iframe> without your consent, this may result in improper display and control of your content. Disabling <iframe> allows you to retain full control over how and where your site is displayed.
Enabling the option “Forbid to show your website in <iframe> tags on third-party websites”in the CleanTalk Security Plugin is very simple. It is enough to activate this option in the plugin settings, and your site will be protected from embedding in <iframe> tags on third-party websites.
The option “Add these headers to the HTTP responses on the public pages: X-Content-Type-Options, X-XSS-Protection” in CleanTalk Security allows you to add the X-Content-Type-Options and X-XSS-Protection security headers to the HTTP responses on your site’s public pages. These headers tell browsers how to process the content of the page and prevent possible XSS-based attacks and malware downloads.
XSS (cross-site scripting) and drive-by download attacks are among the most common and dangerous threats in the online environment. XSS attacks can allow attackers to inject and execute malicious code on your site, while drive-by download attacks attempt to download and install malicious software without the admin’s knowledge.
The X-Content-Type-Options header tells the browser that page content should only be processed according to the specified MIME type (Multipurpose Internet Mail Extensions). This helps prevent possible attacks based on the content type and provides an additional layer of protection.
The X-XSS-Protection header is designed to protect against XSS (cross-site scripting) attacks. It includes built-in protection mechanisms in the browser that allow you to detect and block attempts to execute malicious scripts in a timely manner. Enabling the option “Add these headers to the HTTP responses on the public pages: X-Content-Type-Options, X-XSS-Protection” in the CleanTalk Security Plugin is very simple. Just enable this option in the plugin settings and headers will be automatically added to the HTTP responses on public pages of your site.
In this article we have tried to tell you about the main and most useful options of the CleanTalk Security Plugin for WordPress. You can install the plugin from the official WordPress directory here: https://wordpress.org/plugins/security-malware-firewall
If you have any questions about the CleanTalk Security Plugin functions, feel free to ask them in the comments and we will be happy to assist you.
AMP (Accelerated Mobile Pages) is a free technology, that makes your website pages optimized for mobile web browsing and helps webpages load faster.
There is a way to make your WordPress website AMP-compatible while keeping it protected with CleanTalk Anti-Spam plugin. And there is how you do it:
In your WordPress dashboard go to Plugins → Add New and type “AMP” in the search form.
After that, press the Install Now button near the plugin and the Activate button once the plugin is installed.
After that go to AMP → Settings and click on the Open Wizard button.
The final step is just to follow the instruction on the page and scan the website. After the scan there is nothing else that should be done – the plugin works automatically and if you open your website page, you will see, that all the AMP-incompatible code is already gone.
Congratulations! Now your WordPress website is 100% AMP-compatible.
CleanTalk added spam protection for Kali Forms using direct form integration. So in case, you prefer using Kali Forms be sure to use the most effective Anti-Spam plugin. Read the guide below and learn 4 steps to protect your website from spam.
Once the CleanTalk Anti-Spam plugin is installed it starts to protect all of the existing forms on your WordPress website. It may not only be Kali Forms but also many others.
To install the Anti-Spam plugin, go to your WordPress admin panel → Plugins → Add New.
Then enter «СleanTalk» in the search box and click the Install button for «Spam protection, Anti-Spam, FireWall by CleanTalk».
After installing the plugin, click the «Activate» button.
After it is done go to the plugin settings and click the «Get Access Key Automatically» button. Then just click the «Save Settings» button.
That’s it! From now you How to completely protect your Kali Forms from spam.
How to check spam protection for Kali Forms
You can test the work of Anti-Spam protection for your Kali Forms by using a test email s @ cleantalk.org (without spaces). First, open the form in an Incognito browser tab. Fill in all the required form fields and send a form. After submitting the form, you will see a block message about the block on the form submission.
If you have any questions, add a comment and we will be happy to help you.
Create your CleanTalk account – Register now and protect your Kali Forms from spam in 5 minutes
Update
The protection works only for website visitors, not for website admins. Be sure to test the form protection using Incognito mode.
Additional features
CleanTalk protects all forms at once: comments, registrations, feedbacks, contacts, reviews.
Installation takes about 1-2 minutes.
Smart 99% protection against spambots.
Always online – 24/7 technical support.
Logs, SpamFireWall, personal lists, country filters, stop-words, and many others.
Discover the complete list of CleanTalk Anti-Spam plugin features here.
CleanTalk Traffic Control monitors each request from any IP address and if the number of requests exceeds the limit in a certain time period then this IP address will be temporarily blocked and it wouldn’t be able to access your website at all.
For instance, if an IP address sends requests to your website with a frequency of 1000 requests per 1 hour, such activity will definitely be blocked for 1 hour.
You can adjust the settings of Traffic Control as you want and as you find appropriate. To do that, go to your WP Dashboard → Settings → Security by CleanTalk → General Setting → Firewall.
Time frame to measure page hits – here you can set a time period which will be taken to calculate the number of requests of your visitors.
Block a visitor if the count of the opened pages in the time frame more than – here you can set your limit of requests after exceeding which any IP address will be blocked.
Block a visitor if they exceed the limit of opened pages for X minutes – this option is meant for setting a time period a blocked IP address will be put in.
Ignore logged-in users – tick this option to ignore all requests going from your logged-in users.
Also, on the tab Firewall, you can see all IP addresses that are visiting your website right now.
What are DDoS and DoS?
These are types of attacks on a website when a lot of requests are being sent. If the number of requests is quite high then it will result in problems with the website functioning.
The difference between DDoS and DoS consists of that DDoS has a distributed attack, meaning it is executed from many IP addresses, while DoS has just one or a few IP addresses.
Why DDoS and DoS might be dangerous to a website
Such types of attacks is based on the fact that a webserver has to process each request, thus running all website page scripts, loading all pictures, and so on spending its resources. As a result, the website will function slower or start giving an error on attempts of visiting any page. The second trouble is in a high volume of your website traffic, in some cases, it may lead to unexpected expenses or a warning from your hosting provider.
It’s unwise to underestimate the dangers of such types of attacks and spend your time forbidding IP addresses manually, it’s more efficient to give this task to the automated tools.