What Is This Bot?
The email address belongs to a set of randomized domains generated for automated use. As a result, it does not correspond to a legitimate mailbox and is therefore used for automated form submissions. In practice, log data shows repeated, high-frequency submission attempts, which are typically associated with domains lacking valid MX records. In this context, the observed activity involves machine-generated input that targets website forms and underlying application logic.
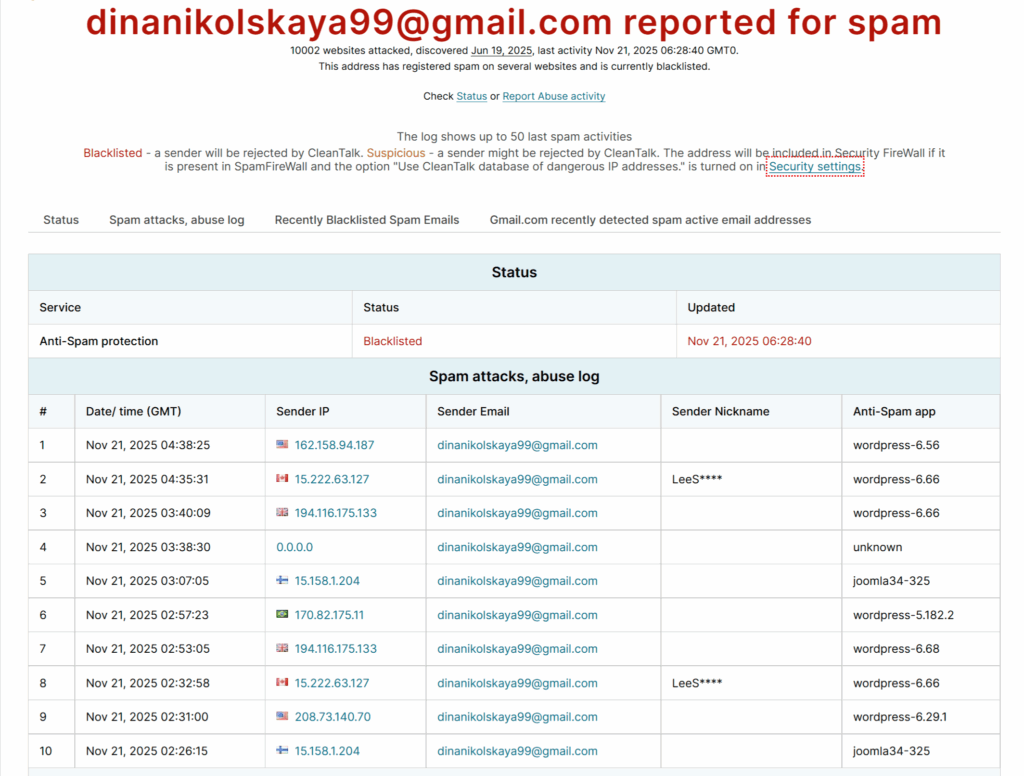
Recent Attacks Detected
Across websites protected by CleanTalk Anti-Spam, this bot consistently demonstrates aggressive behavior. On December 2, 2025, it initiated a rapid sequence of contact-form submissions at machine speed, and attempted multiple user registrations. The following day, the system recorded a pattern of IP rotation that is characteristic of botnet behavior. On December 4, the bot was again identified scanning form endpoints, but the attempt was stopped before reaching the application layer thanks to SpamFireWall filtering.
These events closely align with bot behaviors described by Imperva, where malicious automation imitates real users, rotates identities, and continuously probes for vulnerabilities.
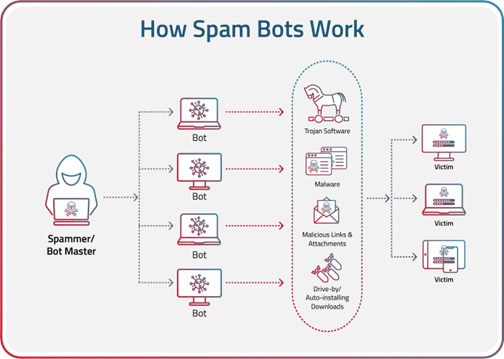
How This Spam Bot Operates
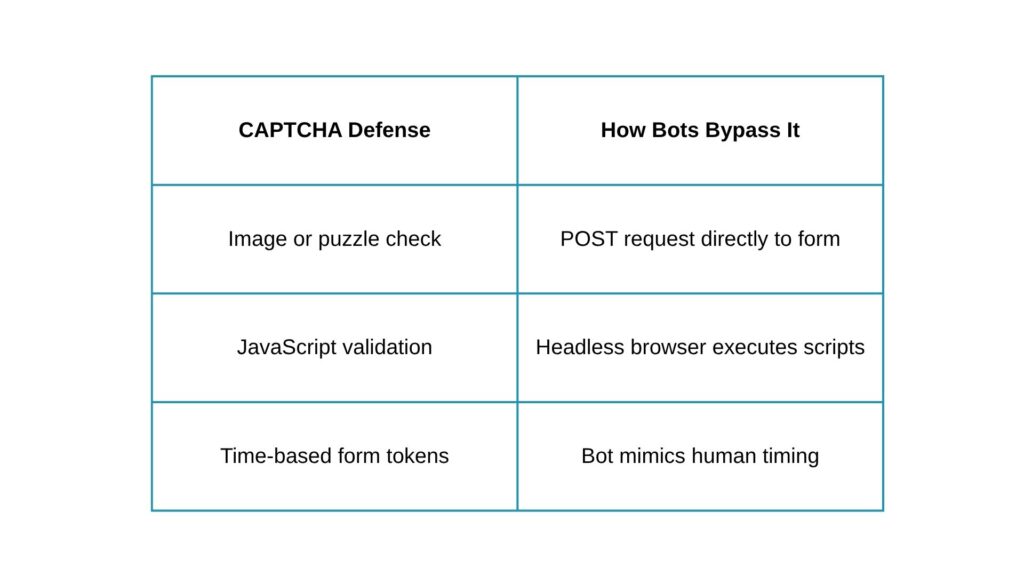
Instead of behaving like a normal visitor, this bot submits forms far faster than a human ever could, changes its user agent headers to appear legitimate, and introduces artificial timing delays to bypass simple JavaScript filters. It fabricates random names, email addresses and message subjects, while trying to discover weak validation rules or unprotected endpoints such as custom APIs.
Beyond this, its activity distorts website analytics by generating fake conversions, sign-ups and form submissions. As confirmed in OOPSpam’s 2024 report, synthetic and disposable emails — exactly like those from the mailcorplrtgood domain cluster — represent the fastest-growing pattern of automated abuse.
Why This Bot Is Dangerous
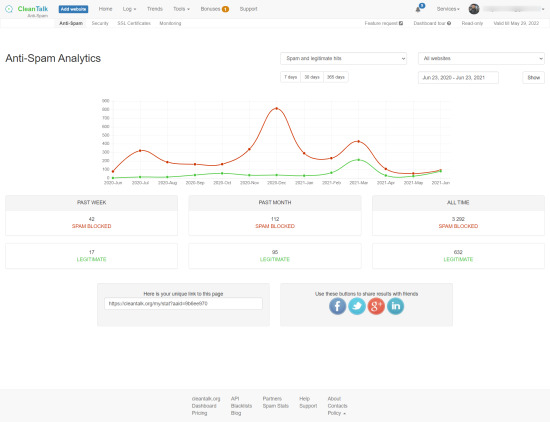
Bots of this type cause multiple layers of damage. They inflate registration and form-submission counts, undermining accurate analytics. Their constant POST requests increase server load, sometimes raising CPU usage by as much as 15–25%, as highlighted by ClickCease’s research.
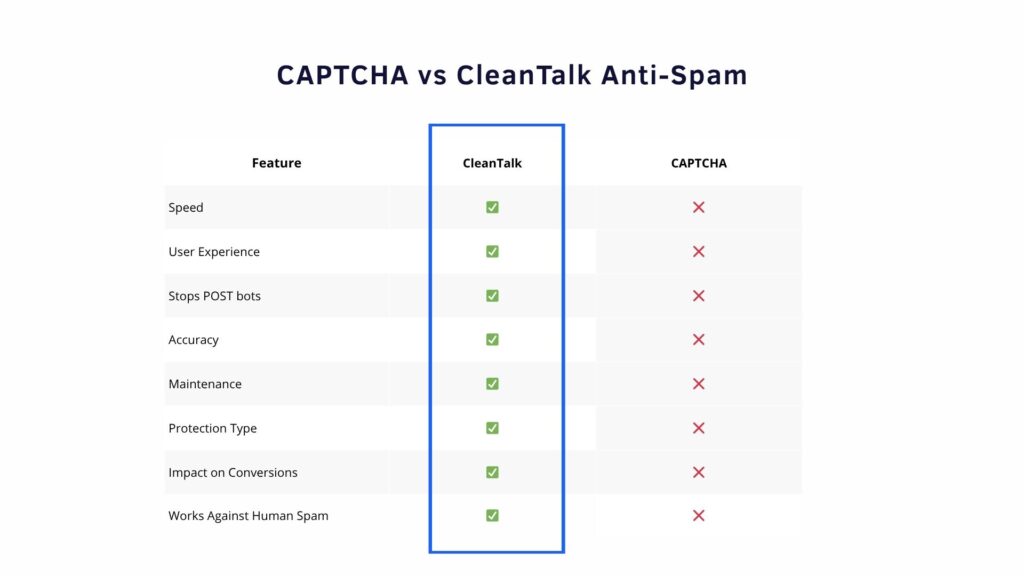
In addition, because they repeatedly scan your site structure, they can reveal vulnerable entry points or expose weak validation. Since modern bots easily bypass common CAPTCHA implementations, their activity often precedes more serious intrusions such as credential stuffing or brute-force attempts.
How to Check This Email
The easiest way to validate whether an email is legitimate is to use the CleanTalk Email Checker: https://cleantalk.org/email-checker
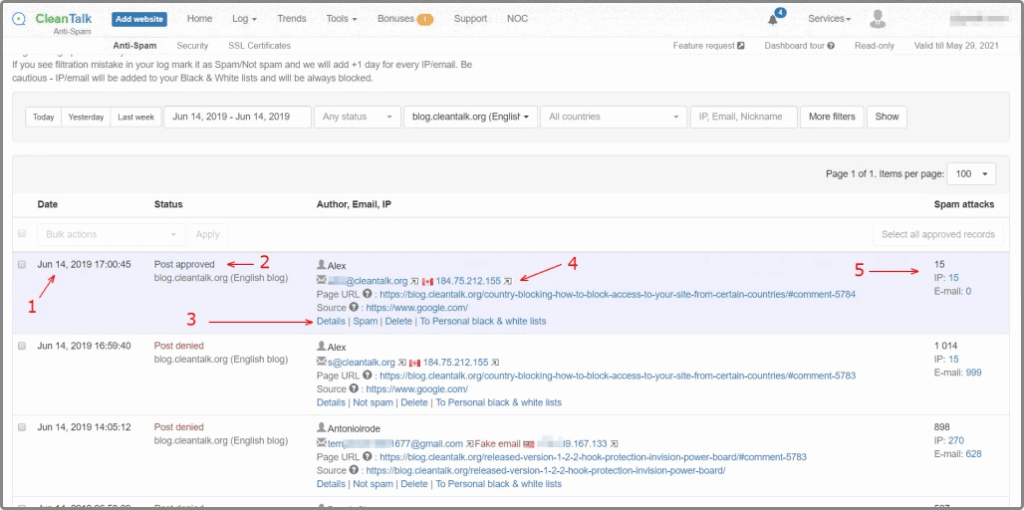
In addition to the Email Checker, you can also verify this address in the CleanTalk Public Blocklist.
This database records spam activity, failed form submissions, and bot-generated behavior for domains and email accounts.
You can view the real-time status of this address here:
The checker evaluates email existence, spam history, MX configuration and signs of bot activity. For otujoye@mailcorplrtgood.com, the system typically reports that the address does not exist, is associated with spam activity, and belongs to a low-reputation synthetic domain — all indicators of a high-risk automated bot.

How to Protect Your Website
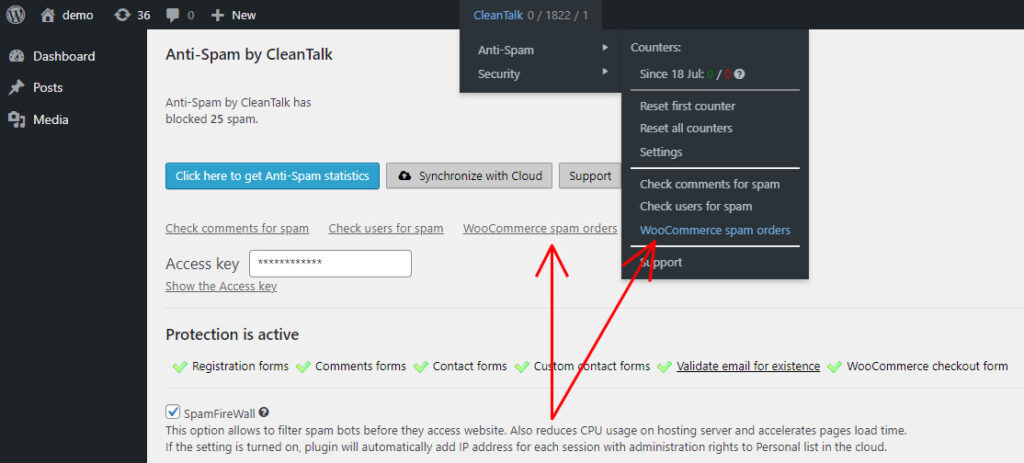
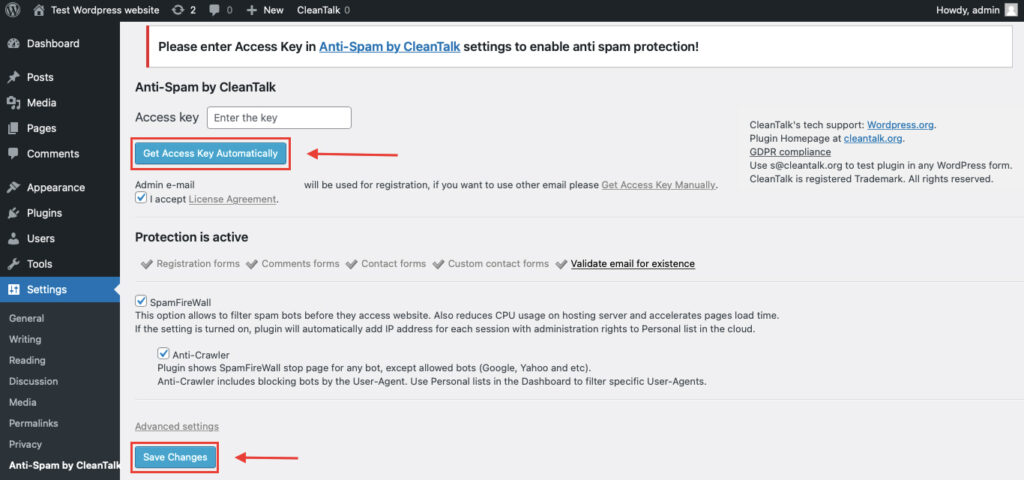
The most reliable method of stopping this bot is to activate CleanTalk Anti-Spam, which filters automated submissions before they reach your backend. Combined with SpamFireWall for IP-level blocking and Anti-Crawler technology for detecting scanning patterns, the system prevents bots from overloading forms or probing endpoints.
Recommended setup:
✔ CleanTalk Anti-Spam Plugin
✔ SpamFireWall
✔ Anti-Crawler
✔ Form & Registration Protection
Install Anti-Spam:
https://cleantalk.org/help
Conclusion
The address otujoye@mailcorplrtgood.com is part of a known botnet that uses machine-generated domains to carry out high-volume automated attacks. With malicious bot traffic representing nearly a third of the modern internet, proactive and cloud-based anti-spam protection is essential.
CleanTalk Anti-Spam blocks bots before they interact with your website, preserving performance, security and analytics integrity.