We’ve been wanting to make our own branded useful merch for our customers for a while now. For this purpose, we needed a marketplace on which we could place our goods, as well as deliver them to customers. No wonder we chose Amazon. In this article, we’d like to share our experience in launching our giftware sales and hopefully help those who are just thinking about how to start selling on Amazon.
Step 1: Finding the Right Products to Sell
One of the most important factors in determining your success on Amazon is finding the right products to sell. If you go to https://www.amazon.com/bestsellers you will see lots of products, that are sold way more often than others. Here you need to research products that sell well to find the ones, you like best or what you would be more comfortable branding.
We have chosen the water bottle category for us for several reasons:
- It’s a product for everyday use.
- It promotes the healthy habit of drinking enough water every day.
- These bottles look great and it will be convenient to put a logo on one.
After choosing the right category and product you will need a product that you can buy as cheaply as possible, apply your logo, and sell at the average market price or higher. To find such a product we went to alibaba.com. It was difficult to find the same item as we wanted, but we were able to find the most similar one and contacted the seller to find out the details.
The good news was that for orders of 50 pieces or more, the seller would put the logo on the items for free. All we had to do was send the logo to the seller and a day later we received a photo of a bottle with the logo already applied.
To make sure of good quality goods and quality logo application we ordered delivery of 1 item.

Despite the $38 shipping cost on a $10 order, it was the right decision. Because after a week we received the product and after that, we were absolutely sure that the product would be a pleasure to use. So we ordered a full batch of 50 water bottles.
Step 2: Setting Up Your Amazon Seller Account
First, you need to choose a seller account type. There are two types of seller accounts:
- Individual accounts are free but you are charged $0.99 per sale.
- Professional accounts cost $39.99 per month, no matter how many items you sell.
We weren’t sure at what rate the items would sell, so we chose an individual account.
After that, you will access your Amazon Dashboard. Once you have connected your payment card and added your brand information, you are ready to add your product to Amazon.
Step 3: Adding a product and setting up a fulfillment plan

ASIN is an Amazon Standard Identification Number, which is the unique combination of 10 letters and/or numbers that is given to your product by Amazon.
ISBN is an International Standard Book Numbers, which are unique identifiers for commercial books with a barcode.
UPC or Universal Product Codes, is a unique 12-digit code assigned to retail packaging to help identify products in the US.
EAN or European Article Numbers is simply a European version of UPC. It consists of 12- or 13-digit numbers for product identification.
If your product is unique like ours, select “I’m adding a product not sold on Amazon”. In this case, Amazon will assign an ASIN to your product, which will become your product’s primary identifier.
After that, you need to fill in all the information about the product in as much detail as possible. Here’s how it looked for us in the end.

And since Amazon’s interface doesn’t explain what and where it is, we’ve prepared a hint for you.
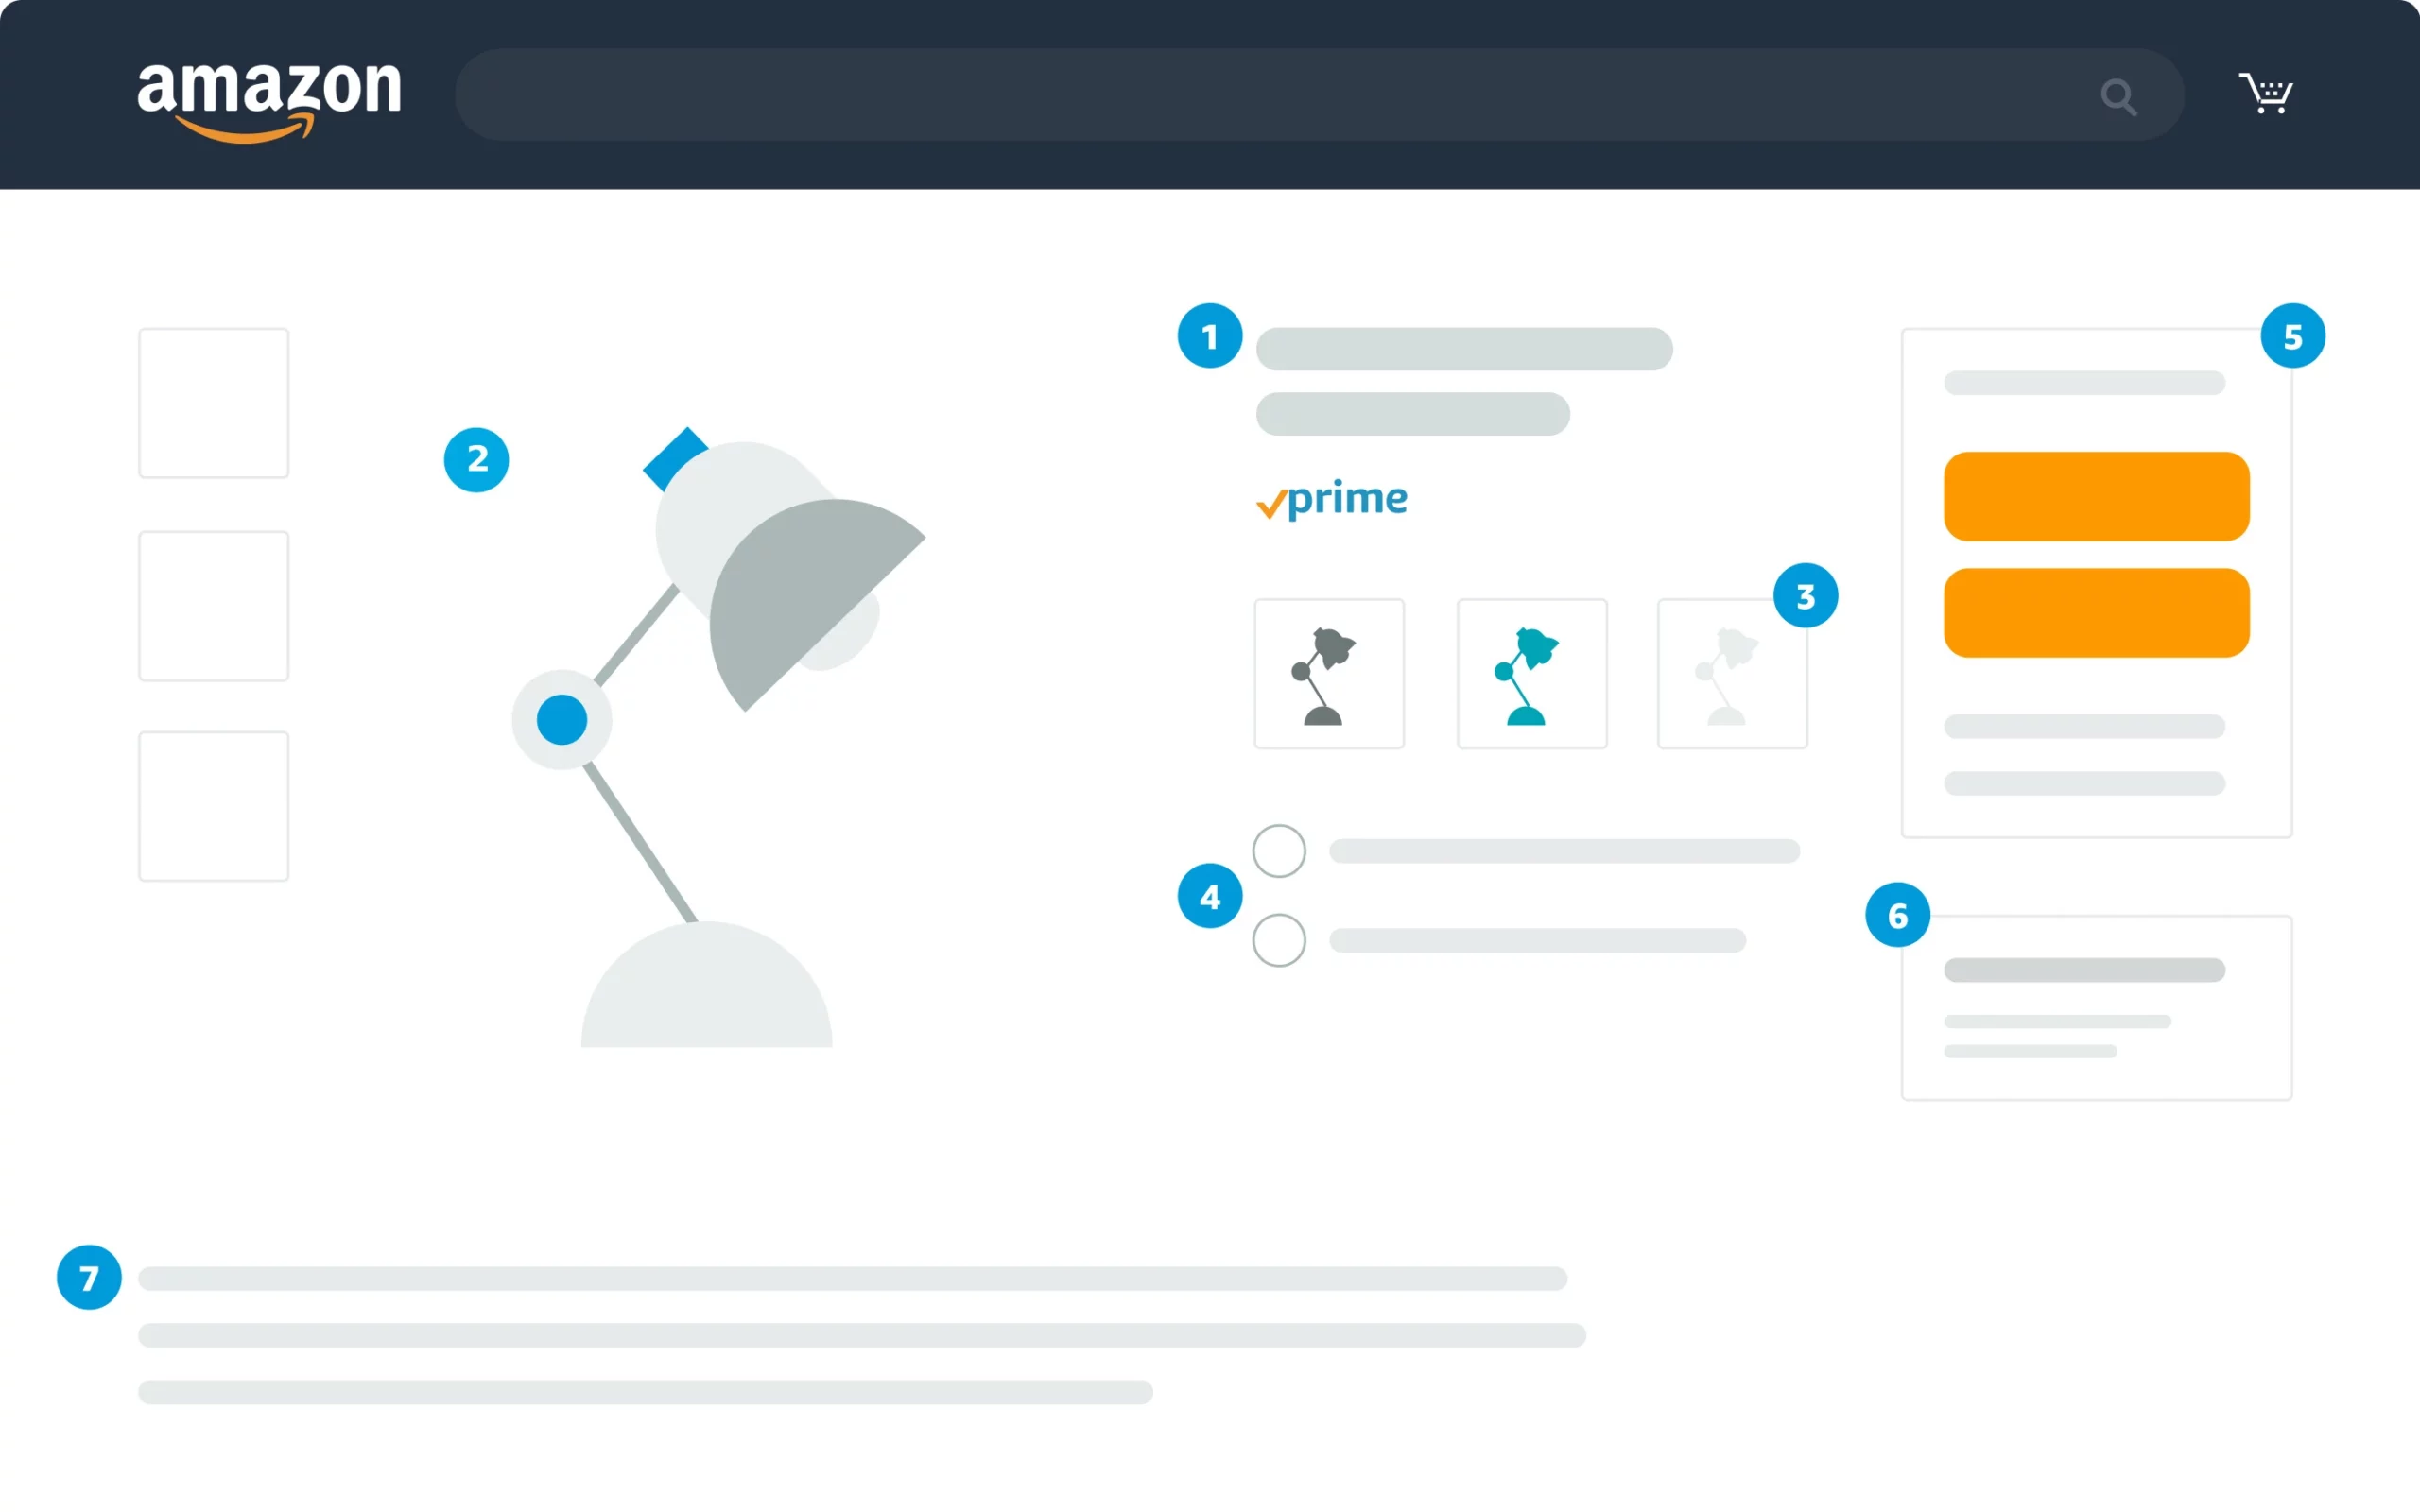
- Title
200 characters max, capitalize the first letter of every word - Images
500 x 500 or 1,000 x 1,000 pixels to increase listing quality - Variations
Such as different colors, scents, or sizes - Bullet points
Short, descriptive sentences highlighting key features and benefits - Featured offer (“Buy Box”)
The featured offer on a detail page. Customers can add to their cart or “Buy Now” - Other offers
The same product sold by multiple sellers offering a different price, shipping options, etc. - Description
Keywords improve the chances that people will find your listing
Once your item is added you need to decide how you will package and ship your items. Amazon has 2 solutions for this:
- You can fulfill orders yourself, maintaining your own inventory and shipping products directly to customers. We call this merchant-fulfilled shipping (MFN).
- You can send your inventory to Amazon and have us pick, pack, and deliver products through Fulfillment by Amazon (FBA). FBA also takes care of customer service and returns.
We chose the second option because we wanted to delegate this issue to experienced professionals to minimize the possibility of mistakes.
Fulfillment by Amazon (FBA)
We would like to talk about this option separately, as it has both pros and cons.
Pros
- free shipping for your customers;
- lower operating costs;
- no need to contend with client inquiries;
Cons
- laborious product preparation requirements;
- potentially costly charges;
- long-term storage fees;
- complex sales tax;
Long story short, FBA is definitely not a cheap option and can make it difficult to justify the expense. But if you want to save your time it is really great.
Step 4: Driving traffic to the product
When you want to increase your sales in a marketplace you shouldn’t just rely on people finding your product on their own and choosing it because of its quality-to-cost ratio. Because there are indeed a lot of products on Amazon. This is especially true for products about a brand that, few people know about.
In this case, you need to take care of additional sources of traffic and a good option could be your website or online store, where people are familiar with your brand.
We have placed several banners on our blog and on our clients’ dashboards. This is roughly what it looked like.
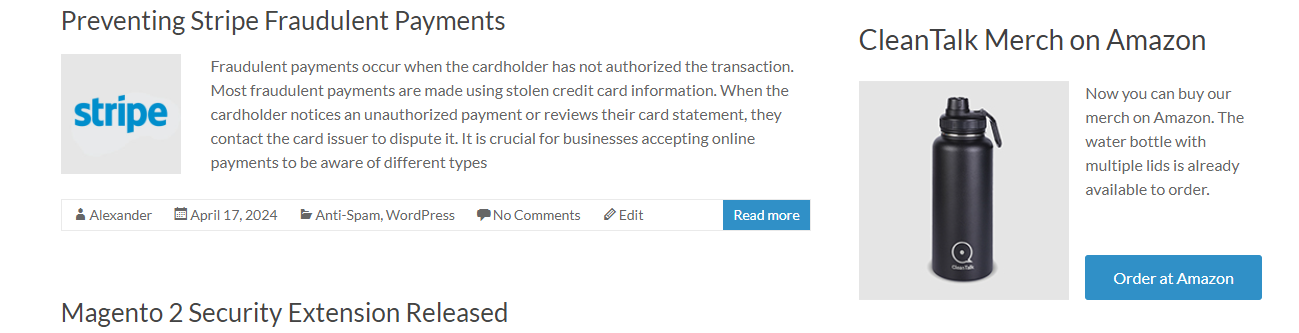
Statistics on traffic sources and purchases are not available on the individual tariff, so we can’t say for sure what share of sales these banners brought, but we assume that not less than a half, taking into account the fact that the main products of our company and the brand itself for a fairly narrow audience.
Step 5: Keep track of your orders and adjust the price
In case you’ve enabled the FBA option, the only thing you’ll have to do is keep an eye on the status of your orders and how Amazon does everything itself.
Also, we recommend you collect sales statistics for a certain period and try to increase or decrease the cost of the product and track the impact of the cost on the number of sales as it can help you optimize your costs and increase your profits.
We wish you great sales!
It is difficult to fit all of our experiences into this article, but we have tried to mention the most important issues that we had to deal with ourselves.
We welcome questions in the comments and will be happy to share more specifics to help you save time and money.
Leave a Reply