Protection for Leaky Paywall covers all submissions made through WordPress plugin Leaky Paywall. Anti-Spam by CleanTalk for WordPress must be installed as well.
CleanTalk added spam protection for Brave Forms using direct form integration. So in case, you prefer using this type of forms be sure to use the most effective Anti-Spam plugin. Read the guide below and learn 4 steps to protect all your contact forms from spam.
Once the CleanTalk Anti-Spam plugin is installed it starts to protect all of the existing forms on your WordPress website. It may not only be Brave Forms but also many others.
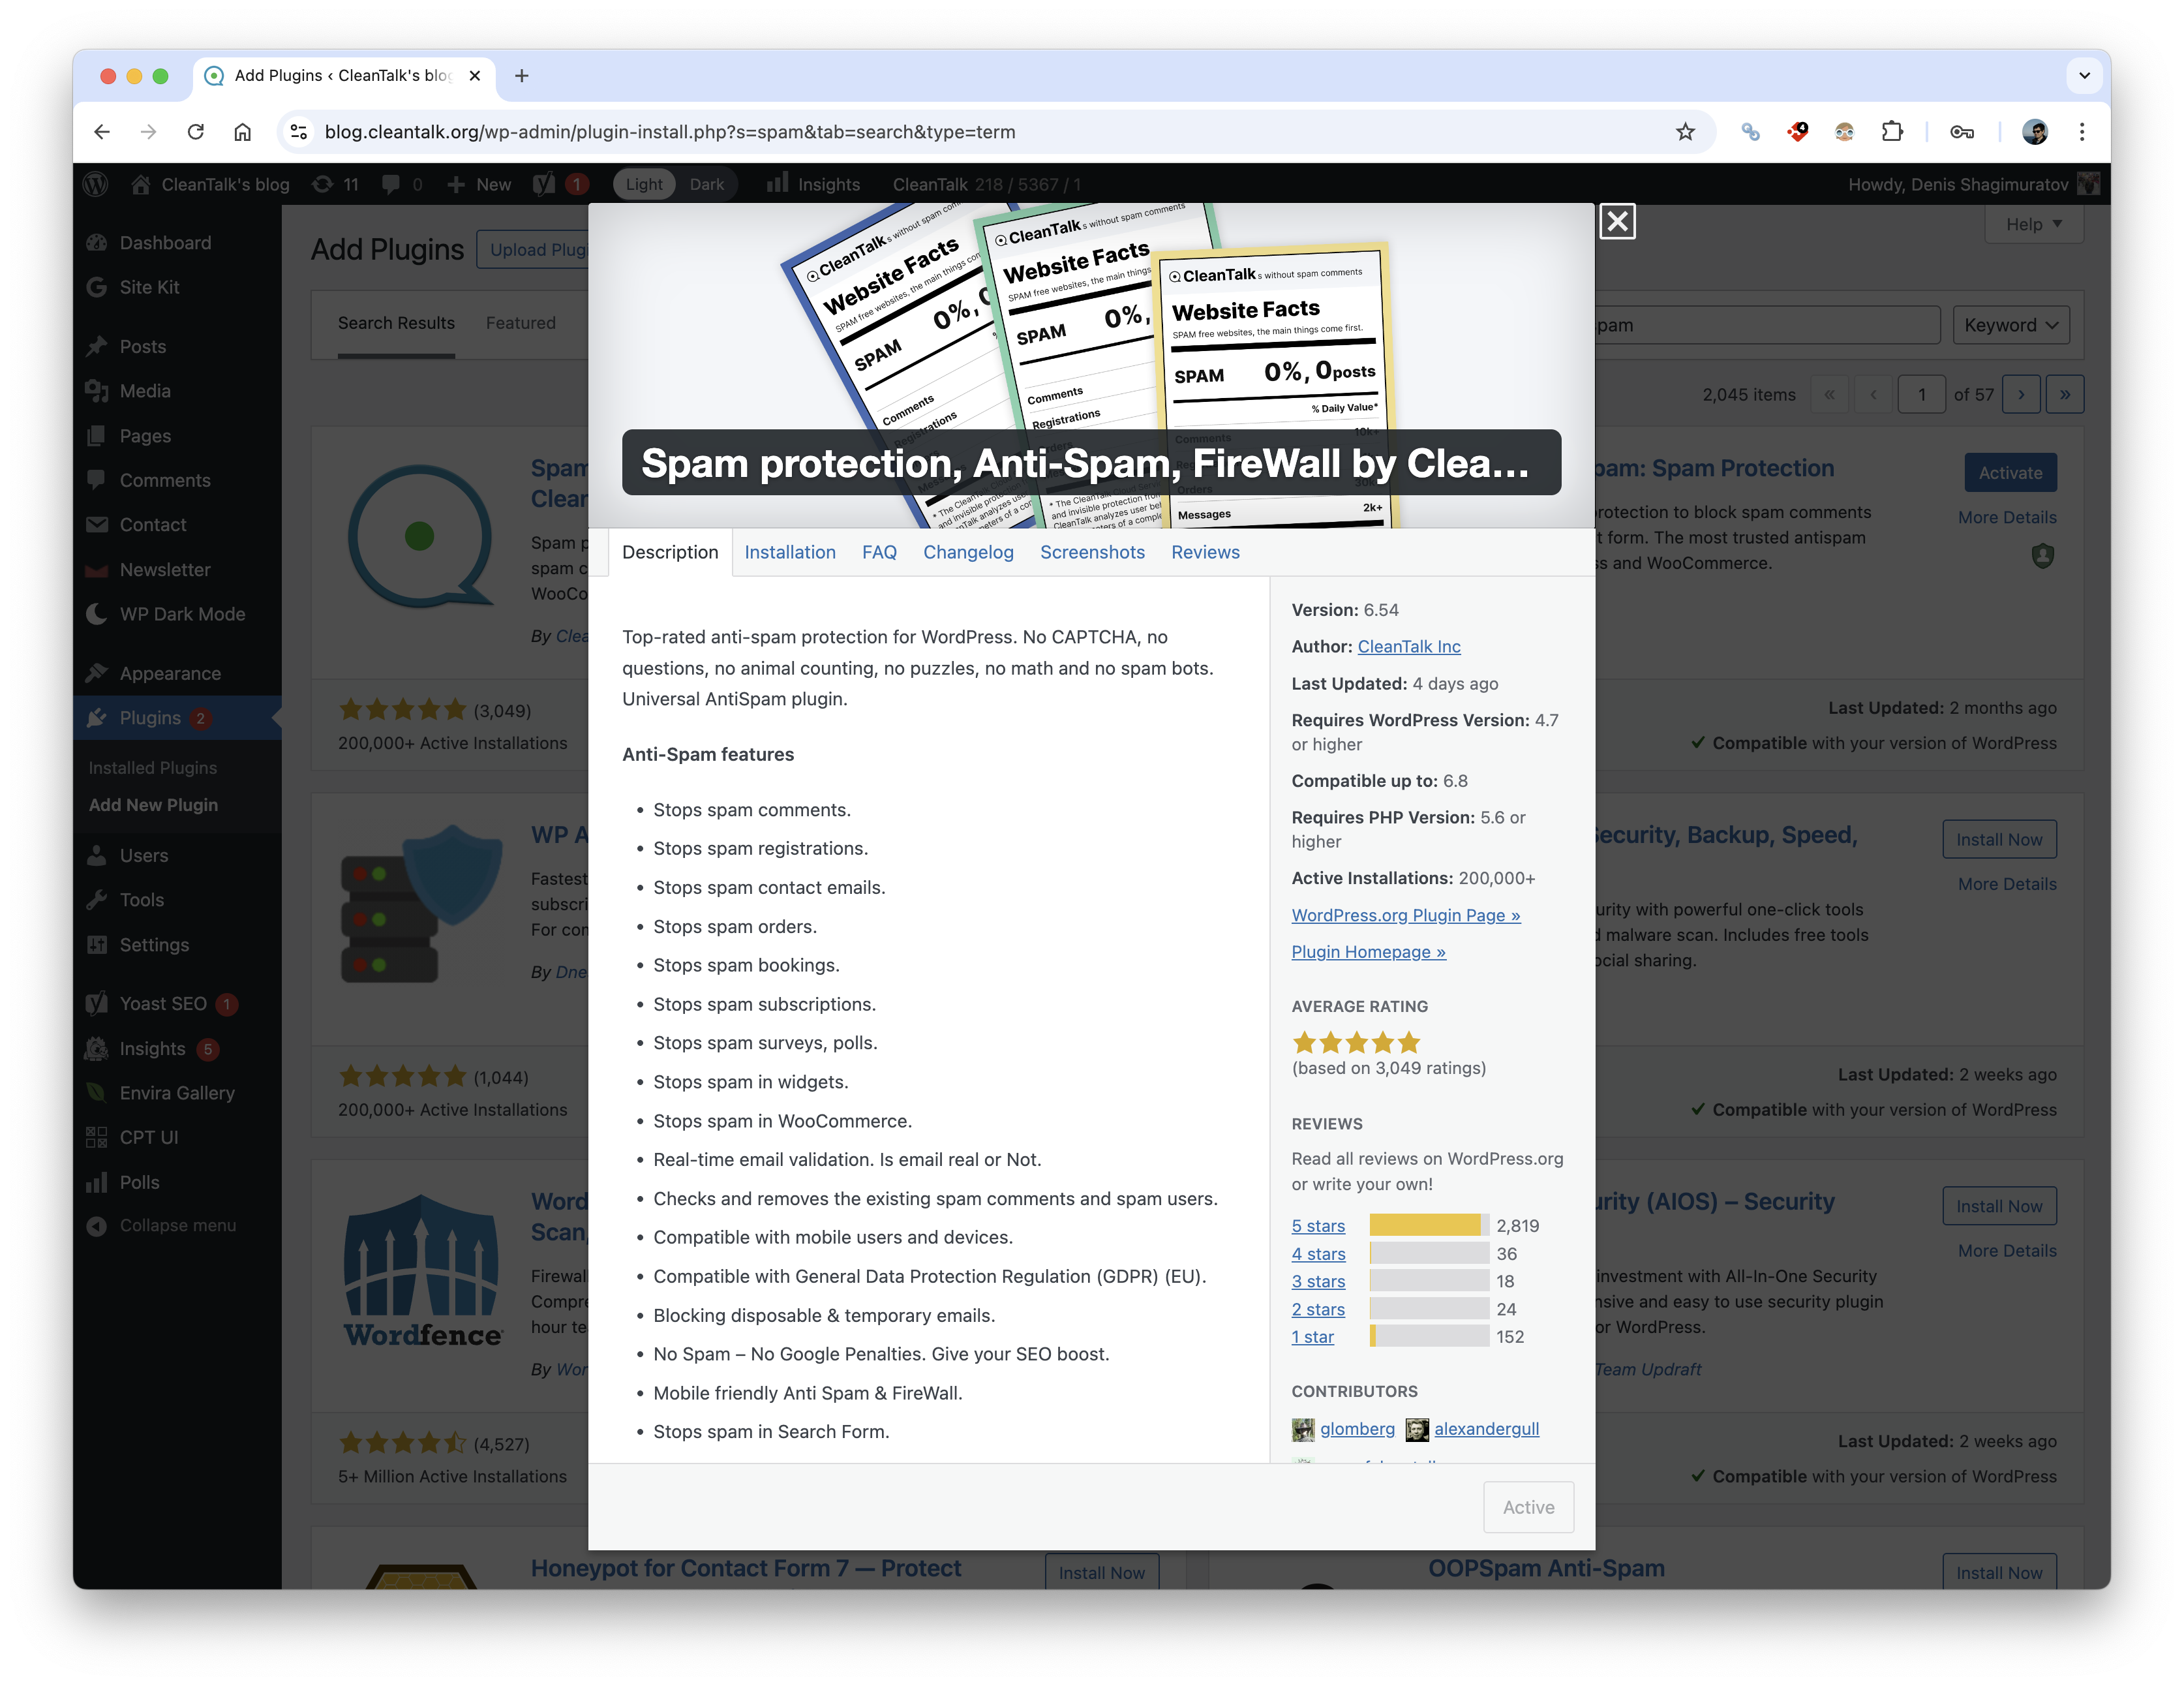
To install the Anti-Spam plugin, go to your WordPress admin panel → Plugins → Add New.
Then enter «CleanTalk» in the search box and click the Install button for «Spam protection, Anti-Spam, FireWall by CleanTalk».
After installing the plugin, click the «Activate» button.
After it is done go to the plugin settings and click the «Get Access Key Automatically» button. Then just click the «Save Settings» button.
That’s it! From now you How to completely protect your Contact Forms from spam.
How to check Brave Forms Spam Protection
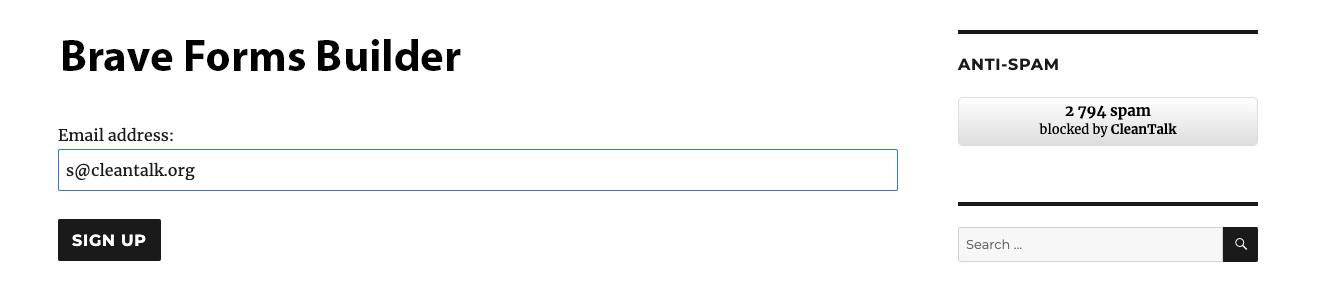
You can test the work of Anti-Spam protection for your Contact Forms by using a test email s @ cleantalk.org (without spaces). First, open the form in an Incognito browser tab. Fill in all the required form fields and send a form. After submitting the form, you will see a block message about the block on the form submission.
brave
If you have any questions, add a comment and we will be happy to help you.
Create your CleanTalk account – Register now and protect your Contact Forms from spam in 5 minutes
Update
The protection works only for website visitors, not for website admins. Be sure to test the form protection using Incognito mode.
Additional features
CleanTalk protects all forms at once: comments, registrations, feedbacks, contacts, reviews.
Installation takes about 1-2 minutes.
Smart 99% protection against spambots.
Always online – 24/7 technical support.
Logs, SpamFireWall, personal lists, country filters, stop-words, and many others.
Discover the complete list of CleanTalk Anti-Spam plugin features here.
CleanTalk added spam protection for FiboSearch Search Forms for WooCommerce in the CleanTalk Anti-Spam plugin using direct form integration. So in case, you prefer using search forms be sure to use the most effective Anti-Spam plugin. Read the guide below and learn 4 steps to protect all your contact forms from spam.
Once the CleanTalk Anti-Spam plugin is installed it starts to protect all of the existing forms on your WordPress website. It may not only be FiboSearch but also many others.
A robust backup strategy for any WordPress website is compulsory to store important content and keep the business running in case anything goes wrong. This guide reviews the best practices for WordPress backup and reviews some of the top-rated WordPress backup plugins to simplify the process.
Automated WordPress Backup: The Power of Plugins
Consider the WordPress backup plugin for a better, more efficient, and more reliable solution. These plugins will automate backing up for you, even on a schedule, and quite often provide extra features, such as:
Restore your entire site to a previous point in time with just one click.
Store backups safely off-site to safeguard against server failures.
Receive notifications for successful or failed backups.
The only backup changes since the last backup have been saving storage space.
Example of WordPress Backup Plugin: WPvivid
WPvivid is a highly rated plugin that offers a wide range of WordPress backup and restoration options. It’s user-friendly and offers peace of mind knowing your site is safe.
How to Use WPvivid
Installation
Login to your WordPress dashboard.
Go to Plugins > Add New.
Search for “WPvivid Backup”
Install the plugin.
Activate the plugin.
First Backup:
Go to WPvivid > Backup & Restore.
Click Backup Now.
Go to WPvivid > Schedule.
Set up a regular schedule of automated backup.
Click Save Changes.
Restore Your Site:
Go to WPvivid > Backup.
Choose the backup you want to restore.
Click Restore.
Extra Tips:
Test Your Backups: Regularly restore your site from a backup to make sure it’s working correctly.
Keep Multiple Backups: Keep multiple backups to be safe from data loss. Secure Your Backups: If you’re storing backups off-site, use strong passwords and encryption.
Monitor Your Backups: Keep an eye on your backup schedule and storage usage.
Regular Backups: Set up regular backups, preferably daily or weekly.
Offsite Storage: Store backups off-site to protect against local disasters.
Test Restores: Periodically test restoring your site from backups to ensure they are working.
Secure Backups: Protect backups with strong passwords and encryption.
With these best practices in place and by using a reliable WordPress backup plugin, you can all but secure your WordPress site and minimize the possible disasters to the barest minimum.
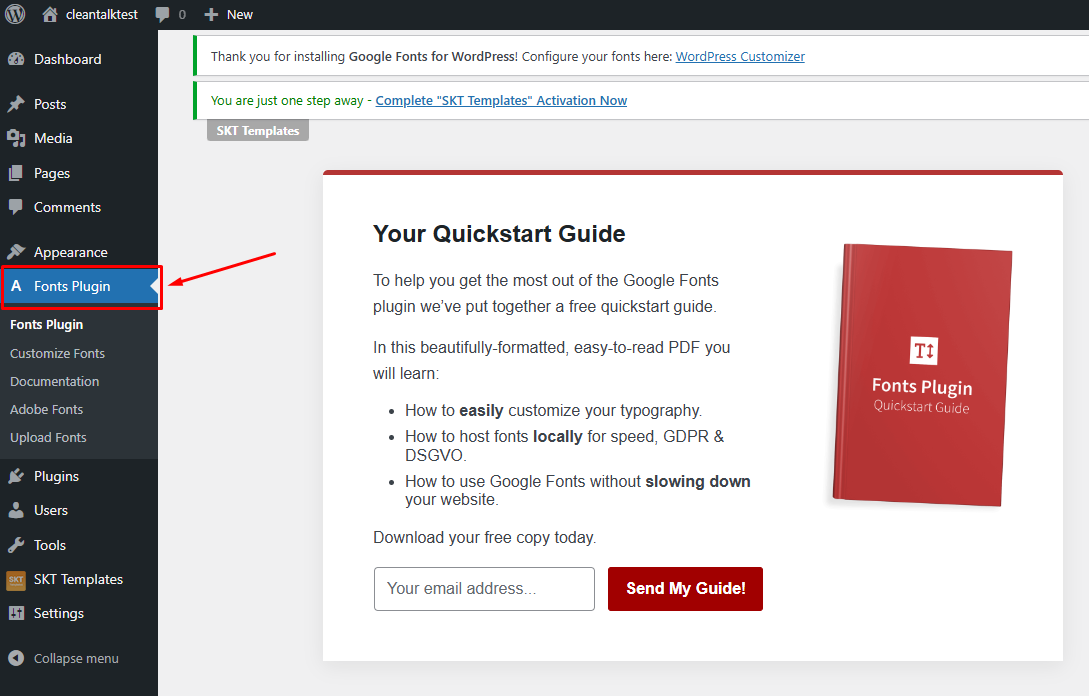
Want to give your WordPress website a professional and stylish look? Google Fonts is the perfect tool to elevate your site’s typography. By adding a wide range of free, high-quality fonts to your website, you can enhance its visual appeal and readability.
How to Install the Google Fonts Plugin
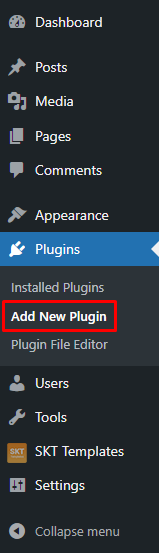
Navigate to “Plugins” and click “Add New”.
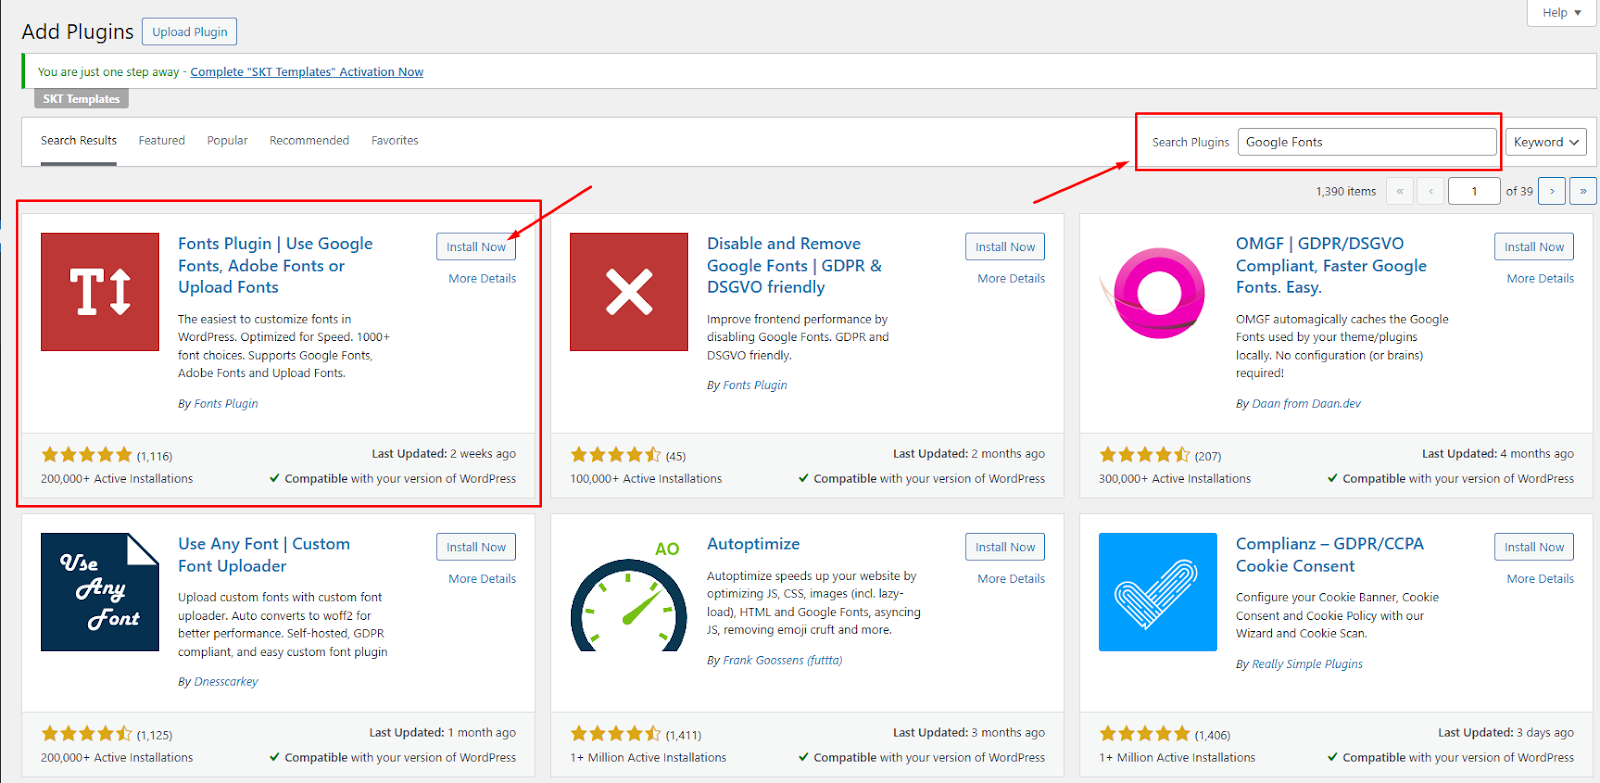
Search for “Google Fonts”.
Install and activate the plugin.
How to Use the Google Fonts Plugin
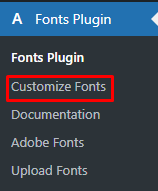
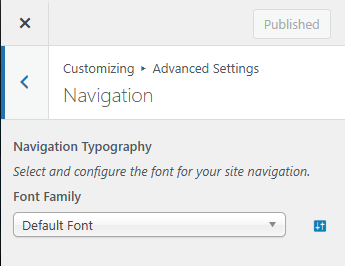
Go to “Fonts Plugin”
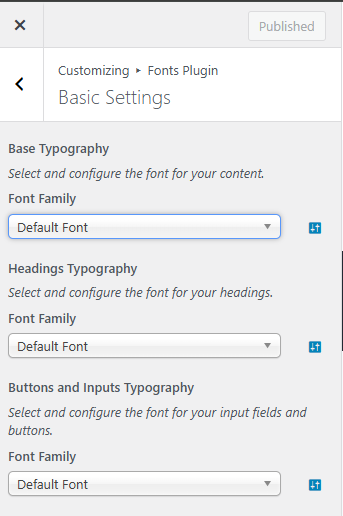
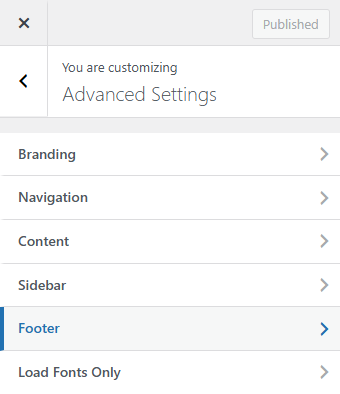
Start the customization. For this, choose a certain menu.
Select your desired fonts. You can search for specific fonts or browse through categories.
Choose font weights and styles. Customize the appearance of your fonts.
Assign fonts to different elements. Apply fonts to headings, body text, menus, buttons, and more.
Save your changes.
Best Practices for Using Google Fonts
Choose readable fonts. Prioritize font clarity and legibility.
Limit font choices. Keep your design clean and focused.
Consider font pairings. Combine fonts that complement each other.
Test on different devices. Ensure your fonts look good across various screen sizes.
Optimize performance. Minimize the number of font files to improve website speed.
By following these steps and best practices, you can easily add Google Fonts to your WordPress website and significantly improve its overall design and user experience.
Feel free to check our other beginner’s guides to make your WordPress start smooth:
Are you looking to customize your WordPress homepage? This comprehensive guide will walk you through everything you need about WordPress main page editing, from understanding the default layout to using page builders. Whether you’re a beginner looking for a step-by-step WordPress homepage editing tutorial or an experienced user wanting advanced customization tips, we’ve got you covered.
Understanding the Default WordPress Homepage
The default WordPress homepage typically displays your latest blog posts, styled according to your chosen theme. While this setup is simple, there may be better options for your website’s specific needs. Before you start making changes, it’s important to understand the basic structure of a WordPress homepage.
Critical Components of a Default Homepage
Header: This top section usually contains your site title, logo, and navigation menu. You can learn how to edit the WordPress homepage header using the methods described below.
Content Area: The central part of the page where your blog posts, excerpts, or other content elements are displayed. You’ll find ways to change WordPress homepage content and layout in this guide.
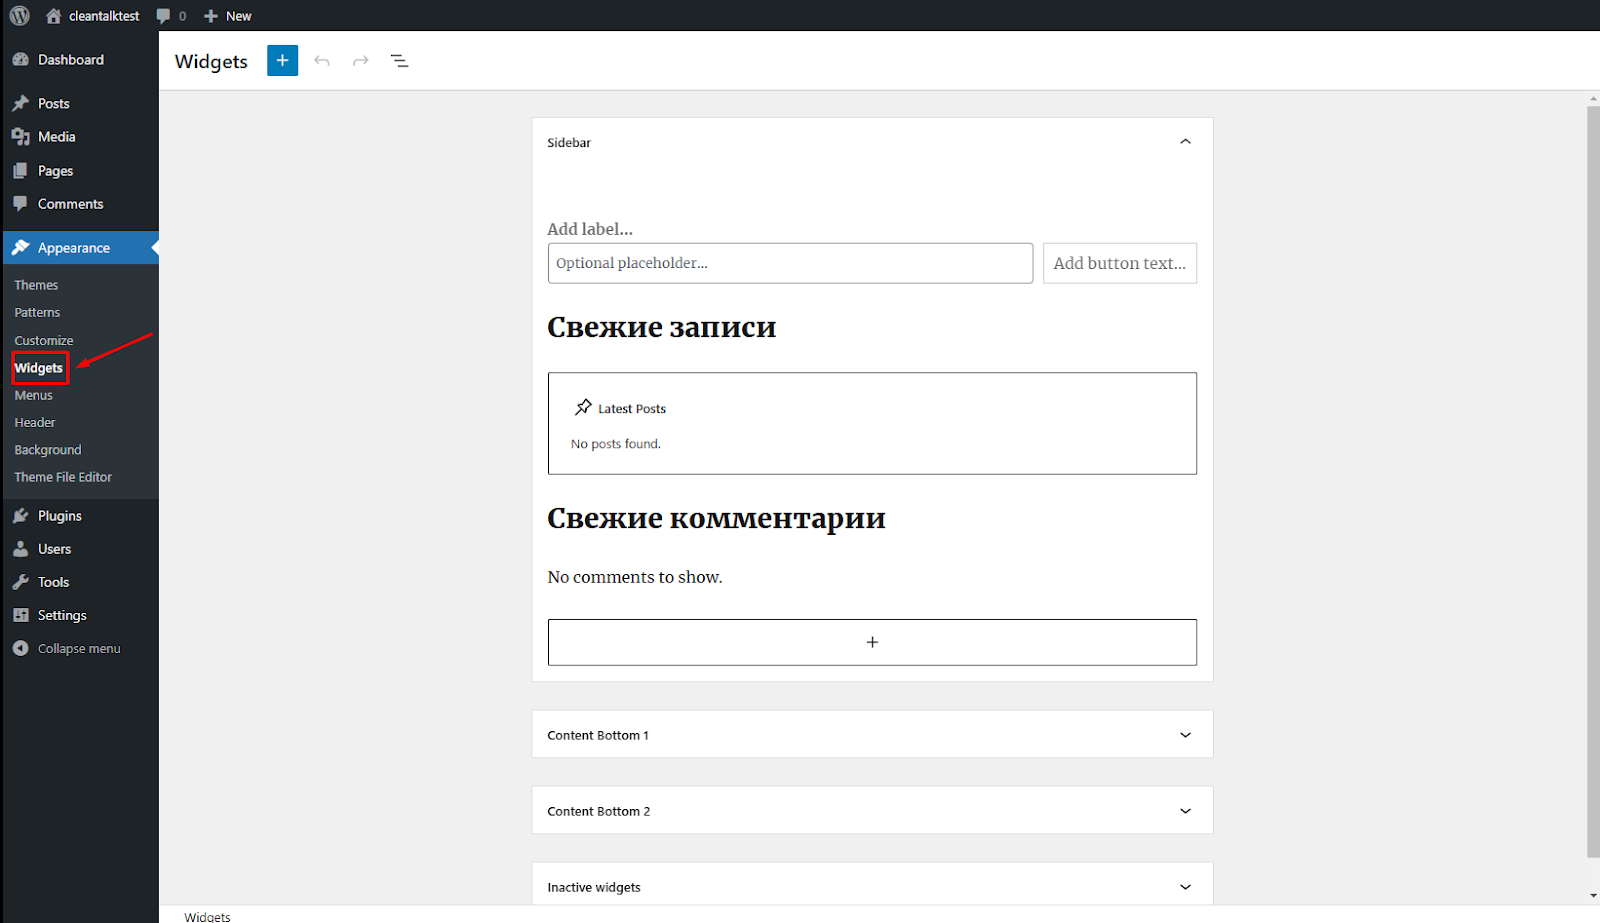
Sidebar: An optional area on either side of the content area, commonly used for widgets. Learn how to customize your sidebar and add widgets to your WordPress homepage.
Footer: The bottom section typically includes copyright information, contact details, and additional links.
Methods for Editing Your WordPress Homepage
There are several ways to edit your WordPress front page:
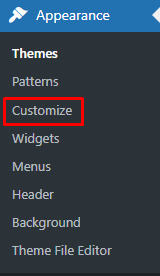
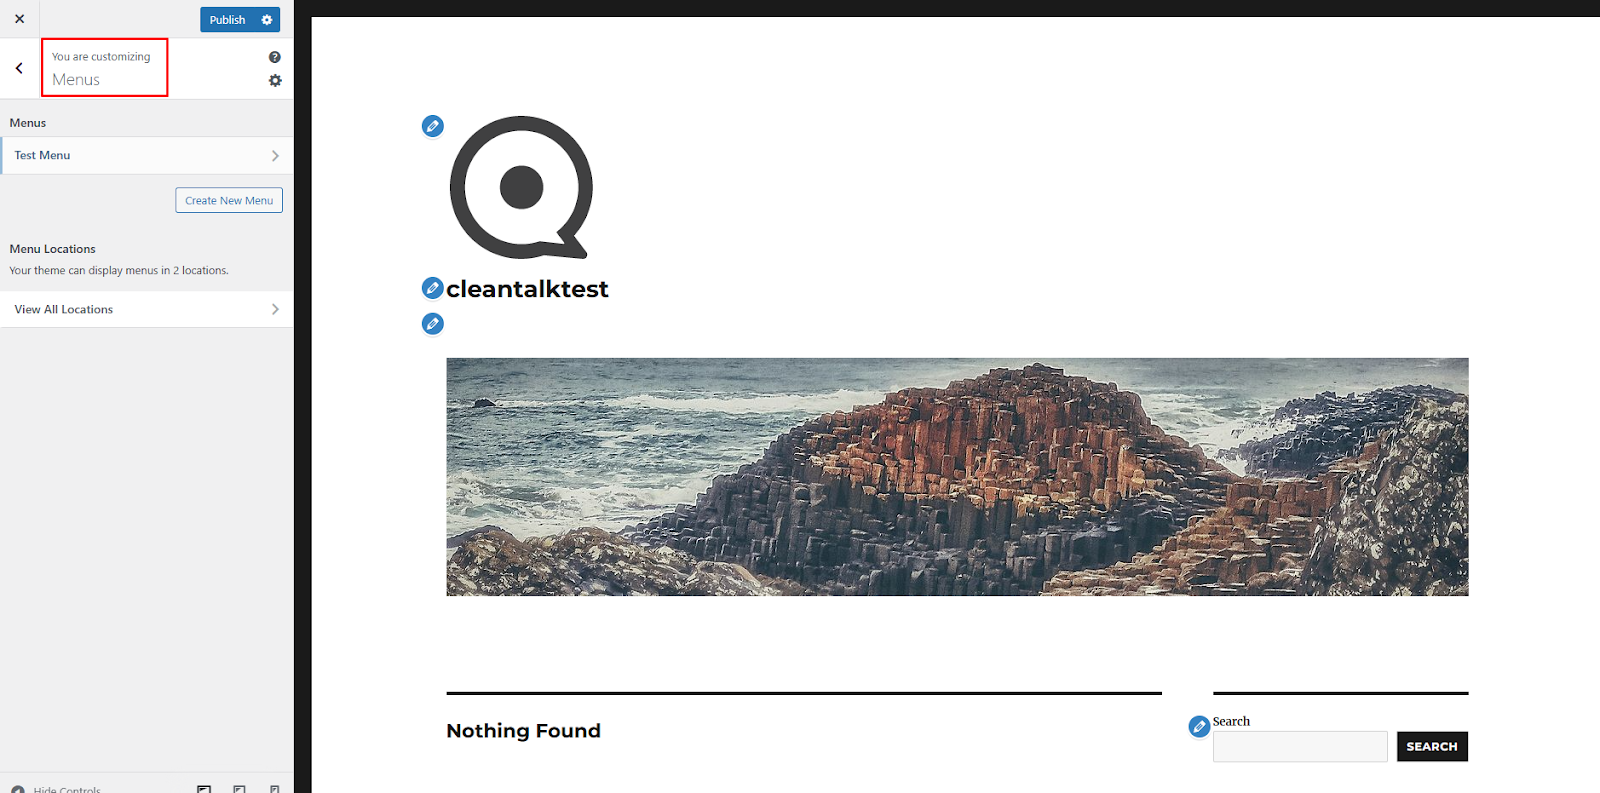
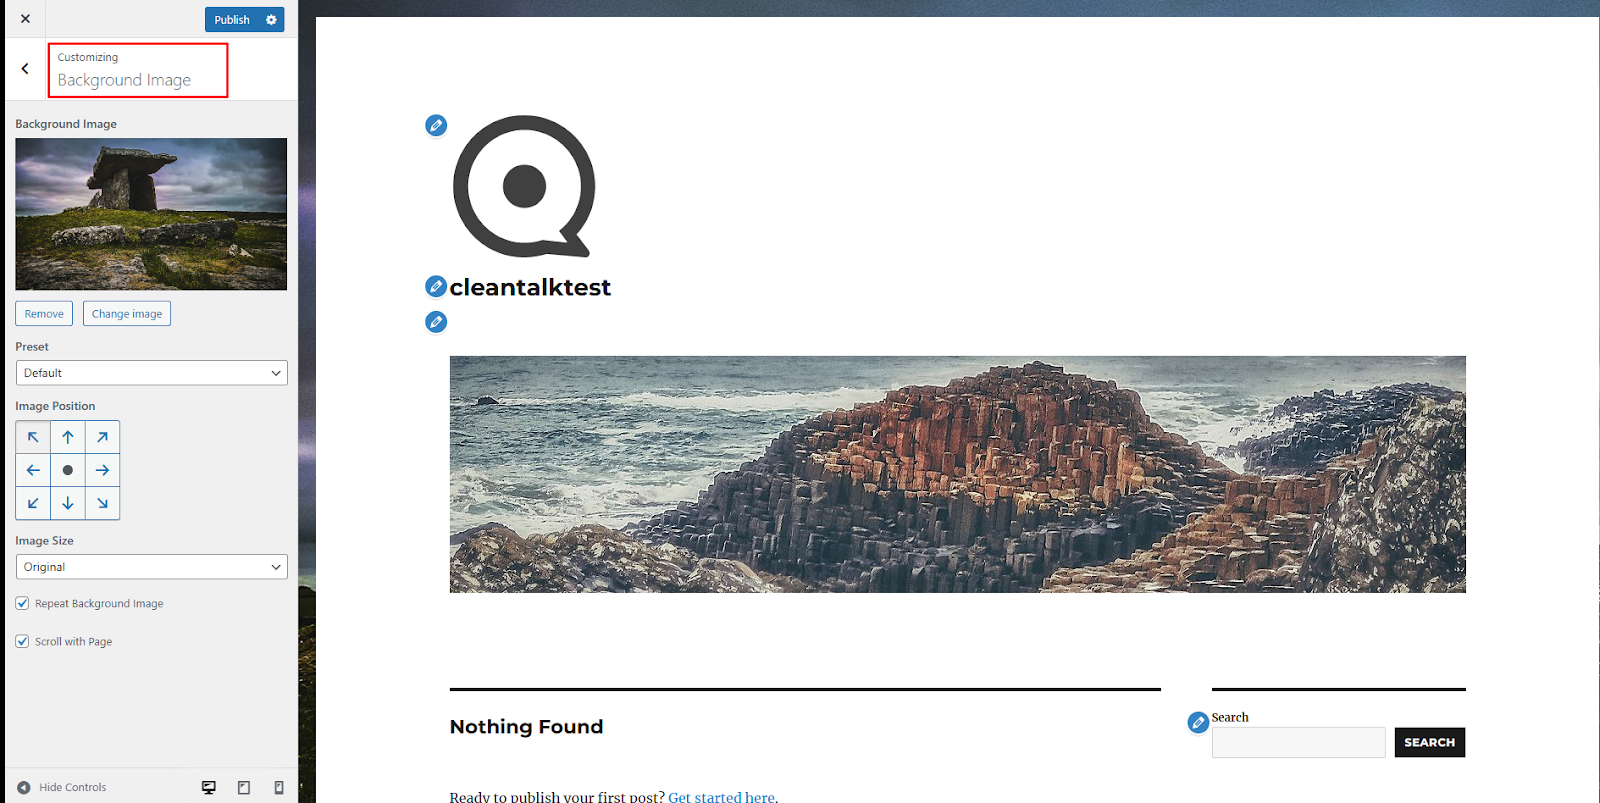
Theme Customizer: Most modern WordPress themes offer a visual customizer that allows you to make changes without writing any code. Access it by navigating to Appearance -> Customize in your WordPress dashboard.
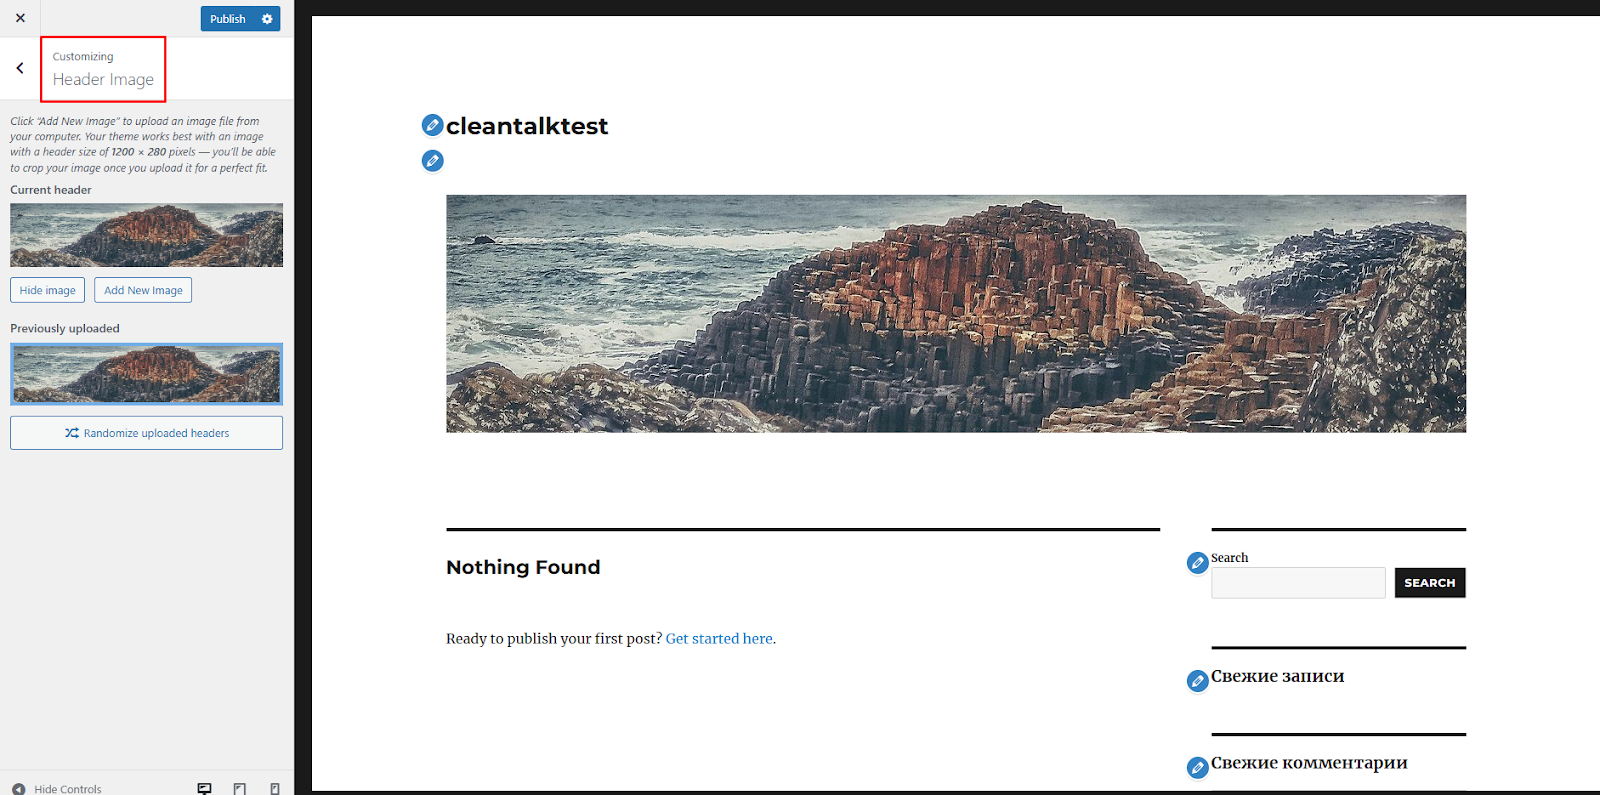
Look for homepage-related options, such as:
Header image or logo
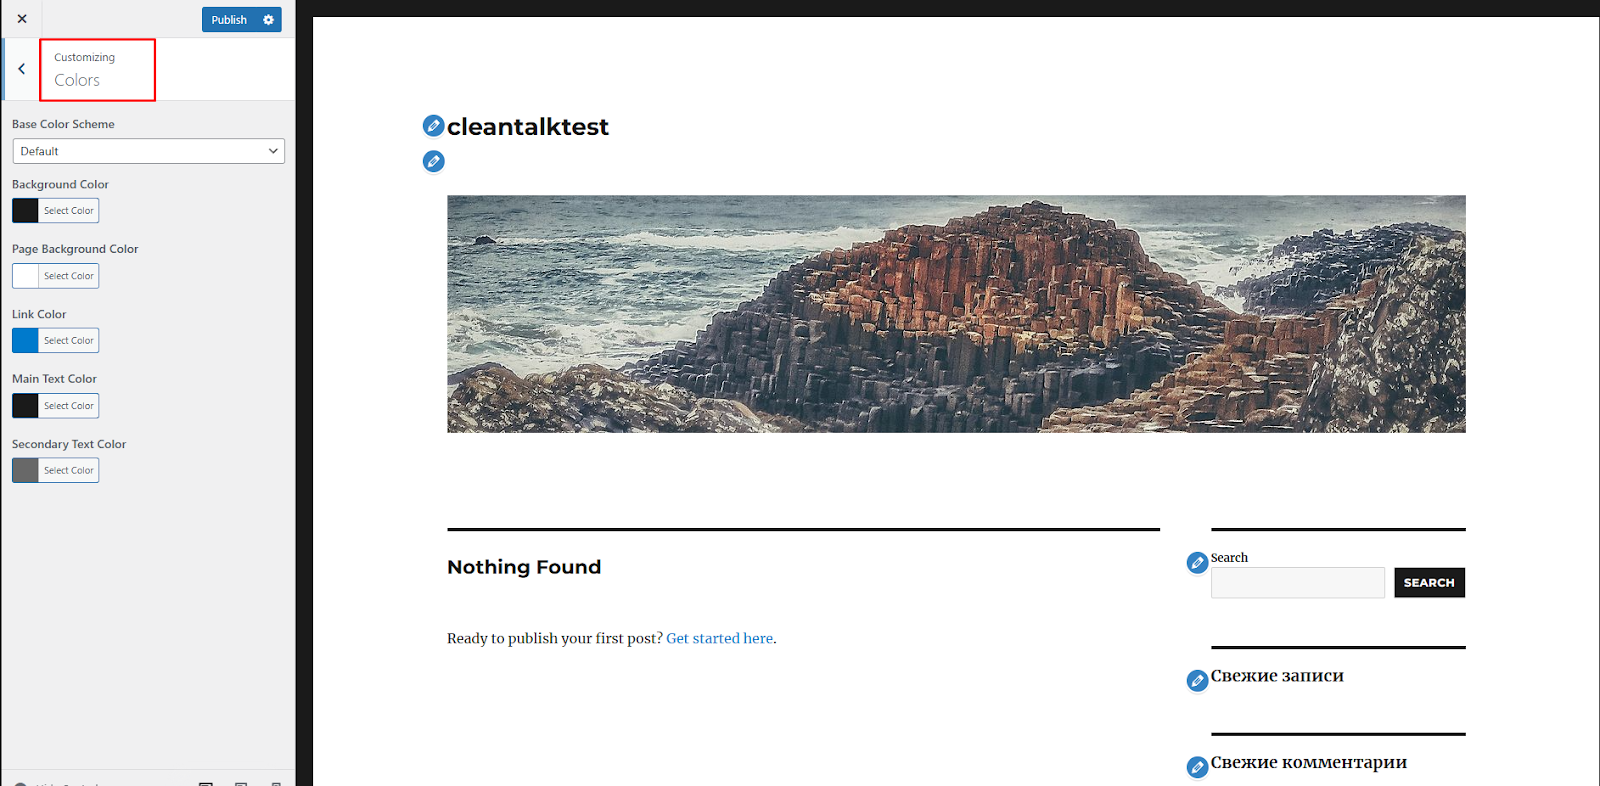
Color scheme
Site identity (such as logo, name, etc.)
Menus
Background image
Widgets
Other settings, like advanced CSS.
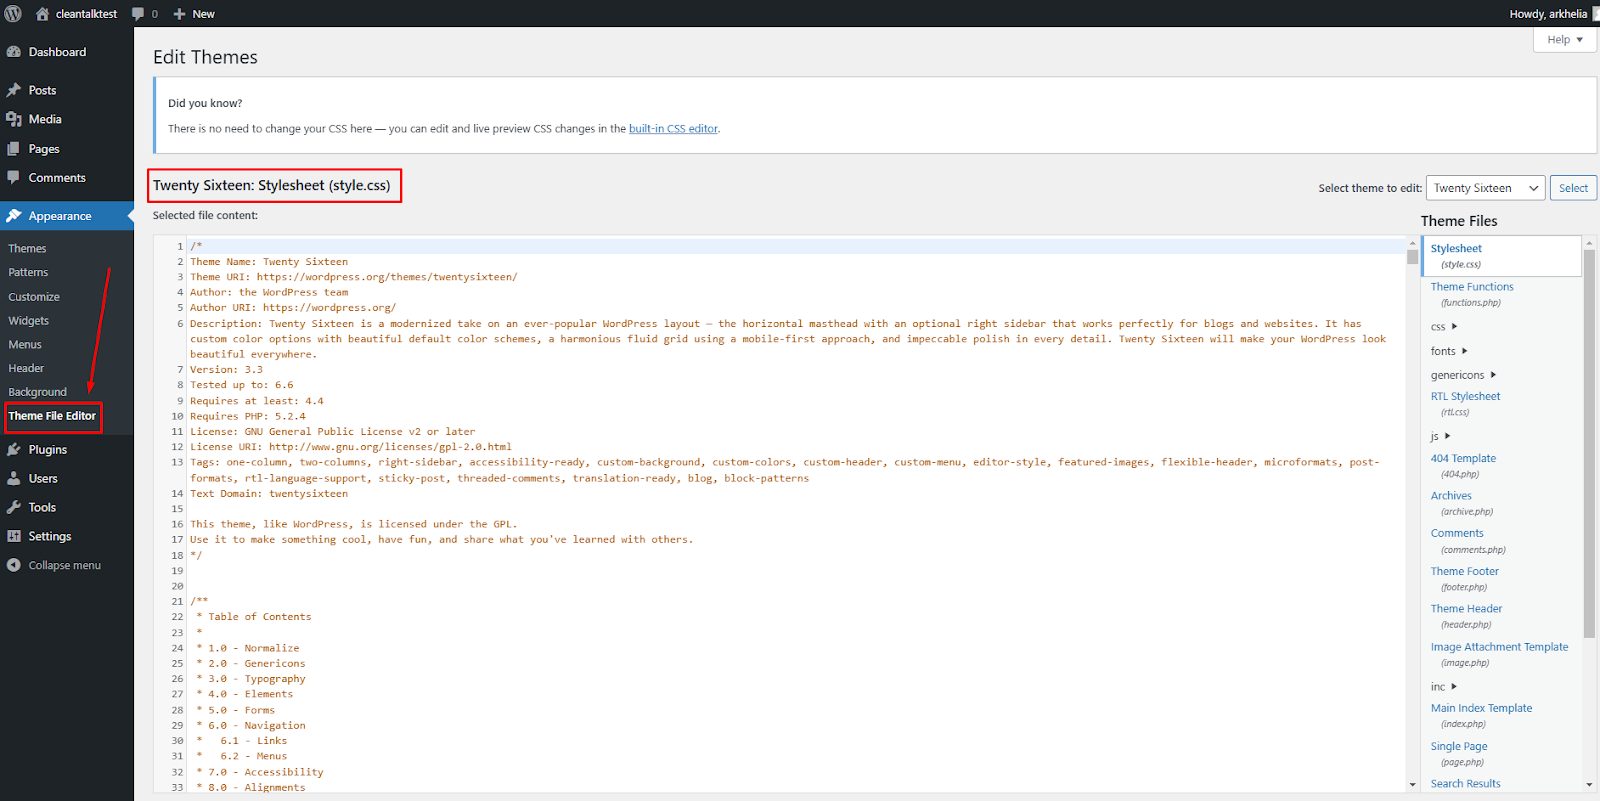
Theme Editor: For more advanced customizations, you can directly edit your theme’s code. However, proceed with caution, as errors can break your site. This method is generally not recommended for beginners. If you’re comfortable with code, go to Appearance -> Theme Editor. You’ll often find the homepage template files named index.php or front-page.php.
Page Builder Plugins: If you prefer a visual, drag-and-drop interface, consider using a page builder plugin like Elementor, Divi, or Beaver Builder. These plugins offer pre-built templates and design options, making it easy to create a custom WordPress homepage without any coding knowledge. They are a great option for beginners looking for an easy way to design their WordPress homepage.
Tailoring Your Homepage to Your Needs
Define Your Homepage’s Purpose: What do you want your homepage to achieve? Is it a product showcase, a blog, or a landing page for lead generation? Clearly outlining your goals will help you design a more effective homepage.
Create a Strong Visual Hierarchy: Guide visitors’ attention to key elements using size, color, and placement.
Optimize for Mobile Devices: Ensure your homepage is responsive and looks good on all devices.
Improve Loading Speed: Optimize images, reduce HTTP requests, and leverage browser caching to optimize your WordPress homepage for SEO.
Test Thoroughly: Preview your homepage on different devices and browsers to catch any issues.
Example Homepage Structures
Business Website: Highlight key services, products, and a clear call to action (CTA).
Blog: Feature recent posts, popular categories, and author bios.
Portfolio Website: Showcase your best work with high-quality images and project descriptions.
E-commerce Store: Display best-selling products, featured categories, and customer testimonials.
Remember, your homepage is the first impression visitors have of your website. Invest time in crafting a design that reflects your brand and engages your audience. By following the tips in this WordPress homepage design for beginners guide, you can create a homepage that is both beautiful and effective.
Feel free to check our other beginner’s guides to make your WordPress start smooth:
CleanTalk added spam protection for Contact Form by BestWebSoft using direct form integration. So in case, you prefer using this type of contact forms be sure to use the most effective Anti-Spam plugin. Read the guide below and learn 4 steps to protect all your contact forms from spam.
Once the CleanTalk Anti-Spam plugin is installed it starts to protect all of the existing forms on your WordPress website. It may not only be Contact Forms by BestWebSoft but also many others.
To install the Anti-Spam plugin, go to your WordPress admin panel → Plugins → Add New.
Then enter «CleanTalk» in the search box and click the Install button for «Spam protection, Anti-Spam, FireWall by CleanTalk».
After installing the plugin, click the «Activate» button.
After it is done go to the plugin settings and click the «Get Access Key Automatically» button. Then just click the «Save Settings» button.
That’s it! From now you How to completely protect your Contact Forms from spam.
How to check Contact Form by BestWebSoft Spam Protection
You can test the work of Anti-Spam protection for your Contact Forms by using a test email s @ cleantalk.org (without spaces). First, open the form in an Incognito browser tab. Fill in all the required form fields and send a form. After submitting the form, you will see a block message about the block on the form submission.
3
If you have any questions, add a comment and we will be happy to help you.
Create your CleanTalk account – Register now and protect your Contact Forms from spam in 5 minutes
Update
The protection works only for website visitors, not for website admins. Be sure to test the form protection using Incognito mode.
Additional features
CleanTalk protects all forms at once: comments, registrations, feedbacks, contacts, reviews.
Installation takes about 1-2 minutes.
Smart 99% protection against spambots.
Always online – 24/7 technical support.
Logs, SpamFireWall, personal lists, country filters, stop-words, and many others.
Discover the complete list of CleanTalk Anti-Spam plugin features here.
WordPress pages are the cornerstones of your website’s static content, perfect for showcasing timeless information like “About Us” or “Contact” sections. This comprehensive guide will empower you to not only create pages in WordPress but also structure them strategically and fill them with engaging content.
Creating a New Page
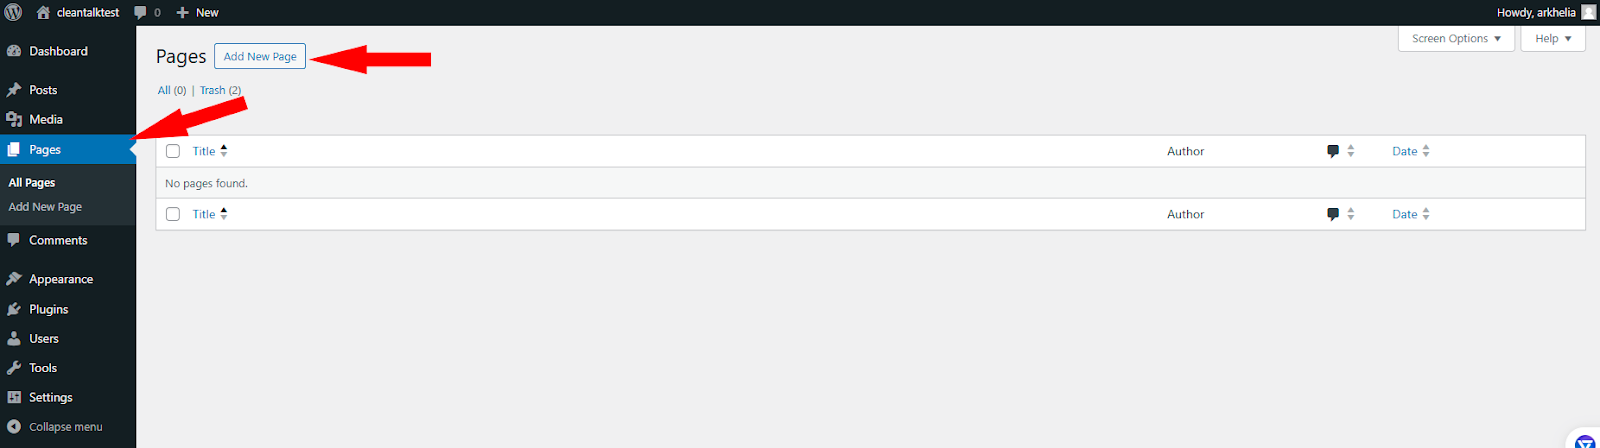
Log in to your WordPress dashboard.
In the left-hand menu, navigate to Pages.
Click on Add New.
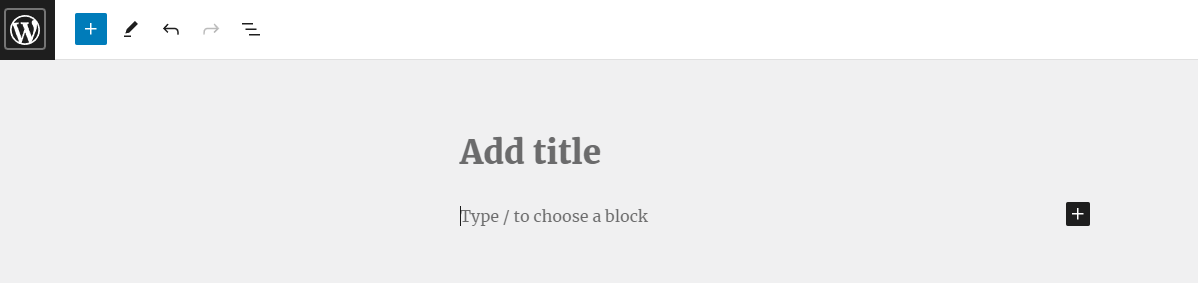
Building Your Page’s Content
Title: Craft a clear and concise title that encapsulates your page’s content. This title will be displayed in navigation menus and search results.
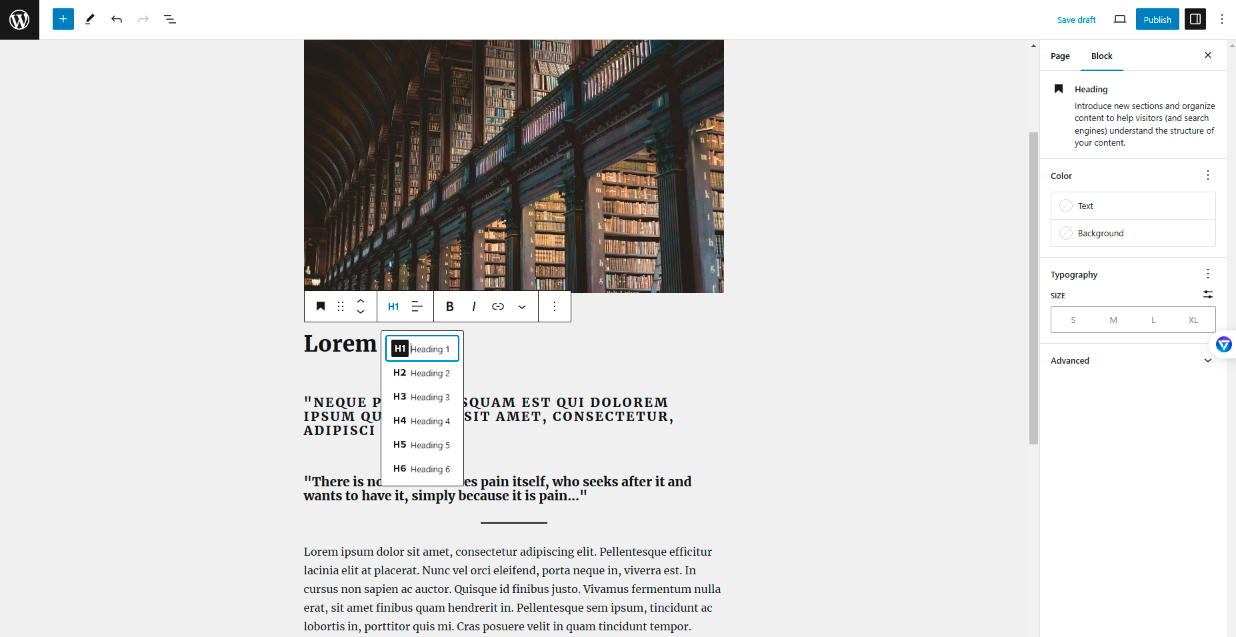
Content Area: This is where your page’s main content resides. WordPress utilizes a block editor, allowing you to add text, images, videos, and more using pre-designed blocks:
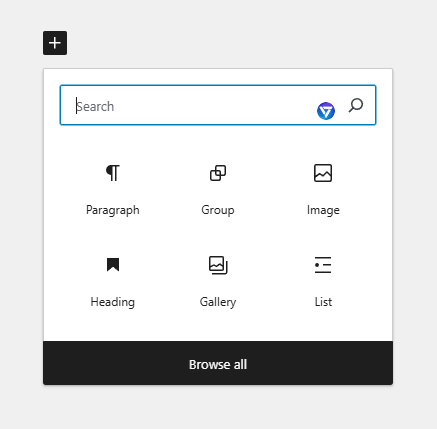
Click the “+” button to explore the various block options.
Drag and drop blocks to arrange your content in the preferred order.
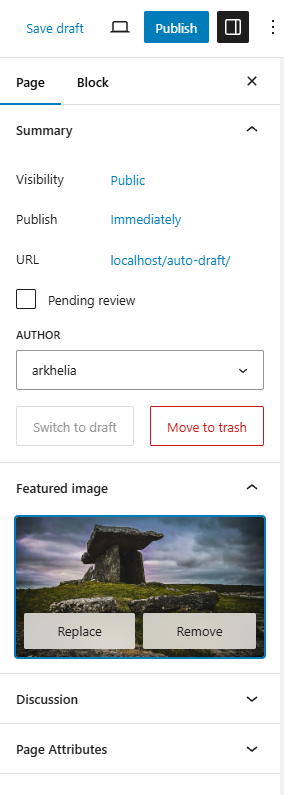
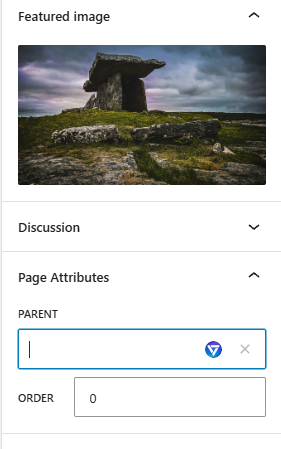
Featured Image (Optional): Select an image that visually represents your page’s content. This image is often displayed alongside your page title.
Content Composition Techniques
Readability Matters: Break up large text chunks with images, headings (H1, H2, etc.), and bullet points. Use short paragraphs for easy scanning.
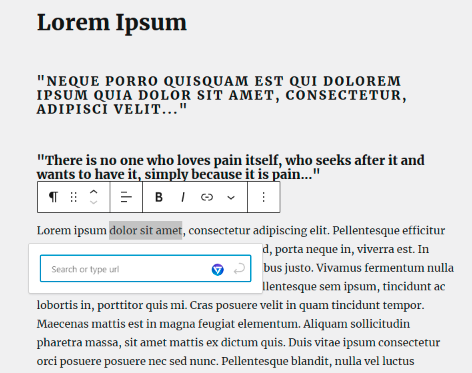
Internal Linking Power: Link to relevant pages within your website to enhance navigation and keep visitors engaged.
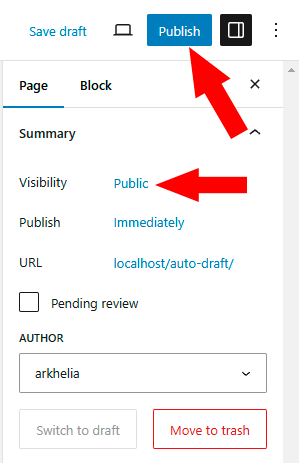
Publishing and Visibility Control
Publish Button: Once your content is ready, click the “Publish” button to make your page live on your website.
Visibility Options: You can choose to make your page publicly viewable, set it as a draft for further editing, or mark it as private for specific users.
Arranging Your Pages for Optimal Flow (Page Hierarchy)
Parent-Child Relationships: WordPress allows you to establish a hierarchical structure for your pages. A parent page acts as a category, housing child pages that fall under its umbrella.
While creating a new page, look for the “Page Attributes” section on the right-hand side of the editor.
Under “Parent,” use the dropdown menu to select an existing page as the parent. This creates a sub-page nested under the chosen parent page.
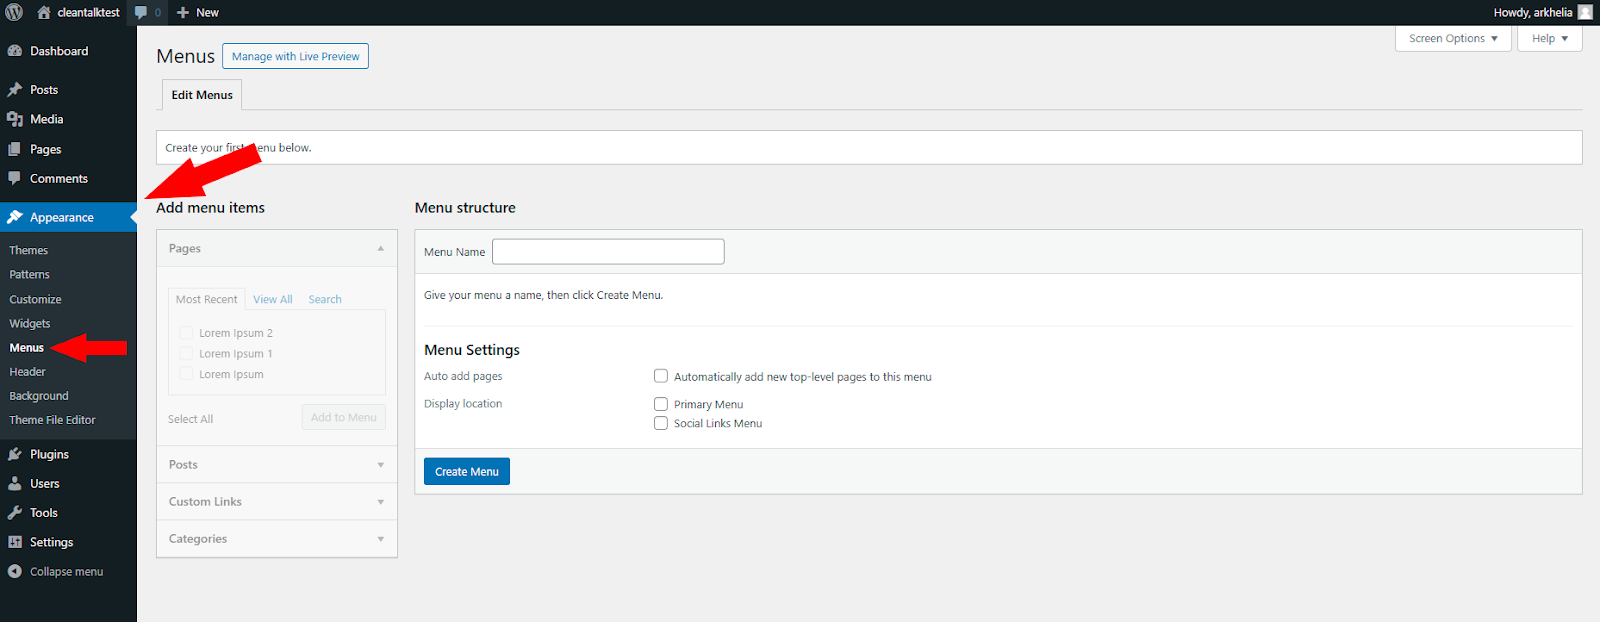
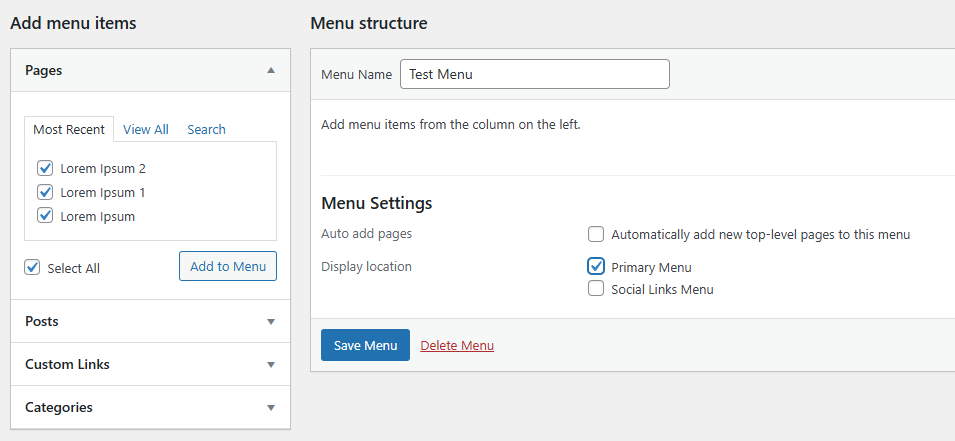
Navigation Menu Creation: Once you have a few pages, it’s time to create a navigation menu to help visitors find their way around.
In the WordPress dashboard, navigate to Appearance > Menus.
Give your menu a name and select the pages you want to include. You can use drag-and-drop to arrange the pages in the desired order within the menu.
Choose a menu location (header, footer, sidebar) and click “Save Menu” to make it live on your website.
Maximizing Your Pages’ Potential
Categorize and Tag: Organize your pages using categories and tags to help visitors discover related content. Categories are broader groupings, while tags are more specific keywords.
Preview Function: Before publishing, use the preview function to see how your page will appear on the live website. This allows you to refine the layout and content before making it public.
SEO Optimization: Enhance your search ranking by incorporating relevant keywords in your title, headings, and content. Consider using SEO plugins for further optimization.
Yoast SEO: A household name in the WordPress SEO world, Yoast offers a user-friendly interface with a comprehensive feature set. It excels in on-page optimization, guiding you through keyword optimization, readability analysis, and title tag and meta description creation. While the free version provides a solid foundation, premium plans offer additional features like internal linking suggestions and social media previews.
Rank Math: This plugin is a powerful contender, known for its extensive free features and affordable paid plans. It offers on-page optimization tools similar to Yoast, including keyword research suggestions, content analysis, and schema markup implementation. Rank Math integrates well with popular page builders and provides basic local SEO and WooCommerce SEO optimization within the free version.
SEOPress: This plugin is another strong option, particularly for those seeking a lightweight and speed-focused solution. SEOPress offers on-page optimization tools, social media optimization, and broken link checker functionalities. Their free version is feature-rich, and their paid plans cater to larger websites with features like content redirection and white labeling.
The SEO Framework: If technical SEO is your primary concern, The SEO Framework is a great choice. It prioritizes website speed and automation, with features like automatic image SEO optimization, robots.txt editor, and built-in XML sitemap generation. While the free version offers valuable tools, paid plans unlock features like local SEO optimization and content audits.
Bonus Advice: Choosing the Right SEO Plugin
The best SEO plugin for your website depends on your specific needs and preferences. Here’s a quick breakdown to help you decide:
For beginners: Yoast SEO or Rank Math (free versions) offer a user-friendly interface and essential features.
For value-seekers: Rank Math provides a comprehensive free feature set with affordable paid upgrades.
For speed-conscious users: SEOPress is a lightweight option that prioritizes website performance.
For technical SEO focus: The SEO Framework excels in website speed optimization and automation.
Remember, SEO is an ongoing process. It’s wise to experiment with different plugins to find the one that best suits your workflow and SEO strategy.
By following these detailed steps and incorporating these tips, you can create well-structured, informative, and engaging pages that will elevate your WordPress website and provide a seamless user experience for your visitors.
The CleanTalk Research Team identified a critical Stored XSS (Cross-Site Scripting) vulnerability in the WP SEOPress plugin, version 7.7.1. This flaw can be exploited by attackers with contributor privileges to create new admin accounts, potentially granting them full control of your WordPress website.
Stored XSS vulnerabilities allow attackers to inject malicious scripts directly into your website’s database. These scripts are then executed whenever someone views the compromised content. Unlike reflected XSS, user interaction isn’t required to trigger the attack, making it particularly dangerous.
How Attackers Can Exploit This Vulnerability
An attacker with contributor privileges can exploit this vulnerability by injecting malicious JavaScript code into the “SEO Title” field while creating a new post. This code can then be used to create a new admin account, granting them complete control over your website.
Potential Consequences of an Exploit
Complete Site Takeover: Attackers could create new admin accounts and seize full control of your website.
Data Theft: Sensitive information like user credentials, financial records, and even your website’s content could be stolen.
Website Defacement: Attackers could alter the appearance of your site, inject further malicious code, or display unauthorized content.
Persistent Backdoors: Malicious actors might install backdoors to ensure continued access even after the initial vulnerability is patched.
Taking Action to Secure Your Website
Update Immediately: The most critical step is to update the WP SEOPress plugin to the latest version as soon as possible. This update addresses the vulnerability and safeguards your website.
Review User Roles: Carefully review user roles and permissions. Contributors should have the minimum access necessary for their tasks.
Through continuous vulnerability discovery and disclosure, we empower website owners and developers to take preventative measures. We believe that by working together, we can create a robust and secure WordPress ecosystem for everyone.