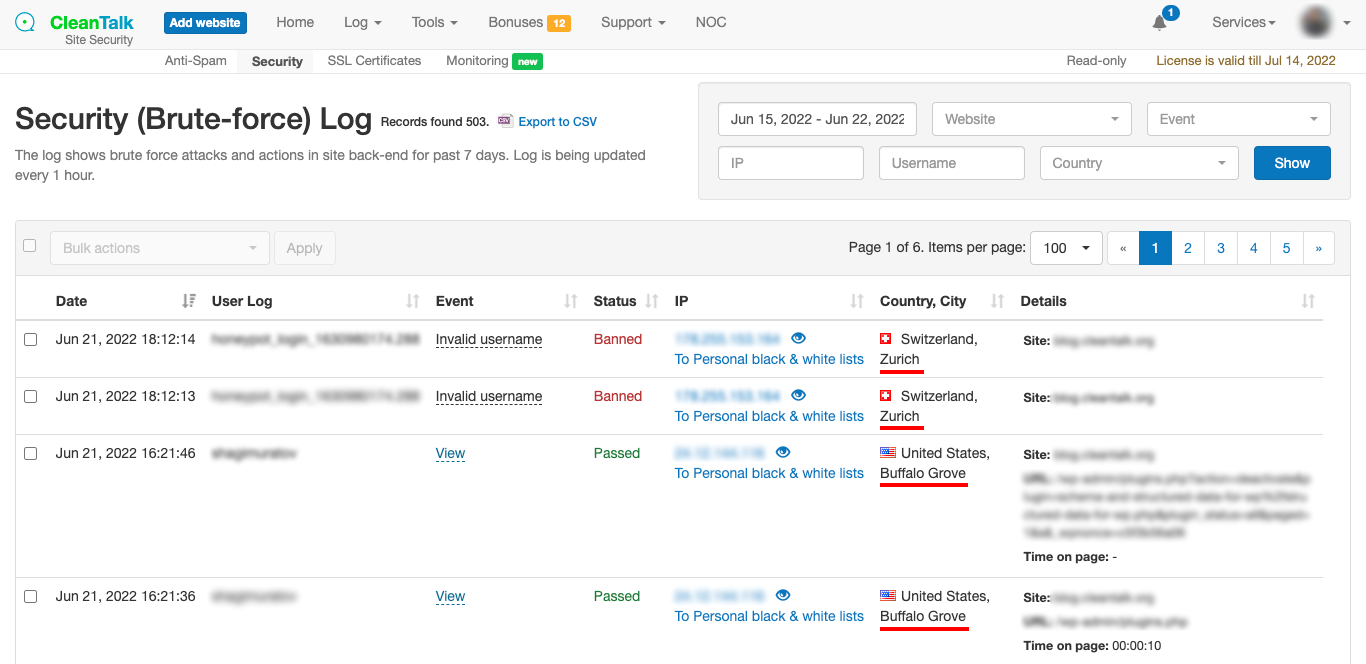
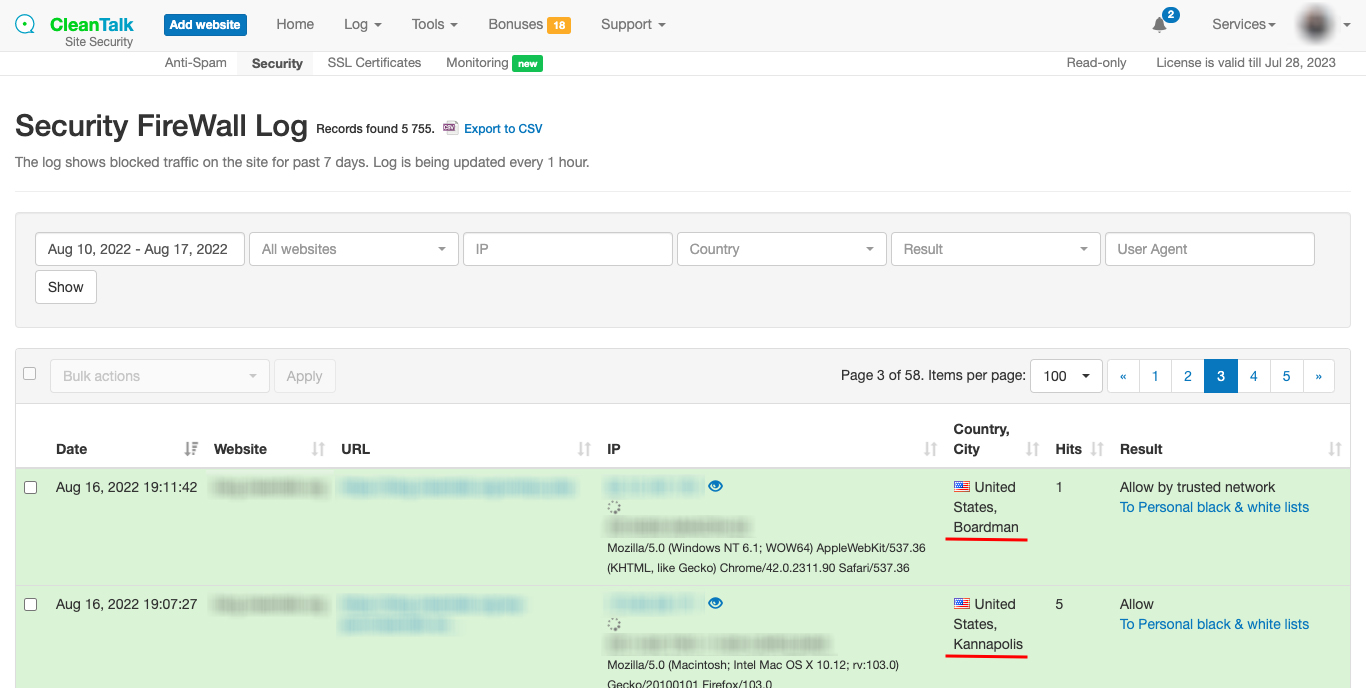
Sometimes knowing the attacker’s country is just not enough, so now we added certain geolocation by IP to help you. The new feature will be added automatically to all Website Security plugin users.
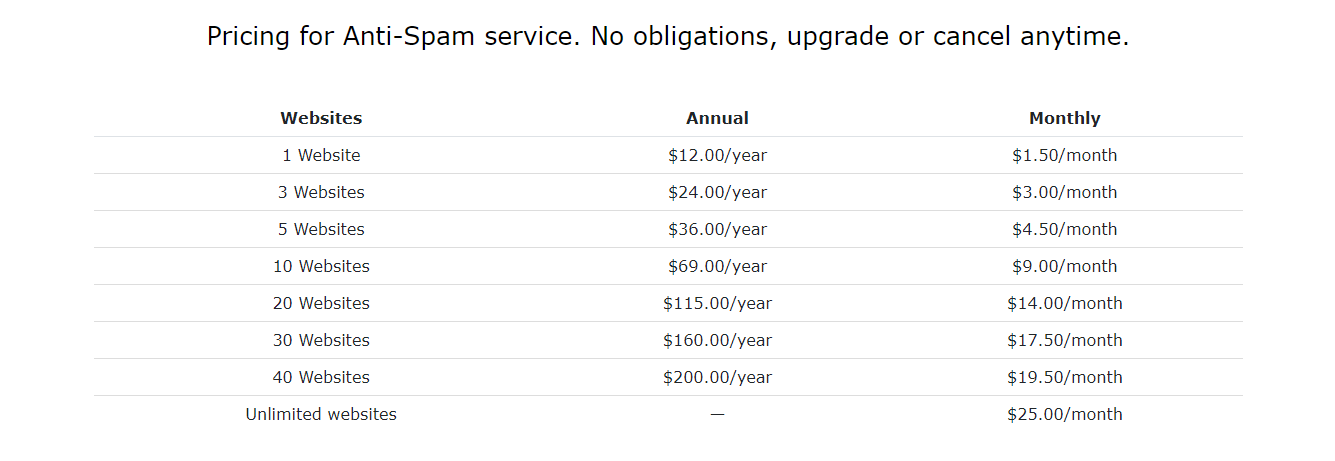
It’s been 8 years since the last pricing change. Since that moment, spam bots become smarter every day and quality requirements for anti-spam services have greatly increased. We’re updating our prices so that we can continue to offer you the best product quality and support experience.
As always, we offer a range of plans, so new clients can pick a price that works for their budget. New clients can also easily compare services between leading anti-spam services and ensure that the prices are quite reasonable.
Before
From August 10 and on
The new prices will apply on August 10, 2022.
The increase will only affect the purchase of new licenses. Previously paid licenses (before August 10, 2022) can be renewed at the previous price from the Dashboard or by auto-pay.
When you use Personal Black Lists (including blocking by country) users see a default message “This is the testing page for Security FireWall” but now you can change it. The message can include your email or phone number. In that case, you can collect data about the reasons for false positives.
How to create a custom message
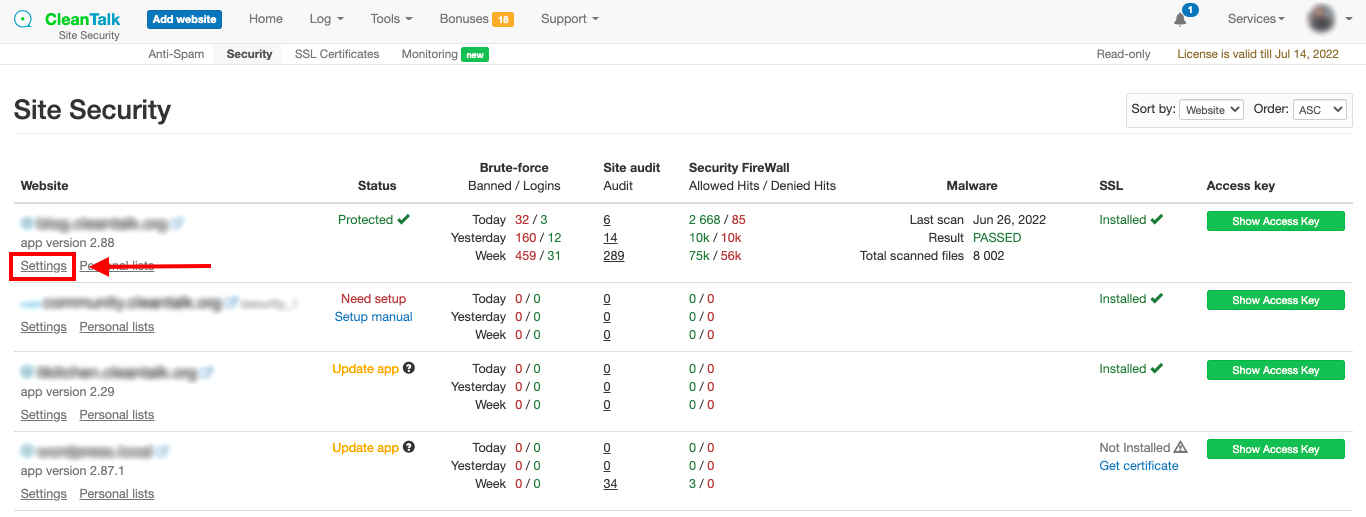
Step 1: Go to your Dashboard => Security. Select your website and click on Settings.
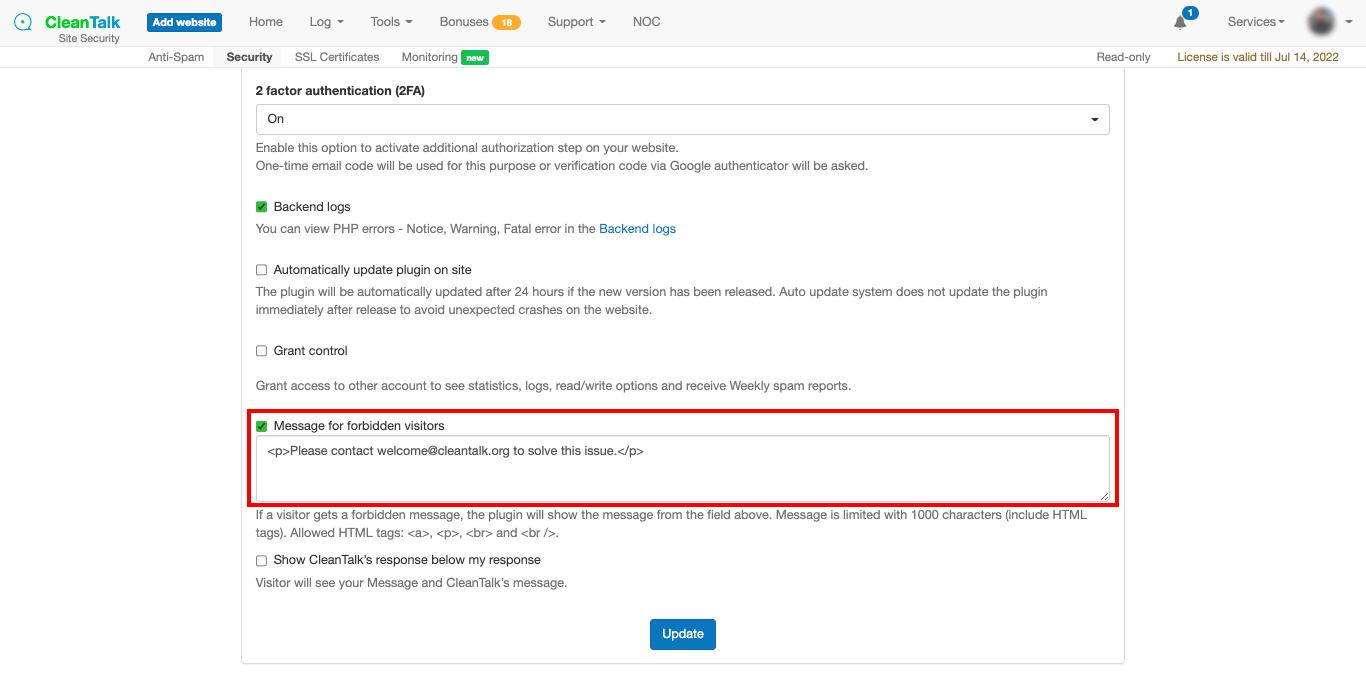
Step2: Scroll down to Message for forbidden visitors and check it. After that you can type any text you want including emails and phone numbers. When finished just press the Update button.
That’s it! Your custom message is enabled and updated. After about 10 minutes you can take a look at your Security FireWall block page.
How to preview your block page
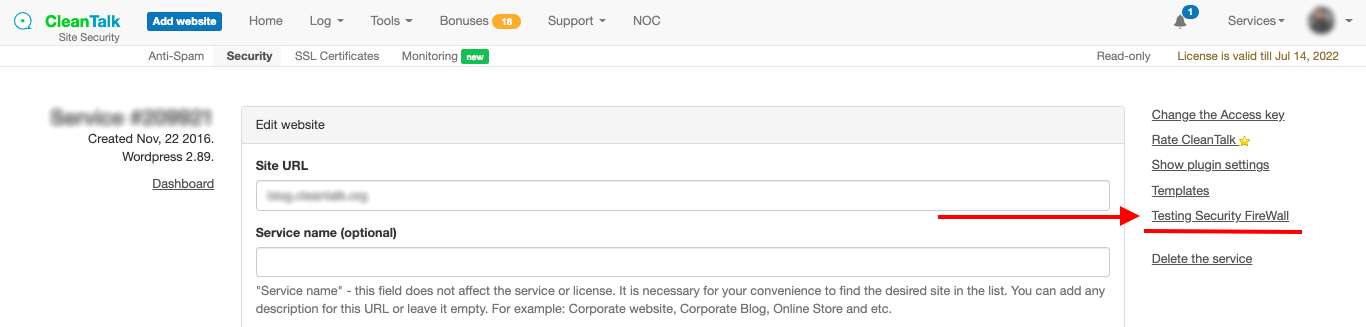
Step 1: Go to Dashboard => Security => Your website Settings (exactly like it was described above). Then click on Testing Security FireWall.
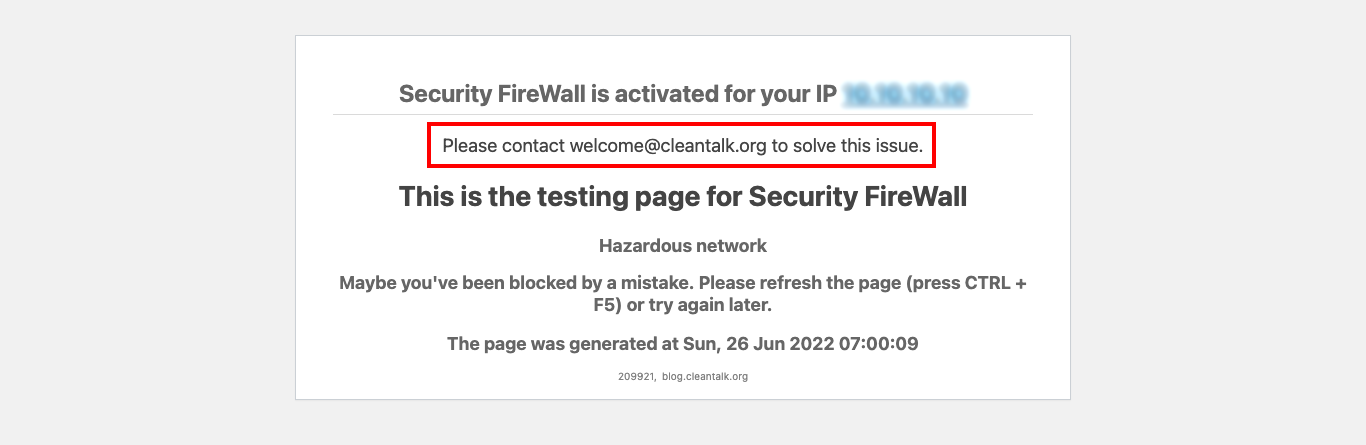
Step 2: After that, your Security FireWall testing page will appear. Here you can preview your custom message and edit it if needed.
We have improved our spam filtering service for non-existent emails. Specifically, we’ve added Encrypted SMTP support to the Email address validation service. Generally, it makes the service much more efficient as this Encrypted SMTP method wasn’t used before in our plugins.
Checking emails for existence is available for all Anti-Spam plugins and is included in the standard package. You can also try our Email Checker Web Interface.
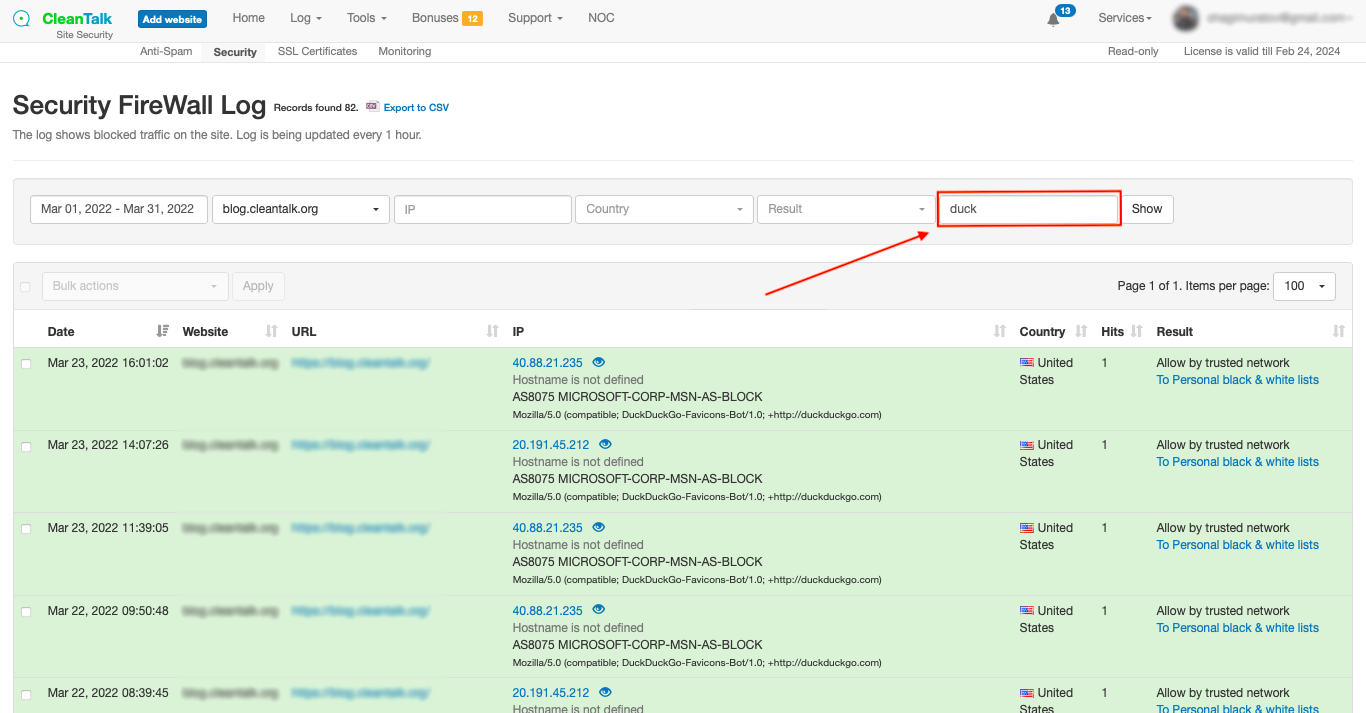
Your website is regularly visited by different bots. The “bad” ones are blocked by your Security FireWall before they even reach your website, but what happens with the “good” ones like Google, Bing, and MSN? From now you can use Security FireWall Log to find out, what ”good“ bot visit your site and how many actions they provide there.
What exact information can you get:
Date
Website
URL of visited website
Bot IP
Hostname (in case it can be defined)
Browser used by bot
Bot country
Quantity of requests (hits)
FireWall result
How it works
Step 1: Go to your Security Dashboard. Choose “Site Security” in the “Services” menu.
We have fixed a minor security vulnerability in Anti-Spam by CleanTalk for WordPress. The vulnerability in the plugin interface can still be exploited in versions till 5.171.2. You can see the changelog here.
You can check the current version of the plugin in the list of your installed plugins.
In case you use one of these previous versions, please be sure to update the plugin to the latest stable version as soon as you read this post using our special guide.
Installing the Anti-Spam service by CleanTalk takes about 10 minutes and grants full spam protection for all the forms on your website. It could be a comment form, a registration form, a feedback form, or any other. Just follow the steps below.
Step 1: Make backup copies of your website files and database.
Step 2: Download and unzip the “CleanTalk” folder into your websites’ ROOT folder.
Step 3: Proceed to address (your_website_name/cleantalk/install.php):
Step 5: Enter your email and password and then click the “LOGIN” button to continue with the installation.
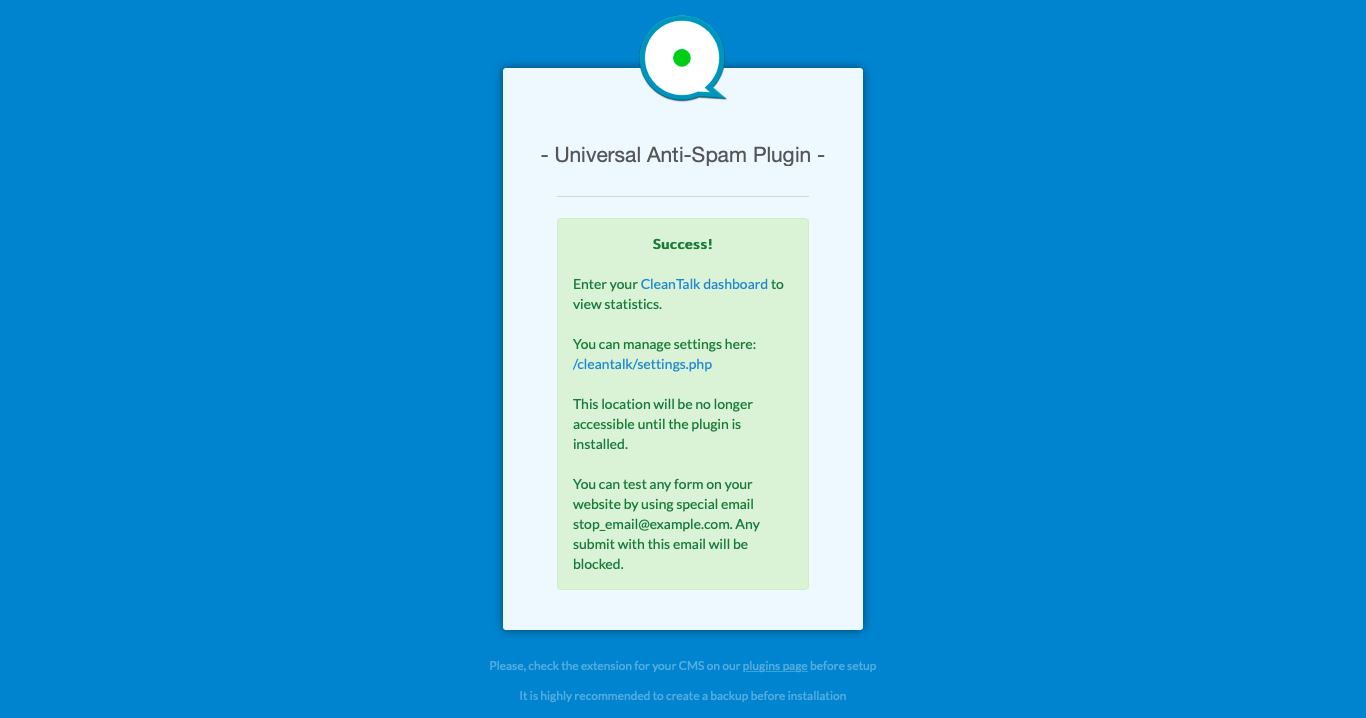
At the end of the successful installation, you will see this message
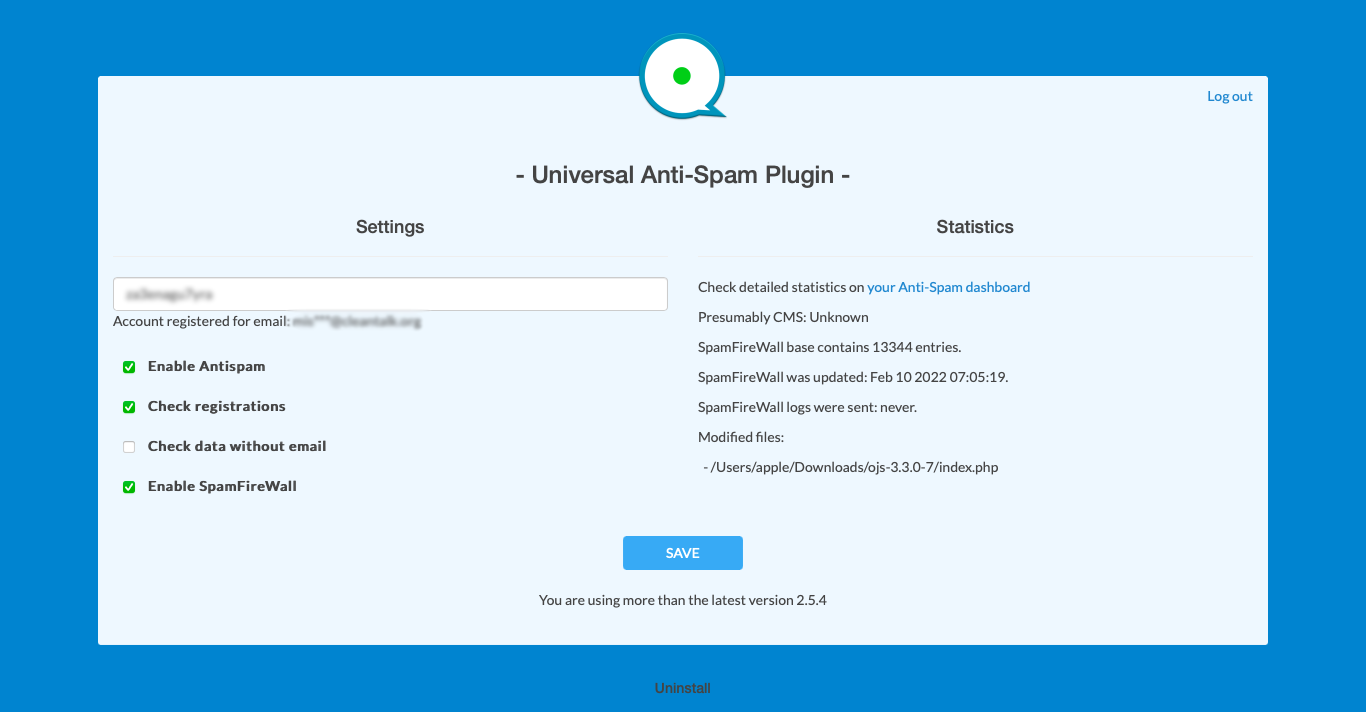
To enter the plugin settings go to (your_website_name/cleantalk/settings.php). Here you can manage the plugin options, see statistics and uninstall the plugin.
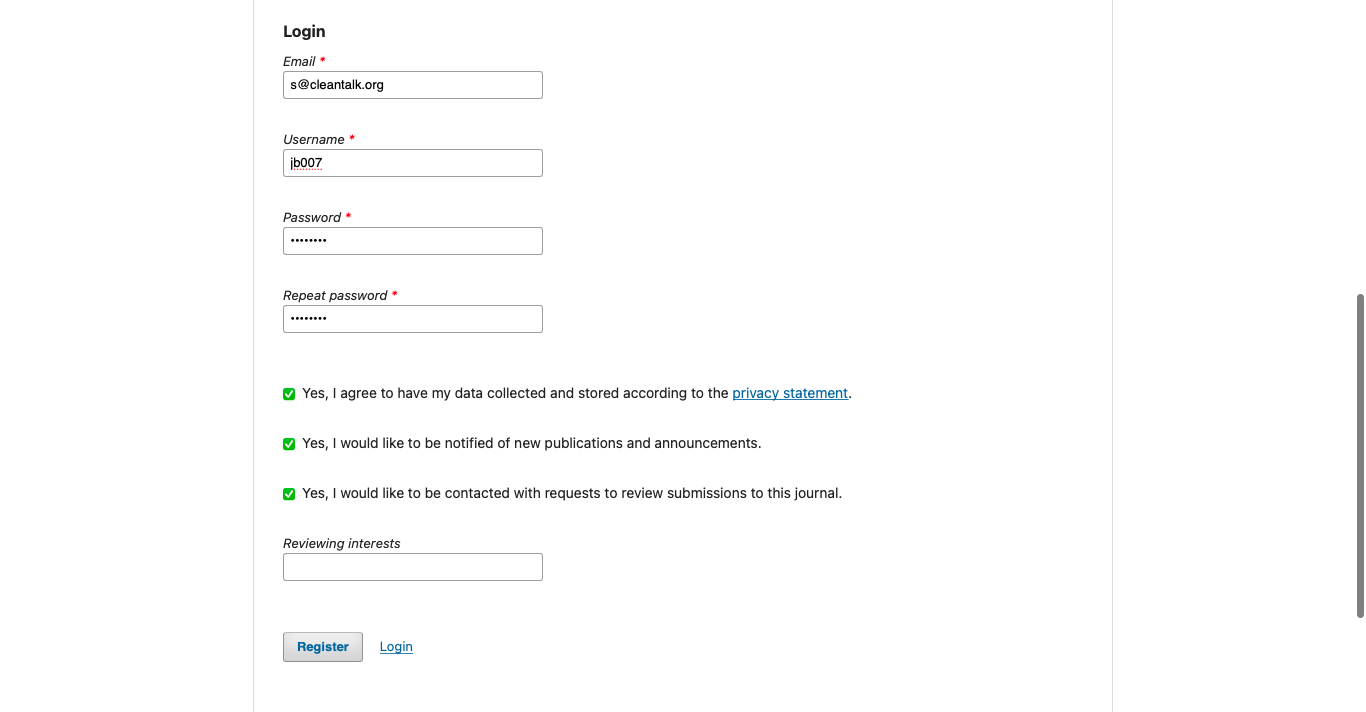
How to check that the Anti-Spam already works with your OJS website
Go to any form on your site (e.g. registration form) and type in
You can test the work of Anti-Spam protection by using a test email s @ cleantalk.org (without spaces). Fill in all the required form fields and send a form.
After submitting the form, you will see a block message about the block on the form submission.
That’s it. From now on your Open Journal System website forms are fully protected from spam.
Good news for our EU clients: from now on you can store all your CleanTalk Data exclusively on EU servers. We have developed a data storage system based on geographic location to help you comply with the GDPR policy. If you choose to store data only in the EU, you will be sure that this data will not be stored in other locations. The choice of storage location will not affect the speed of data processing.
By default, data is stored on servers with no connection to the location, but now we allow you to transfer and store data already by geography.
Stel 2: Open the menu by clicking on your profile name in the upper right corner, then click on the Profile link. Or just use this link.
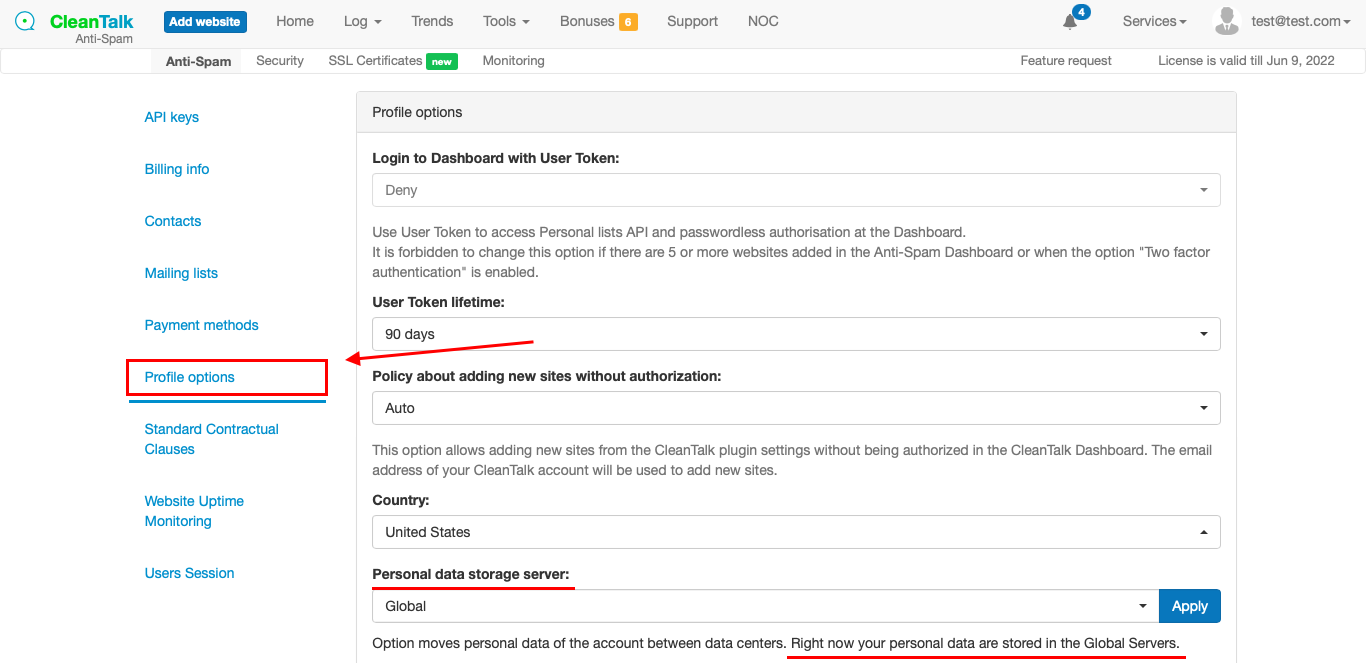
Step 3: Open the Profile Options section. Find the Personal data storage server option. The description shows which servers are currently used to store your CleanTalk data.
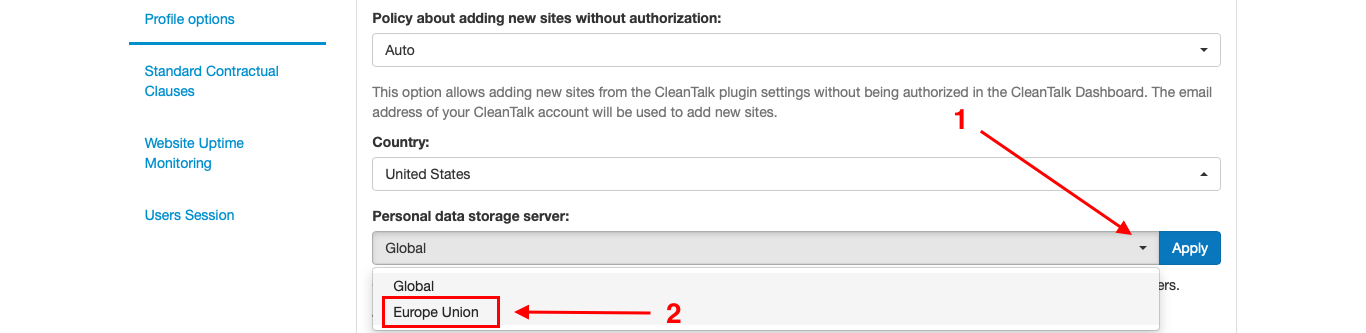
Step 4: Select the needed option from the drop-down list and click Apply. The transfer will begin. This may take 10-20 minutes (be sure to refresh the page to see the results).
Does your website work correctly right now? Is its loading speed convenient for visitors? Are you sure it is available 24/7 for all your potential customers?
If all your answers are “Yes, sure” then you got our respect. Otherwise, we highly recommend you get control of your website availability and loading speed. Because all of this can greatly affect your website search ranking or lower the number of visitors returned to your website.
As a reminder, here are some reasons for you to start Uptime Monitoring:
Uptime control One of the most important parameters of a website is its reliability and speed, which means a website is available to guests and customers 100% of its work time.
Load speed monitoring Additionally, the service monitors your website load speed. It shows the exact time how long it takes to load each website page.
Real-time statistics The statistics demonstrate changes of data in real-time, so you can identify the time of the heaviest load and see what caused such load in the first place.
Immediate notification 24/7 The service will inform you when your website became unavailable for your visitors, when the access was restored and how much time your website was down.
More stable and faster The more stable and faster your website works the better for the SEO, your visitors and your business growth.
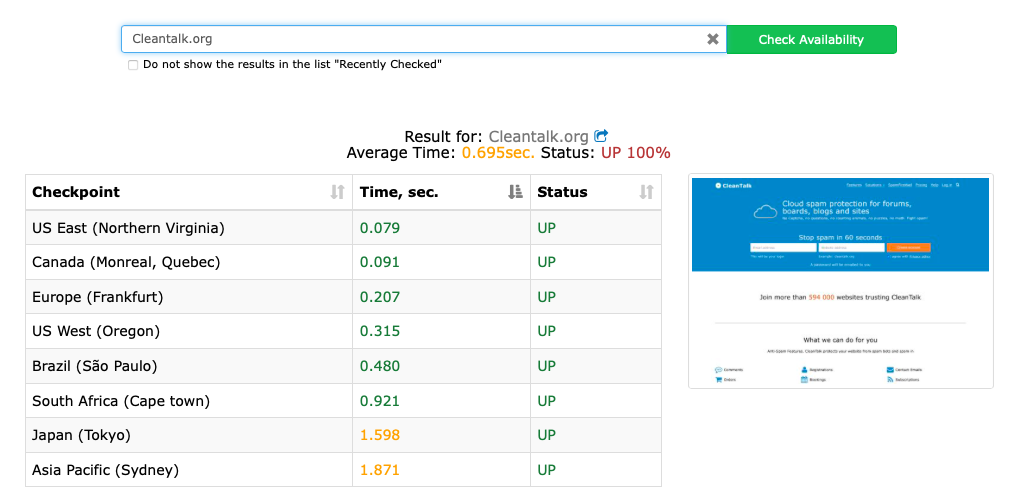
Every-minute checking The Website Uptime Monitoring checks whether your website is accessible or not every minute and it does that from different checkpoints simultaneously.
The end of the year is a perfect time to clean up and get rid of all unnecessary.
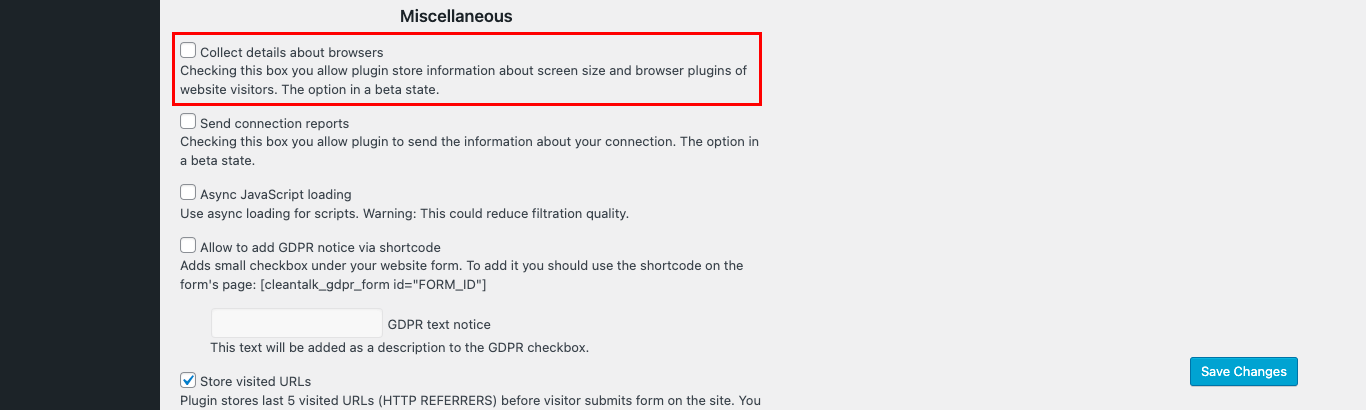
So we have made a decision to remove «Collect information about browsers» option from our Anti-Spam plugin for WordPress. It is no longer needed or useful. It will be fully deleted on December 2.
«Collect information about browsers» option
You can always find all the advanced options of Anti-Spam plugin going to [YOUR_WEBSITE]/wp-admin/options-general.php?page=cleantalk and clicking on Advanced Options link.