If you use Flamingo to store contact form submissions in WordPress, spam will eventually become a real issue. Fake messages, bot submissions, promotional junk, and low-quality inquiries can quickly pile up in your database and make it harder to work with genuine submissions.
This guide explains how to set up Flamingo spam protection using CleanTalk as the main filtering layer on your website, along with additional tools such as Akismet, Cloudflare Turnstile, Google reCAPTCHA, Contact Form 7’s disallowed list, and other practical controls.
This approach is relevant for websites that use Contact Form 7 as the form engine and Flamingo as the storage layer for inbound messages.

Flamingo for Contact Form 7
To begin, it helps to understand what Flamingo actually does.
Flamingo is a WordPress plugin created for Contact Form 7 that saves submitted messages in the WordPress database. Once activated, it adds an interface in the admin panel where website owners can review, search, and manage stored messages later.
This is especially useful because Contact Form 7 does not save submissions by default. Without Flamingo, an important message can be lost if email delivery fails or if the mail settings are not configured properly.
In practice, Flamingo helps website owners:
- keep a database copy of inbound messages
- review past inquiries in the WordPress dashboard
- search through saved submissions
- preserve important communication even when email delivery is unreliable
The same feature that makes Flamingo useful also creates its biggest weakness: it stores whatever gets through the form. If spam reaches the form, spam reaches Flamingo too. That is why a proper Flamingo spam protection setup matters from the start.
Flamingo works hand in hand with Contact Form 7 because it stores messages submitted through Contact Form 7 forms. If you also want a broader guide focused on protecting the form layer itself, see our article on how to protect Contact Form 7 from spam:https://blog.cleantalk.org/how-to-protect-contactform7-from-spam/
As WordPress.org shows, Flamingo is currently used on over 800,000 websites and has 118 user reviews with an average rating of 4.2.
Plugin Homepage at WordPress.org | Documentation at Contact Form 7
Why Flamingo Becomes a Spam Magnet
Strictly speaking, Flamingo is not the source of the spam. It simply records what your public forms receive.
But in real-world use, that distinction does not make much difference. If Contact Form 7 is exposed on a public website, spambots and low-quality submissions will eventually find it. Once that happens, Flamingo starts storing all that noise alongside legitimate inquiries.
Typical examples include:
- automated contact form submissions
- irrelevant promotional messages
- spam containing suspicious or malicious links
- repeated junk inquiries that fill up the message list
The more visible your website becomes, the more likely it is that those submissions will start accumulating.
Anti-Spam by CleanTalk
The main tool we’re going to use here is CleanTalk Anti-Spam.
CleanTalk is a cloud-based anti-spam service for WordPress websites. In practical terms, it helps filter suspicious submissions before they are stored in Flamingo, checks sender reputation, detects automated abuse patterns, and reduces junk messages before they become part of your saved message history.
That is especially important for Flamingo because the goal is not only to stop annoying emails. The larger issue is keeping your database clean and making sure stored submissions remain useful instead of becoming clutter.
If real inquiries are buried under junk, Flamingo stops being an asset and starts becoming a maintenance problem.
How CleanTalk Fits into the Flamingo Workflow
Flamingo is usually used together with Contact Form 7, so the right place for protection is before the message is stored.
That means the real focus is not Flamingo alone, but the submission flow that feeds it.
If Contact Form 7 is running on WordPress and Flamingo is active, a site-level anti-spam layer can help block suspicious submissions before they are saved as inbound messages.
If the website uses extra Contact Form 7 logic, custom handlers, or additional workflows tied to form submissions, the anti-spam check should still be placed before the message is fully processed and written to the database.
That is the key principle: do not wait until spam appears inside Flamingo. Stop it earlier in the chain.
Because of that, Flamingo spam protection should always be considered together with Contact Form 7 spam protection. For a more detailed guide focused specifically on the form layer, you can also read: https://blog.cleantalk.org/how-to-protect-contactform7-from-spam/
According to WordPress.org, Anti-Spam by CleanTalk for WordPress has over 200,000 active installations, with thousands of reviews and an average rating around 4.7 out of 5.
Plugin Homepage at cleantalk.org | Latest release at GitHub.com
If Flamingo is being used together with Contact Form 7 on WordPress, the simplest option is to install the CleanTalk WordPress plugin.
Install the CleanTalk Anti-Spam plugin
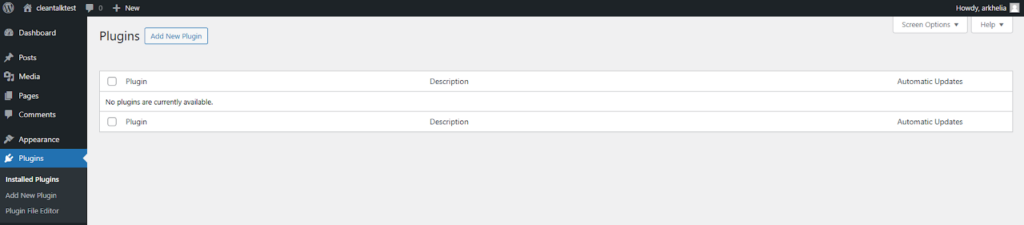
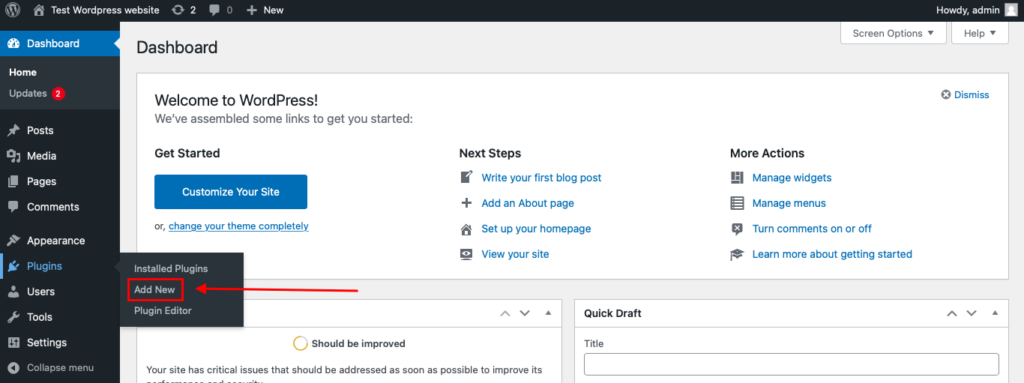
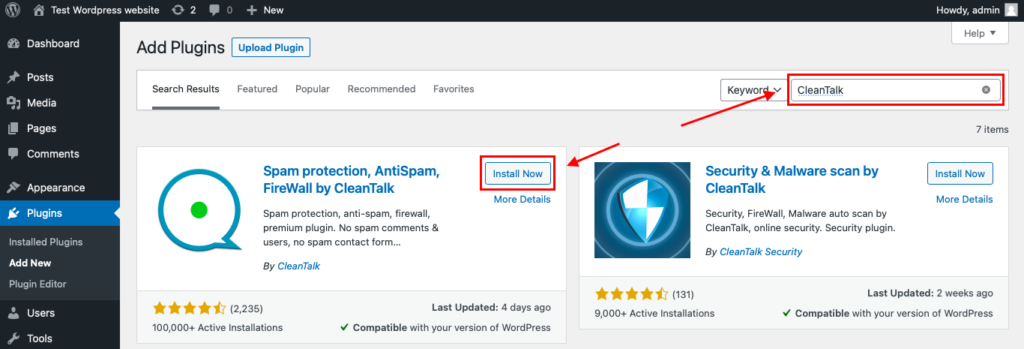
To install the Anti-Spam plugin, go to your WordPress admin panel→ Plugins→ Add New.
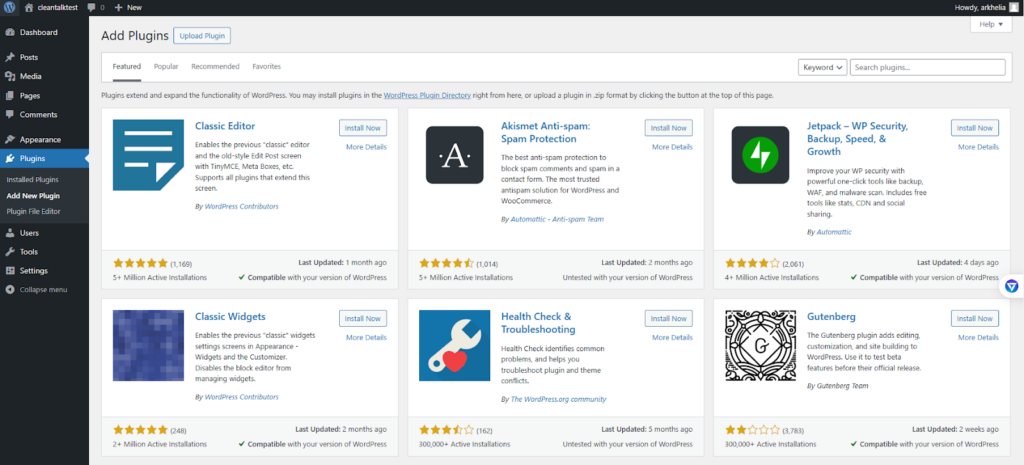
Then enter «СleanTalk» in the search box and click the Install button for «Spam protection, Anti-Spam, FireWall by CleanTalk».
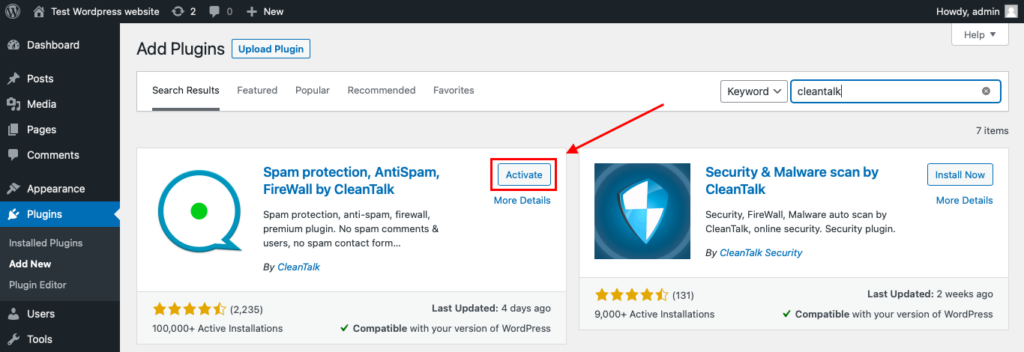
After installing the plugin, click the «Activate» button.
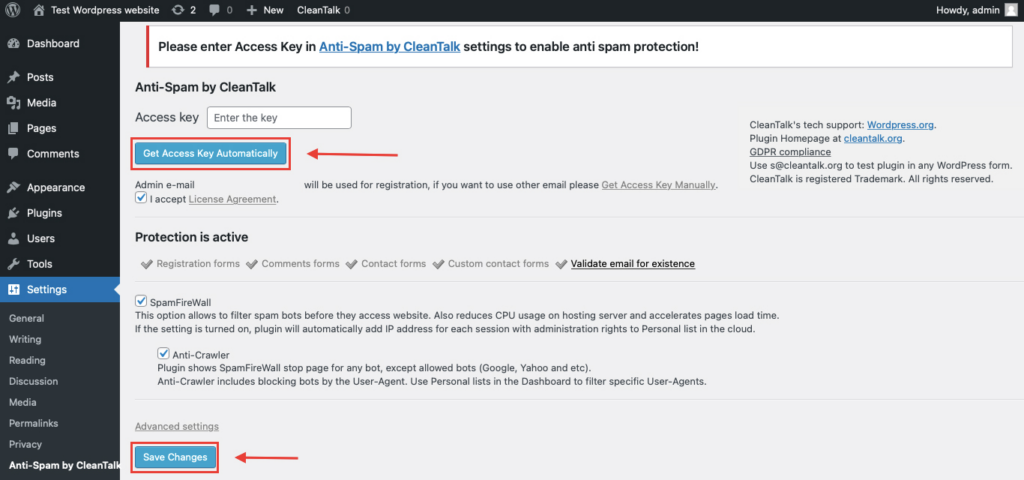
After it is done go to the plugin settings and click the «Get Access Key Automatically» button. Then just click the «Save Settings» button.
That’s all – Contact Form 7 are now protected From this moment,CleanTalk automatically protects the Contact Form 7 registration form (REST route /wp-json/Contact Form 7press/v1/users/), and the Add Listing form used to submit new listings.
You don’t need to paste any shortcodes – just use Contact Form 7 as usual, and CleanTalk will filter spam in the background.
Once that is done, the site has an anti-spam layer working in the background. This helps reduce suspicious form activity before unwanted messages ever reach Flamingo.
Check if spam protection works with Contact Form 7 (CF7)
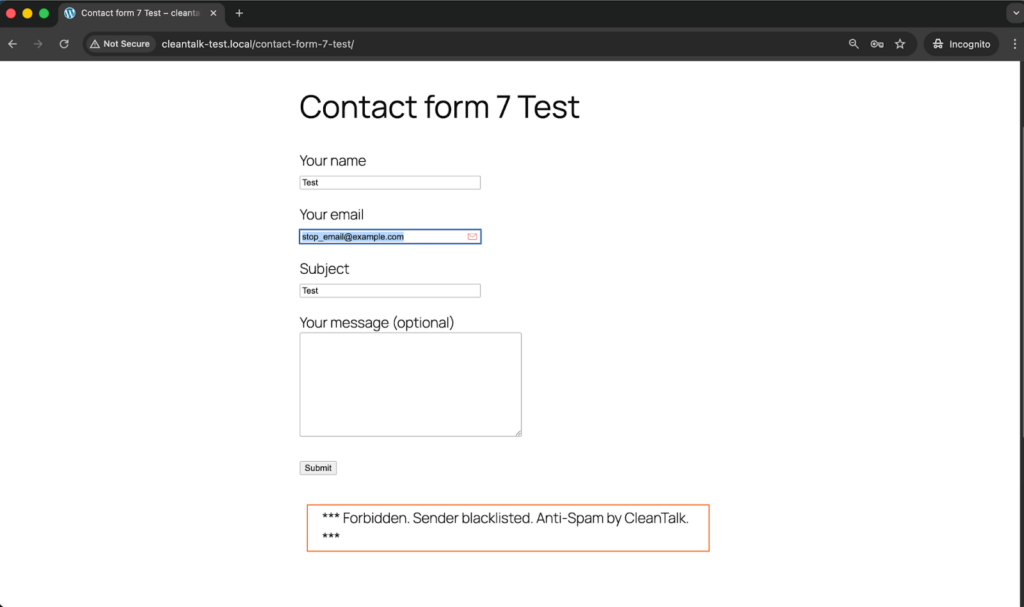
The best way to text the spam protection by using a test email,
stop_email@example.com
- Open a page with a Contact Form 7 (for example, the registration popup or the Add Listing form) in an Incognito / private browser tab.
- Fill out the Contact form using stop_email@example.com as sender’s email.
- Send the form.
- You should see a message from the Anti-Spam plugin confirming that a spam submission was blocked.
*** Forbidden. Sender blacklisted. Anti-Spam by CleanTalk. ***
This double check is important because visible blocking on the page and actual storage behavior in WordPress are not always the same thing.
Cloud Dashboard and Monitoring
Blocking spam is only part of the job. Good protection also gives you visibility.
In the anti-spam dashboard, it is useful to review:
- sender IP and email
- submission time
- source page
- request status: denied or approved
- the likely reason a message was flagged
This makes it easier to spot recurring spam waves, identify low-quality traffic sources, and understand which forms are attracting the most junk.
That kind of visibility helps you improve the setup over time instead of relying on guesswork.
Akismet, Cloudflare Turnstile, Google reCAPTCHA, and Disallowed List
Besides CleanTalk, there are several other methods that can strengthen Flamingo and Contact Form 7 protection.
Akismet
Akismet is a familiar option for WordPress users and works well as an additional spam-filtering layer for Contact Form 7.
It is especially useful when:
- you want a Contact Form 7-compatible filtering option
- Akismet is already active elsewhere on the site
- you want another signal alongside your main anti-spam layer
That said, Akismet works better as part of a broader setup than as the only safeguard on a website with serious spam traffic.
Cloudflare Turnstile
Turnstile is one of the best frontend protection options for modern contact forms.
Its main advantages are:
- little or no visible friction for visitors
- a smoother experience than traditional image-based CAPTCHA flows
- a good fit for contact pages where usability matters
For Contact Form 7 forms connected to Flamingo, Turnstile is often the most user-friendly additional layer.
Google reCAPTCHA
Google reCAPTCHA is still one of the most familiar anti-bot tools.
Many WordPress users consider it first simply because it is widely recognized and easy to understand.
At the same time, in a modern Contact Form 7 and Flamingo setup, reCAPTCHA often makes more sense as an optional supporting tool than as the foundation of the whole protection strategy.
Disallowed List
The WordPress disallowed list remains useful for recurring, predictable spam patterns.
It works best when:
- the same keywords appear again and again in junk messages
- certain IP-based sources need to be blocked
- you want a quick manual rule for repeated spam patterns
It is not enough on its own, but it can be a useful reinforcement layer when spam follows recognizable patterns.
Why Stored Spam Creates a Bigger Headache Than Expected
With Flamingo, spam does not just interrupt the moment. It stays behind.
Once junk submissions start getting stored, they can:
- clutter the Inbound Messages view
- make legitimate inquiries harder to find
- create unnecessary database noise
- slow down support or sales workflows that depend on stored submissions
That is one of the main reasons Flamingo spam protection deserves attention. Flamingo is meant to preserve valuable communication. But when filtering is weak, the same storage advantage turns into an organizational burden.
Comparison of Anti-Spam Approaches for Flamingo
| Solution | Main role | Strengths | Limitations | Best use case |
| Akismet | Native Contact Form 7 spam filtering | Fits well into Contact Form 7 workflows, familiar to WordPress users, useful as an additional layer | Not strong enough on its own for websites with heavy spam volume | Sites that want a Contact Form 7-compatible filtering option |
| Cloudflare Turnstile | Lightweight frontend verification | Low friction, strong user experience, suitable for conversion-focused forms | Needs proper implementation and does not replace broader filtering | Websites that want a user-friendly frontend protection layer |
| Google reCAPTCHA | Familiar anti-bot verification | Widely recognized, easy to understand, adds a visible anti-bot checkpoint | Can introduce friction and is not always the best modern default | Sites that specifically prefer Google-based protection |
| Disallowed list | Manual rule-based spam filtering | Useful for repeated spam phrases and IP patterns, easy to update manually | Limited on its own and requires ongoing maintenance | Situations where recurring spam follows recognizable patterns |
| CleanTalk | Core site-level anti-spam filtering | Stops suspicious submissions before they reach Flamingo, reduces junk storage, works quietly in the background | Usually strongest when combined with other layers | Websites that want the main anti-spam layer to protect Flamingo message quality |
In practice, the most reliable setup is layered: site-level filtering first, lightweight frontend verification second, and manual rules such as disallowed list on top where they add value.
Frequently Asked Questions
Flamingo is filling up with spam messages. Where should I begin?
Start by looking at the form flow, not the storage screen.
Review whether Contact Form 7 has any real anti-spam protection enabled, check if Akismet or Turnstile is active, and make sure suspicious submissions are being filtered before they are written to the database.
If junk keeps appearing in Flamingo, the weak point is usually earlier in the process.
Contact Form 7 seems to be working normally, so why does Flamingo still contain spam?
Because Flamingo simply saves what gets accepted.
If an unwanted message slips through the form layer, Flamingo may store it like any legitimate inquiry. That is why protection has to happen before the submission reaches storage, using tools such as CleanTalk, Akismet, Turnstile, or disallowed list rules.
Can spam and legitimate inquiries be separated inside Flamingo?
Yes, depending on how the filtering workflow is configured.
With the right anti-spam tools in place, suspicious entries and genuine submissions can be handled more clearly instead of ending up mixed together in one crowded stream of messages.
We installed Turnstile, but suspicious messages are still being saved. What could be wrong?
In many cases, the problem is not the idea but the implementation.
Turnstile helps reduce automated abuse, but it does not replace deeper filtering, email checks, or manual blocking rules. If junk is still getting through, review whether backend verification is configured correctly and whether another filtering layer is needed.
Contact Form 7 sometimes shows an orange border warning. What usually triggers that?
That warning typically means one of the spam protection mechanisms marked the submission as suspicious.
In other words, the system did not treat it as a regular inquiry. If this happens often, it is worth checking which layer is being triggered and whether the settings are too aggressive or working exactly as intended.
What setup tends to work best for Flamingo in 2026?
For most websites, the strongest setup is a layered one.
A site-level anti-spam filter should do the main screening, a user-friendly frontend solution such as Turnstile or a Contact Form 7-compatible layer such as Akismet can add another checkpoint, and disallowed list rules can help handle recurring spam patterns you already recognize.
Why does Flamingo spam become harder to manage over time?
Because saved junk does not clear itself.
Once spam starts accumulating, it makes the inbox harder to navigate, hides real inquiries among irrelevant messages, and creates more manual cleanup work inside WordPress. The longer it continues, the more it affects daily workflow.
What should I do if real inquiries are being blocked together with spam?
Start by reviewing your filters one by one.
Look at your keyword rules, test your frontend protection settings, and check whether the anti-spam layer is acting too aggressively. In most cases, the solution is not removing protection altogether, but adjusting the combination of rules so legitimate messages can pass more reliably.
Recommended Anti-Spam Stack for Flamingo (2026)
| Use case | Recommended setup | Why it works |
| Standard contact website | CleanTalk as the main anti-spam filtering layer + Contact Form 7 disallowed list + optional Akismet | Helps block obvious spam, reduce junk messages, and keep Flamingo inboxes cleaner |
| Business website with important inquiries | CleanTalk as the main anti-spam filtering layer + Cloudflare Turnstile + Flamingo storage | Reduces bot submissions while preserving important messages in the database |
| High-traffic contact pages | CleanTalk as the main anti-spam filtering layer + Turnstile or Akismet + manual disallowed list updates | Balances spam protection with usability and adds extra control over recurring spam patterns |
| Privacy-sensitive projects | CleanTalk as the main filtering layer + Cloudflare Turnstile + stricter form rules | Adds protection while keeping a more privacy-friendly setup |
| Contact Form 7 sites already using Flamingo heavily | CleanTalk + Akismet + Flamingo spam review workflow | Helps reduce junk storage while preserving visibility into stored submissions |
Final Thoughts
No single anti-spam tool can stop every type of junk submission that reaches Flamingo.
Some solutions are better at reducing bot traffic. Others are more useful for identifying suspicious message patterns or adding a lightweight verification layer without hurting usability. The most dependable approach is to combine several methods so that each one covers a different part of the problem.
For most WordPress websites using Contact Form 7 and Flamingo, the strongest setup is to use a site-level anti-spam layer such as CleanTalk, add a Contact Form 7-compatible control such as Akismet or Cloudflare Turnstile, and apply disallowed list rules where recurring manual patterns appear.
This combination helps keep bad submissions out of your saved messages, reduces unnecessary database clutter, and makes genuine inquiries easier to find and manage.
Because Flamingo stores messages submitted through Contact Form 7, it makes sense to protect both layers together. If you want a more detailed guide focused specifically on Contact Form 7, read also:https://blog.cleantalk.org/how-to-protect-contactform7-from-spam/
By this point, most spam issuesin your Flamingo inbox should be significantly reduced.
If they are not, review the current setup and make sure you are not depending on only one method. In most cases, the answer is not to store messages more carefully after the fact, but to filter more effectively before they are ever saved.