Author: Anthony M

  • New feature in Website Security FireWall Log

    New feature in Website Security FireWall Log

    Your website is regularly visited by different bots. The “bad” ones are blocked by your Security FireWall before they even reach your website, but what happens with the “good” ones like Google, Bing, and MSN? From now you can use Security FireWall Log to find out, what ”good“ bot visit your site and how many actions they provide there.

    What exact information can you get:

    • Date
    • Website
    • URL of visited website
    • Bot IP
    • Hostname (in case it can be defined)
    • Browser used by bot
    • Bot country
    • Quantity of requests (hits)
    • FireWall result

    How it works

    Step 1: Go to your Security Dashboard. Choose “Site Security” in the “Services” menu.

    Step 2: Go to your Security FireWall Log:

    In order to find information about some specific bot just type in the name of it (or part of the name).

    From that page, you may decide whether you want to block one of these bots or not.

    How to block bots by User-Agent

    Feel free to block any bot using our special guide.

  • Breezing Forms – Spam Protection for Joomla

    Breezing Forms – Spam Protection for Joomla

    If you prefer to use Breezing Forms be sure to use the most effective Anti-Spam plugin. Read the guide below and learn 8 steps to protect your Breezing Forms from spam.

    Once the CleanTalk Anti-Spam plugin is installed it starts to protect all of the existing forms on your Joomla website. It may not only be email forms but also contact forms and many others.

    Download CleanTalk Anti-Spam plugin | Download Breezing Forms 

    How to install CleanTalk Anti-Spam plugin

    1. Make a backup of the site files and database.

    2. Download the Anti-Spam extension archive via link above.

    3. In the main Joomla menu open Extensions → Manage → Install.

    4. Click the «Browse for file» button to upload the archive.

    Joomla install

    5. After installation you will see a success message:

    Joomla success

    6. Go to plugin settings: Extensions → Plugins → Anti-Spam by CleanTalk. Enable the plugin and save settings.

    7. In plugin settings press «Get access key automatically» button. Admin email address will be used for registration. If you want to use another address click the button «Get access key manually». Fill in the easy registration form and you will receive your key.

    Joomla Anti-Spam settings

    8. Enter your Access key in its field, choose protection options and save settings.

    Anti-Spam settings

    That’s it! From now you know how to completely protect your Breezing Forms from spam.

    How to check spam protection for Breezing Forms

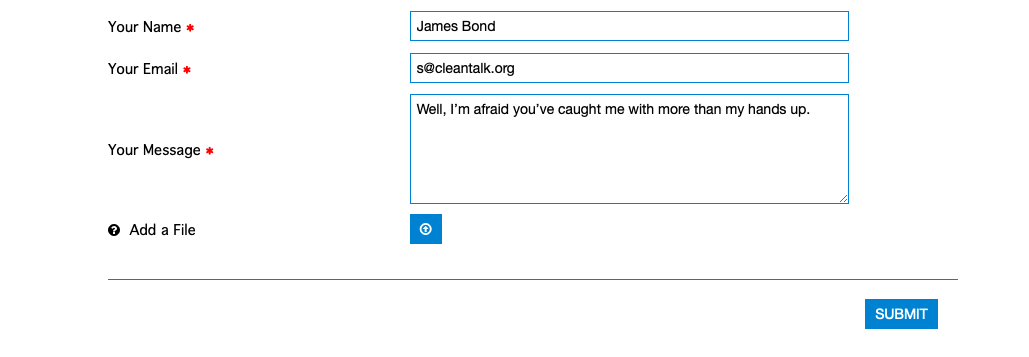
    You can test the work of Anti-Spam protection for your Breezing Forms by using a test email s @ cleantalk.org (without spaces). First, open the form in an Incognito browser tab. Fill in all the required form fields and send a form. After submitting the form, you will see a block message about the block on the form submission.
    If you have any questions, add a comment and we will be happy to help you.

    Create your CleanTalk account – Register now and protect your Breezing Forms from spam in 5 minutes.

    Update

    The protection works only for website visitors, not for website admins. Be sure to test the form protection using Incognito mode.

    Additional features

    • CleanTalk protects all forms at once: comments, registrations, feedbacks, contacts, reviews.
    • Installation takes about 1-2 minutes.
    • Smart 99% protection against spambots.
    • Always online – 24/7 technical support.
    • Logs, SpamFireWall, personal lists, country filters, stop-words, and many others.

    Discover the complete list of CleanTalk Anti-Spam plugin features here.

  • The7 Theme – Spam Protection for WordPress

    The7 Theme – Spam Protection for WordPress

    In case you prefer using The7 Theme be sure to use the most effective Anti-Spam plugin. Read the guide below and learn 4 steps to protect your The7 Theme Forms from spam.

    Once the CleanTalk Anti-Spam plugin is installed it starts to protect all of the existing forms on your WordPress website. It may not only be The7 Theme forms but also many others.

    Download CleanTalk Anti-Spam plugin | Download The7 Theme 

    How to install CleanTalk Anti-Spam plugin

    To install the Anti-Spam plugin, go to your WordPress admin panelPluginsAdd New.

    Then enter «СleanTalk» in the search box and click the Install button for «Spam protection, Anti-Spam, FireWall by CleanTalk».

    After installing the plugin, click the «Activate»‎ button.

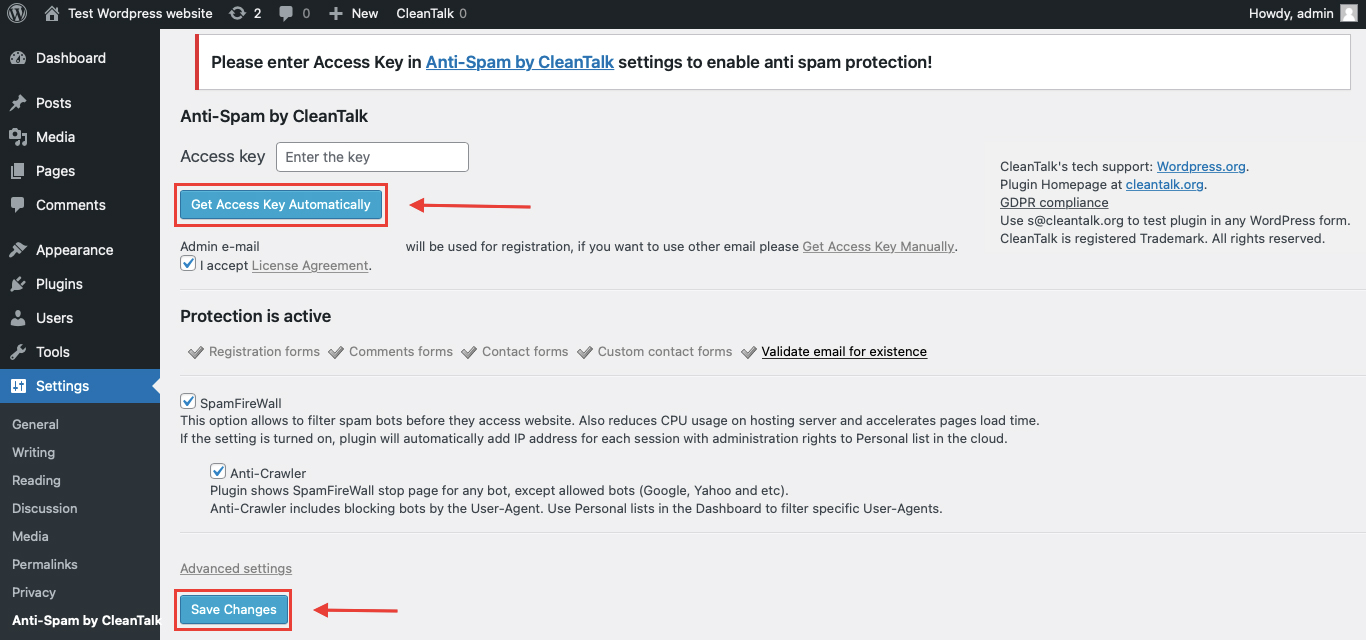
    After it is done go to the plugin settings and click the «Get Access Key Automatically» button. Then just click the «Save Settings»‎ button.

    That’s it! From now you How to completely protect your СonvertKit Forms from spam.

    How to check spam protection for The7 Theme

    You can test the work of Anti-Spam protection for your СonvertKit Forms by using a test email s @ cleantalk.org (without spaces). First, open the form in an Incognito browser tab. Fill in all the required form fields and send a form. After submitting the form, you will see a block message about the block on the form submission.

    If you have any questions, add a comment and we will be happy to help you.

    Create your CleanTalk account – Register now and protect your СonvertKit Forms from spam in 5 minutes

    Update

    The protection works only for website visitors, not for website admins. Be sure to test the form protection using Incognito mode.

    Additional features

    • CleanTalk protects all forms at once: comments, registrations, feedbacks, contacts, reviews.
    • Installation takes about 1-2 minutes.
    • Smart 99% protection against spambots.
    • Always online – 24/7 technical support.
    • Logs, SpamFireWall, personal lists, country filters, stop-words, and many others.

    Discover the complete list of CleanTalk Anti-Spam plugin features here.

  • HubSpot Spam Protection for WordPress

    HubSpot Spam Protection for WordPress

    If you prefer to use HubSpot Forms be sure to use the most effective Anti-Spam plugin. Read the guide below and learn 4 steps to grant your HubSpot Spam Protection, that it deserves.

    Once the CleanTalk Anti-Spam plugin is installed it starts to protect all of the existing forms on your WordPress website. It may not only be email forms but also contact forms and many others.

    Download CleanTalk Anti-Spam plugin | Download HubSpot Forms 

    How to install CleanTalk Anti-Spam plugin

    To install the Anti-Spam plugin, go to your WordPress admin panelPluginsAdd New.

    Then enter «СleanTalk» in the search box and click the Install button for «Spam protection, Anti-Spam, FireWall by CleanTalk».

    After installing the plugin, click the «Activate»‎ button.

    After it is done go to the plugin settings and click the «Get Access Key Automatically» button. Then just click the «Save Settings»‎ button.

    That’s it! From now you How to completely protect your HubSpot Forms from spam.

    How to check spam protection for HubSpot Forms

    You can test the work of Anti-Spam protection for your HubSpot Forms by using a test email s @ cleantalk.org (without spaces). First, open the form in an Incognito browser tab. Fill in all the required form fields and send a form. After submitting the form, you will see a block message about the block on the form submission.

    If you have any questions, add a comment and we will be happy to help you.

    Create your CleanTalk account – Register now and protect your HubSpot Forms from spam in 5 minutes

    Update

    The protection works only for website visitors, not for website admins. Be sure to test the form protection using Incognito mode.

    Additional features

    • CleanTalk protects all forms at once: comments, registrations, feedbacks, contacts, reviews.
    • Installation takes about 1-2 minutes.
    • Smart 99% protection against spambots.
    • Always online – 24/7 technical support.
    • Logs, SpamFireWall, personal lists, country filters, stop-words, and many others.

    Discover the complete list of CleanTalk Anti-Spam plugin features here.

  • Our client’s story: LBMSOLUTIONS.CO.UK

    Our client’s story: LBMSOLUTIONS.CO.UK

    We continue sharing our clients’ reviews and today’s story is brought to you by Dave from lbmsolutions.co.uk.

    Love this company, great products and excellent support.

  • Divi Theme – Spam Protection for WordPress

    Divi Theme – Spam Protection for WordPress

    If you prefer to use Divi Theme be sure to use the most effective Anti-Spam plugin. Read the guide below and learn 4 steps to protect your Divi Forms from spam.

    Once the CleanTalk Anti-Spam plugin is installed it starts to protect all of the existing forms on your WordPress website. It may not only be email forms but also contact forms and many others.

    Download CleanTalk Anti-Spam plugin | Download Divi Theme 

    How to install CleanTalk Anti-Spam plugin

    To install the Anti-Spam plugin, go to your WordPress admin panelPluginsAdd New.

    Then enter «СleanTalk» in the search box and click the Install button for «Spam protection, Anti-Spam, FireWall by CleanTalk».

    After installing the plugin, click the «Activate»‎ button.

    After it is done go to the plugin settings and click the «Get Access Key Automatically» button. Then just click the «Save Settings»‎ button.

    That’s it! From now you How to completely protect your Divi Theme Forms from spam.

    How to check spam protection for Divi Theme

    You can test the work of Anti-Spam protection for your Divi Theme Forms by using a test email s @ cleantalk.org (without spaces). First, open the form in an Incognito browser tab. Fill in all the required form fields and send a form. After submitting the form, you will see a block message about the block on the form submission.

    If you have any questions, add a comment and we will be happy to help you.

    Create your CleanTalk account – Register now and protect your Divi Theme Forms from spam in 5 minutes

    Update

    The protection works only for website visitors, not for website admins. Be sure to test the form protection using Incognito mode.

    Additional features

    • CleanTalk protects all forms at once: comments, registrations, feedbacks, contacts, reviews.
    • Installation takes about 1-2 minutes.
    • Smart 99% protection against spambots.
    • Always online – 24/7 technical support.
    • Logs, SpamFireWall, personal lists, country filters, stop-words, and many others.

    Discover the complete list of CleanTalk Anti-Spam plugin features here.
  • Our client’s story: SERENADE-RADIO.COM

    Our client’s story: SERENADE-RADIO.COM

    We continue sharing our clients’ reviews and today’s story is brought to you by @piewackets from serenade-radio.com.

    Although I’ve only been running CleanTalk for a few days I am very impressed by the results, nothing has got through via contact form or comments, lots have been blocked though! At this price what’s not to love. I would certainly recommend this plugin.

  • СonvertKit Forms – Spam Protection for WordPress

    СonvertKit Forms – Spam Protection for WordPress

    If you prefer to use СonvertKit Forms be sure to use the most effective Anti-Spam plugin. Read the guide below and learn 4 steps to protect your СonvertKit Forms from spam.

    Once the CleanTalk Anti-Spam plugin is installed it starts to protect all of the existing forms on your WordPress website. It may not only be email forms but also contact forms and many others.

    Download CleanTalk Anti-Spam plugin | Download СonvertKit plugin 

    How to install CleanTalk Anti-Spam plugin

    To install the Anti-Spam plugin, go to your WordPress admin panelPluginsAdd New.

    Then enter «СleanTalk» in the search box and click the Install button for «Spam protection, Anti-Spam, FireWall by CleanTalk».

    After installing the plugin, click the «Activate»‎ button.

    After it is done go to the plugin settings and click the «Get Access Key Automatically» button. Then just click the «Save Settings»‎ button.

    That’s it! From now you How to completely protect your СonvertKit Forms from spam.

    How to check spam protection for СonvertKit Forms

    You can test the work of Anti-Spam protection for your СonvertKit Forms by using a test email s @ cleantalk.org (without spaces). First, open the form in an Incognito browser tab. Fill in all the required form fields and send a form. After submitting the form, you will see a block message about the block on the form submission.

    If you have any questions, add a comment and we will be happy to help you.

    Create your CleanTalk account – Register now and protect your СonvertKit Forms from spam in 5 minutes

    Update

    The protection works only for website visitors, not for website admins. Be sure to test the form protection using Incognito mode.

    Additional features

    • CleanTalk protects all forms at once: comments, registrations, feedbacks, contacts, reviews.
    • Installation takes about 1-2 minutes.
    • Smart 99% protection against spambots.
    • Always online – 24/7 technical support.
    • Logs, SpamFireWall, personal lists, country filters, stop-words, and many others.

    Discover the complete list of CleanTalk Anti-Spam plugin features here.

  • ActiveCampaign Forms – Spam Protection for WordPress

    ActiveCampaign Forms – Spam Protection for WordPress

    If you prefer to use ActiveCampaign Subscription Forms be sure to use the most effective Anti-Spam plugin. Read the guide below and learn 4 steps to protect your ActiveCampaign Subscription Forms from spam.

    Once the CleanTalk Anti-Spam plugin is installed it starts to protect all of the existing forms on your WordPress website. It may not only be subscription forms but also contact forms and many others.

    Download CleanTalk Anti-Spam plugin | Download ActiveCampaign Subscription Form plugin 

    How to install CleanTalk Anti-Spam plugin

    To install the Anti-Spam plugin, go to your WordPress admin panelPluginsAdd New.

    Then enter «СleanTalk» in the search box and click the Install button for «Spam protection, Anti-Spam, FireWall by CleanTalk».

    After installing the plugin, click the «Activate»‎ button.

    After it is done go to the plugin settings and click the «Get Access Key Automatically» button. Then just click the «Save Settings»‎ button.

    That’s it! From now you How to completely protect your ActiveCampaign Subscription Forms from spam.

    How to check spam protection for ActiveCampaign Forms

    You can test the work of Anti-Spam protection for your ActiveCampaign Subscription Forms by using a test email s @ cleantalk.org (without spaces). First, open the form in an Incognito browser tab. Fill in all the required form fields and send a form. After submitting the form, you will see a block message about the block on the form submission.

    If you have any questions, add a comment and we will be happy to help you.

    Create your CleanTalk account – Register now and protect your ActiveCampaign Subscription Forms from spam in 5 minutes

    Update

    The protection works only for website visitors, not for website admins. Be sure to test the form protection using Incognito mode.

    Additional features

    • CleanTalk protects all forms at once: comments, registrations, feedbacks, contacts, reviews.
    • Installation takes about 1-2 minutes.
    • Smart 99% protection against spambots.
    • Always online – 24/7 technical support.
    • Logs, SpamFireWall, personal lists, country filters, stop-words, and many others.

    Discover the complete list of CleanTalk Anti-Spam plugin features here.

  • PopupAlly Forms – Spam Protection for WordPress

    PopupAlly Forms – Spam Protection for WordPress

    If you prefer to use PopupAlly Subscription Forms be sure to use the most effective Anti-Spam plugin. Read the guide below and learn 4 steps to protect your PopupAlly Subscription Forms from spam.

    Once the CleanTalk Anti-Spam plugin is installed it starts to protect all of the existing forms on your WordPress website. It may not only be subscription forms but also contact forms and many others.

    Download CleanTalk Anti-Spam plugin | Download PopupAlly Subscription Form plugin 

    How to install CleanTalk Anti-Spam plugin

    To install the Anti-Spam plugin, go to your WordPress admin panelPluginsAdd New.

    Then enter «СleanTalk» in the search box and click the Install button for «Spam protection, Anti-Spam, FireWall by CleanTalk».

    After installing the plugin, click the «Activate»‎ button.

    After it is done go to the plugin settings and click the «Get Access Key Automatically» button. Then just click the «Save Settings»‎ button.

    That’s it! From now you How to completely protect your PopupAlly Subscription Forms from spam.

    How to check spam protection for PopupAlly Forms

    You can test the work of Anti-Spam protection for your PopupAlly Subscription Forms by using a test email s @ cleantalk.org (without spaces). First, open the form in an Incognito browser tab. Fill in all the required form fields and send a form. After submitting the form, you will see a block message about the block on the form submission.

    If you have any questions, add a comment and we will be happy to help you.

    Create your CleanTalk account – Register now and protect your PopupAlly Subscription Forms from spam in 5 minutes

    Update

    The protection works only for website visitors, not for website admins. Be sure to test the form protection using Incognito mode.

    Additional features

    • CleanTalk protects all forms at once: comments, registrations, feedbacks, contacts, reviews.
    • Installation takes about 1-2 minutes.
    • Smart 99% protection against spambots.
    • Always online – 24/7 technical support.
    • Logs, SpamFireWall, personal lists, country filters, stop-words, and many others.

    Discover the complete list of CleanTalk Anti-Spam plugin features here.