Tag: security firewall

  • Custom text messages for Security FireWall Block Page

    Custom text messages for Security FireWall Block Page

    We’re glad to introduce the new feature of our Security Extra Package.

    When you use Personal Black Lists (including blocking by country) users see a default message “This is the testing page for Security FireWall” but now you can change it. The message can include your email or phone number. In that case, you can collect data about the reasons for false positives.

    How to create a custom message

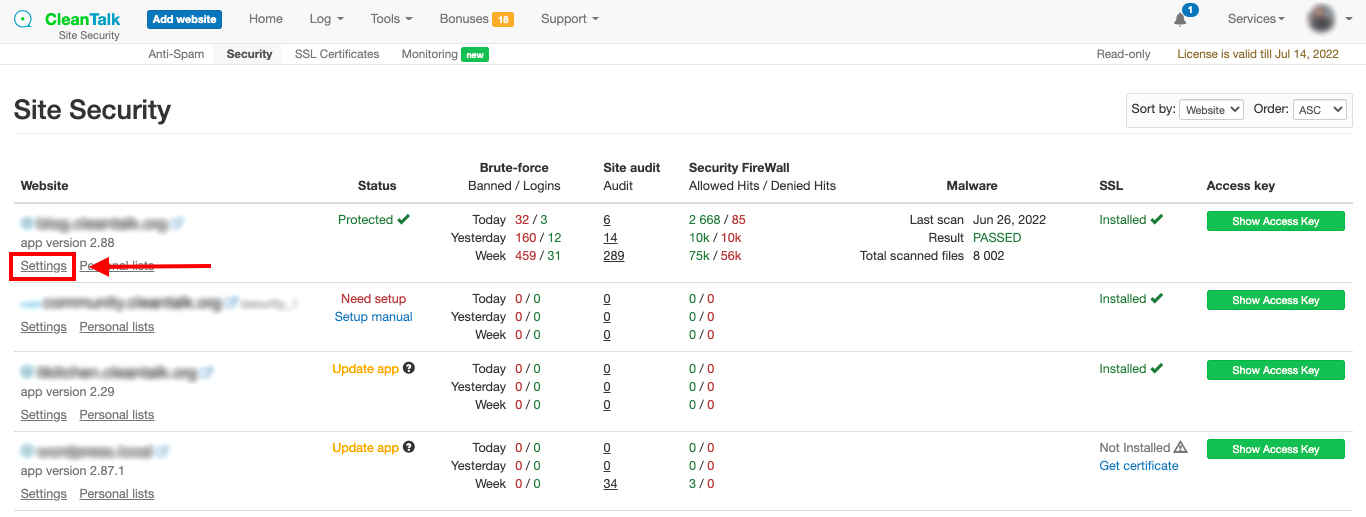
    Step 1: Go to your Dashboard => Security. Select your website and click on Settings.
    Step2: Scroll down to Message for forbidden visitors and check it. After that you can type any text you want including emails and phone numbers. When finished just press the Update button.
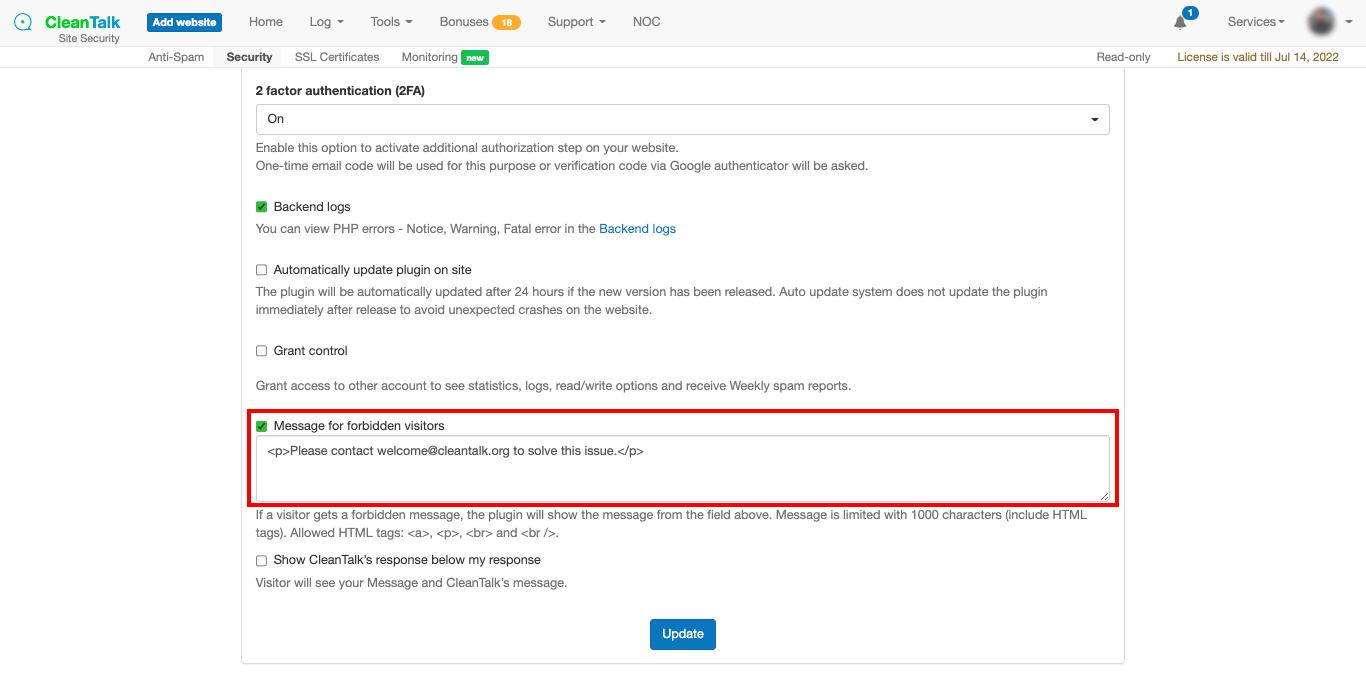
    That’s it! Your custom message is enabled and updated. After about 10 minutes you can take a look at your Security FireWall block page.

    How to preview your block page

    Step 1: Go to Dashboard => Security => Your website Settings (exactly like it was described above). Then click on Testing Security FireWall.

    Step 2: After that, your Security FireWall testing page will appear. Here you can preview your custom message and edit it if needed.

    Get your Website Security now


  • New feature in Website Security FireWall Log

    New feature in Website Security FireWall Log

    Your website is regularly visited by different bots. The “bad” ones are blocked by your Security FireWall before they even reach your website, but what happens with the “good” ones like Google, Bing, and MSN? From now you can use Security FireWall Log to find out, what ”good“ bot visit your site and how many actions they provide there.

    What exact information can you get:

    • Date
    • Website
    • URL of visited website
    • Bot IP
    • Hostname (in case it can be defined)
    • Browser used by bot
    • Bot country
    • Quantity of requests (hits)
    • FireWall result

    How it works

    Step 1: Go to your Security Dashboard. Choose “Site Security” in the “Services” menu.

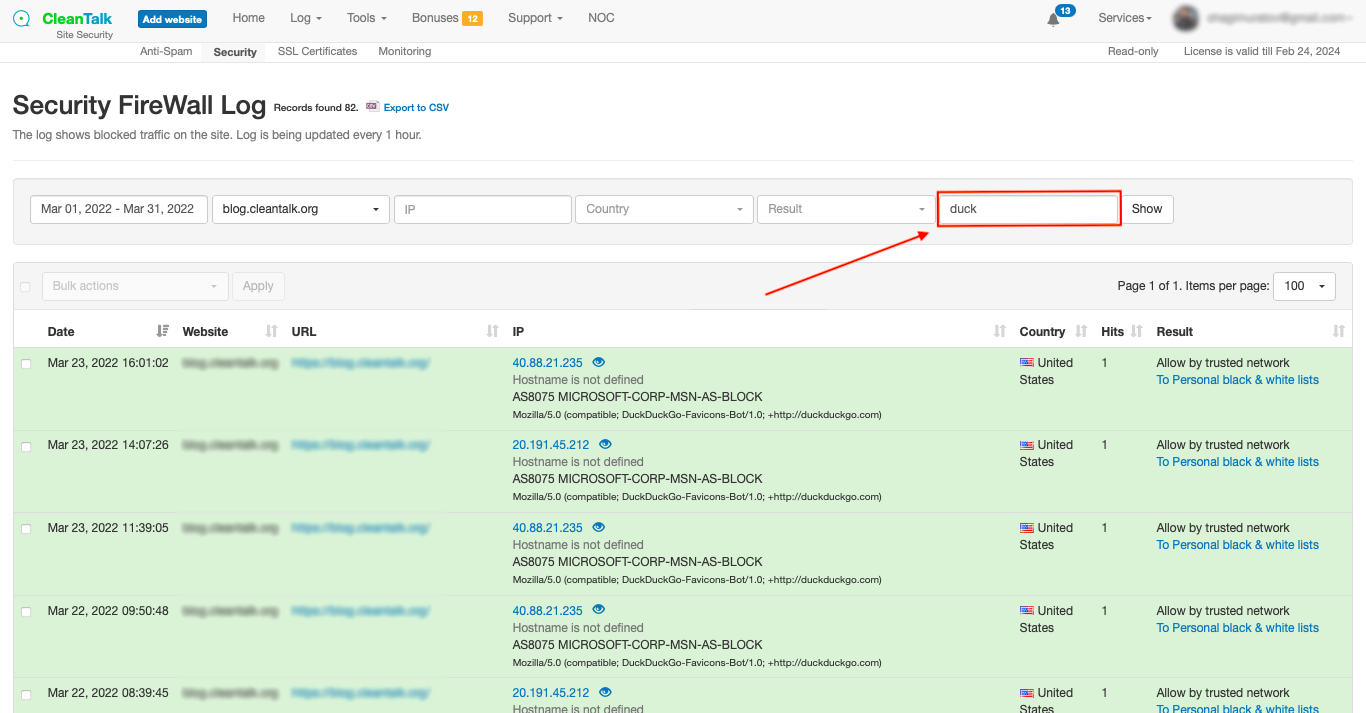
    Step 2: Go to your Security FireWall Log:

    In order to find information about some specific bot just type in the name of it (or part of the name).

    From that page, you may decide whether you want to block one of these bots or not.

    How to block bots by User-Agent

    Feel free to block any bot using our special guide.

  • New feature: Settings and Personal lists templates for Anti-Spam and Security

    New feature: Settings and Personal lists templates for Anti-Spam and Security

    For our clients with more than one website used by Anti-Spam and Security protection we created Templates to save your website settings and personal lists – you can find it in your «Tools» menu. Using Templates you can easily copy any quantity of personal lists and filters, that you have already created for one of your websites, connected to your CleanTalk account.

    How to connect your website to CleanTalk

    In order to connect your website to CleanTalk just register via register link and follow the instructions from email. It may take you about 5 minutes to fully protect your website from spam.

    How to use Templates

    Step 1: If you want to use personal lists template, create at least one list. For more details about adding and working with personal lists use our guide. Website settings for templates are always created automatically when the site is connected to CleanTalk.

    Step 2: After that go to «Tools»«Templates» and press «Add template» button.

    In the dialog window name your Template and select a website that has at least one personal list using «Copy settings from site» field.

    Use «Set as default» checkbox to automatically add personal lists to all the new websites you connect to your CleanTalk account and «Copy personal list from…» checkbox to add personal lists from selected site to this template. If the checkbox is not marked, the template will only copy website settings.

    Step 3: Apply Settings and Personal lists template to your new website. In order to apply the template to any site use «Apply» link under the template that you wish to use.

    After that just use «Apply to services» field in order to select website that you wish to use this template with.

    That’s it! Feel free to use as many templates as needed to save time while protecting your websites from spam and security issues.

    If you’re looking from where to start – create your first template.

    In case you got any problems while using CleanTalk you can always open a private ticket.